Hollow Knight: Silksong – Great Conchflies Boss Guide
Of all the optional fights in Hollow Knight: Silksong, the Great Conchflies feel like one of the bosses that could best fit in the game's predecessor. Fun, fair, and the right amount of silly, the Great Conchflies are a nice little challenge on the summit of the Blasted Steps, more often found by accident than on purpose.
However, as fun as the fight may be, this is also a battle you do not want to lose. A loss here means a very long and arduous trek back from the nearest bench (and by nearest, we mean leagues away). Victory here is non-negotiable, and the reward that lies on the line is one you will not want to pass up, either.
How To Find The Great Conchflies
The conchflies are an optional boss standing between you and the nail art: Needle Strike. The nail art is taught by the Pinstress on the far west side of the Blasted Steps map, and the Great Conchflies lie waiting in the arena before her.
To reach their arena, you must climb the Blasted Steps from the Shellwood area. To do this:
- Go up where possible after the Shellwood entrance.
- Use the bench above as a checkpoint.
- Climb the room west of the bench to enter the center vertical chamber.
- Exit the vertical chamber using the first left at the chamber's midway point.
- Jump left across several platforms guarded by smaller conchflies.
We recommend picking up the map from Shakra in the room east of the center vertical chamber during your first ascent.
How To Defeat The Great Conchflies
Attack
Wind-Up Tells And Attack Description
Suggested Counters
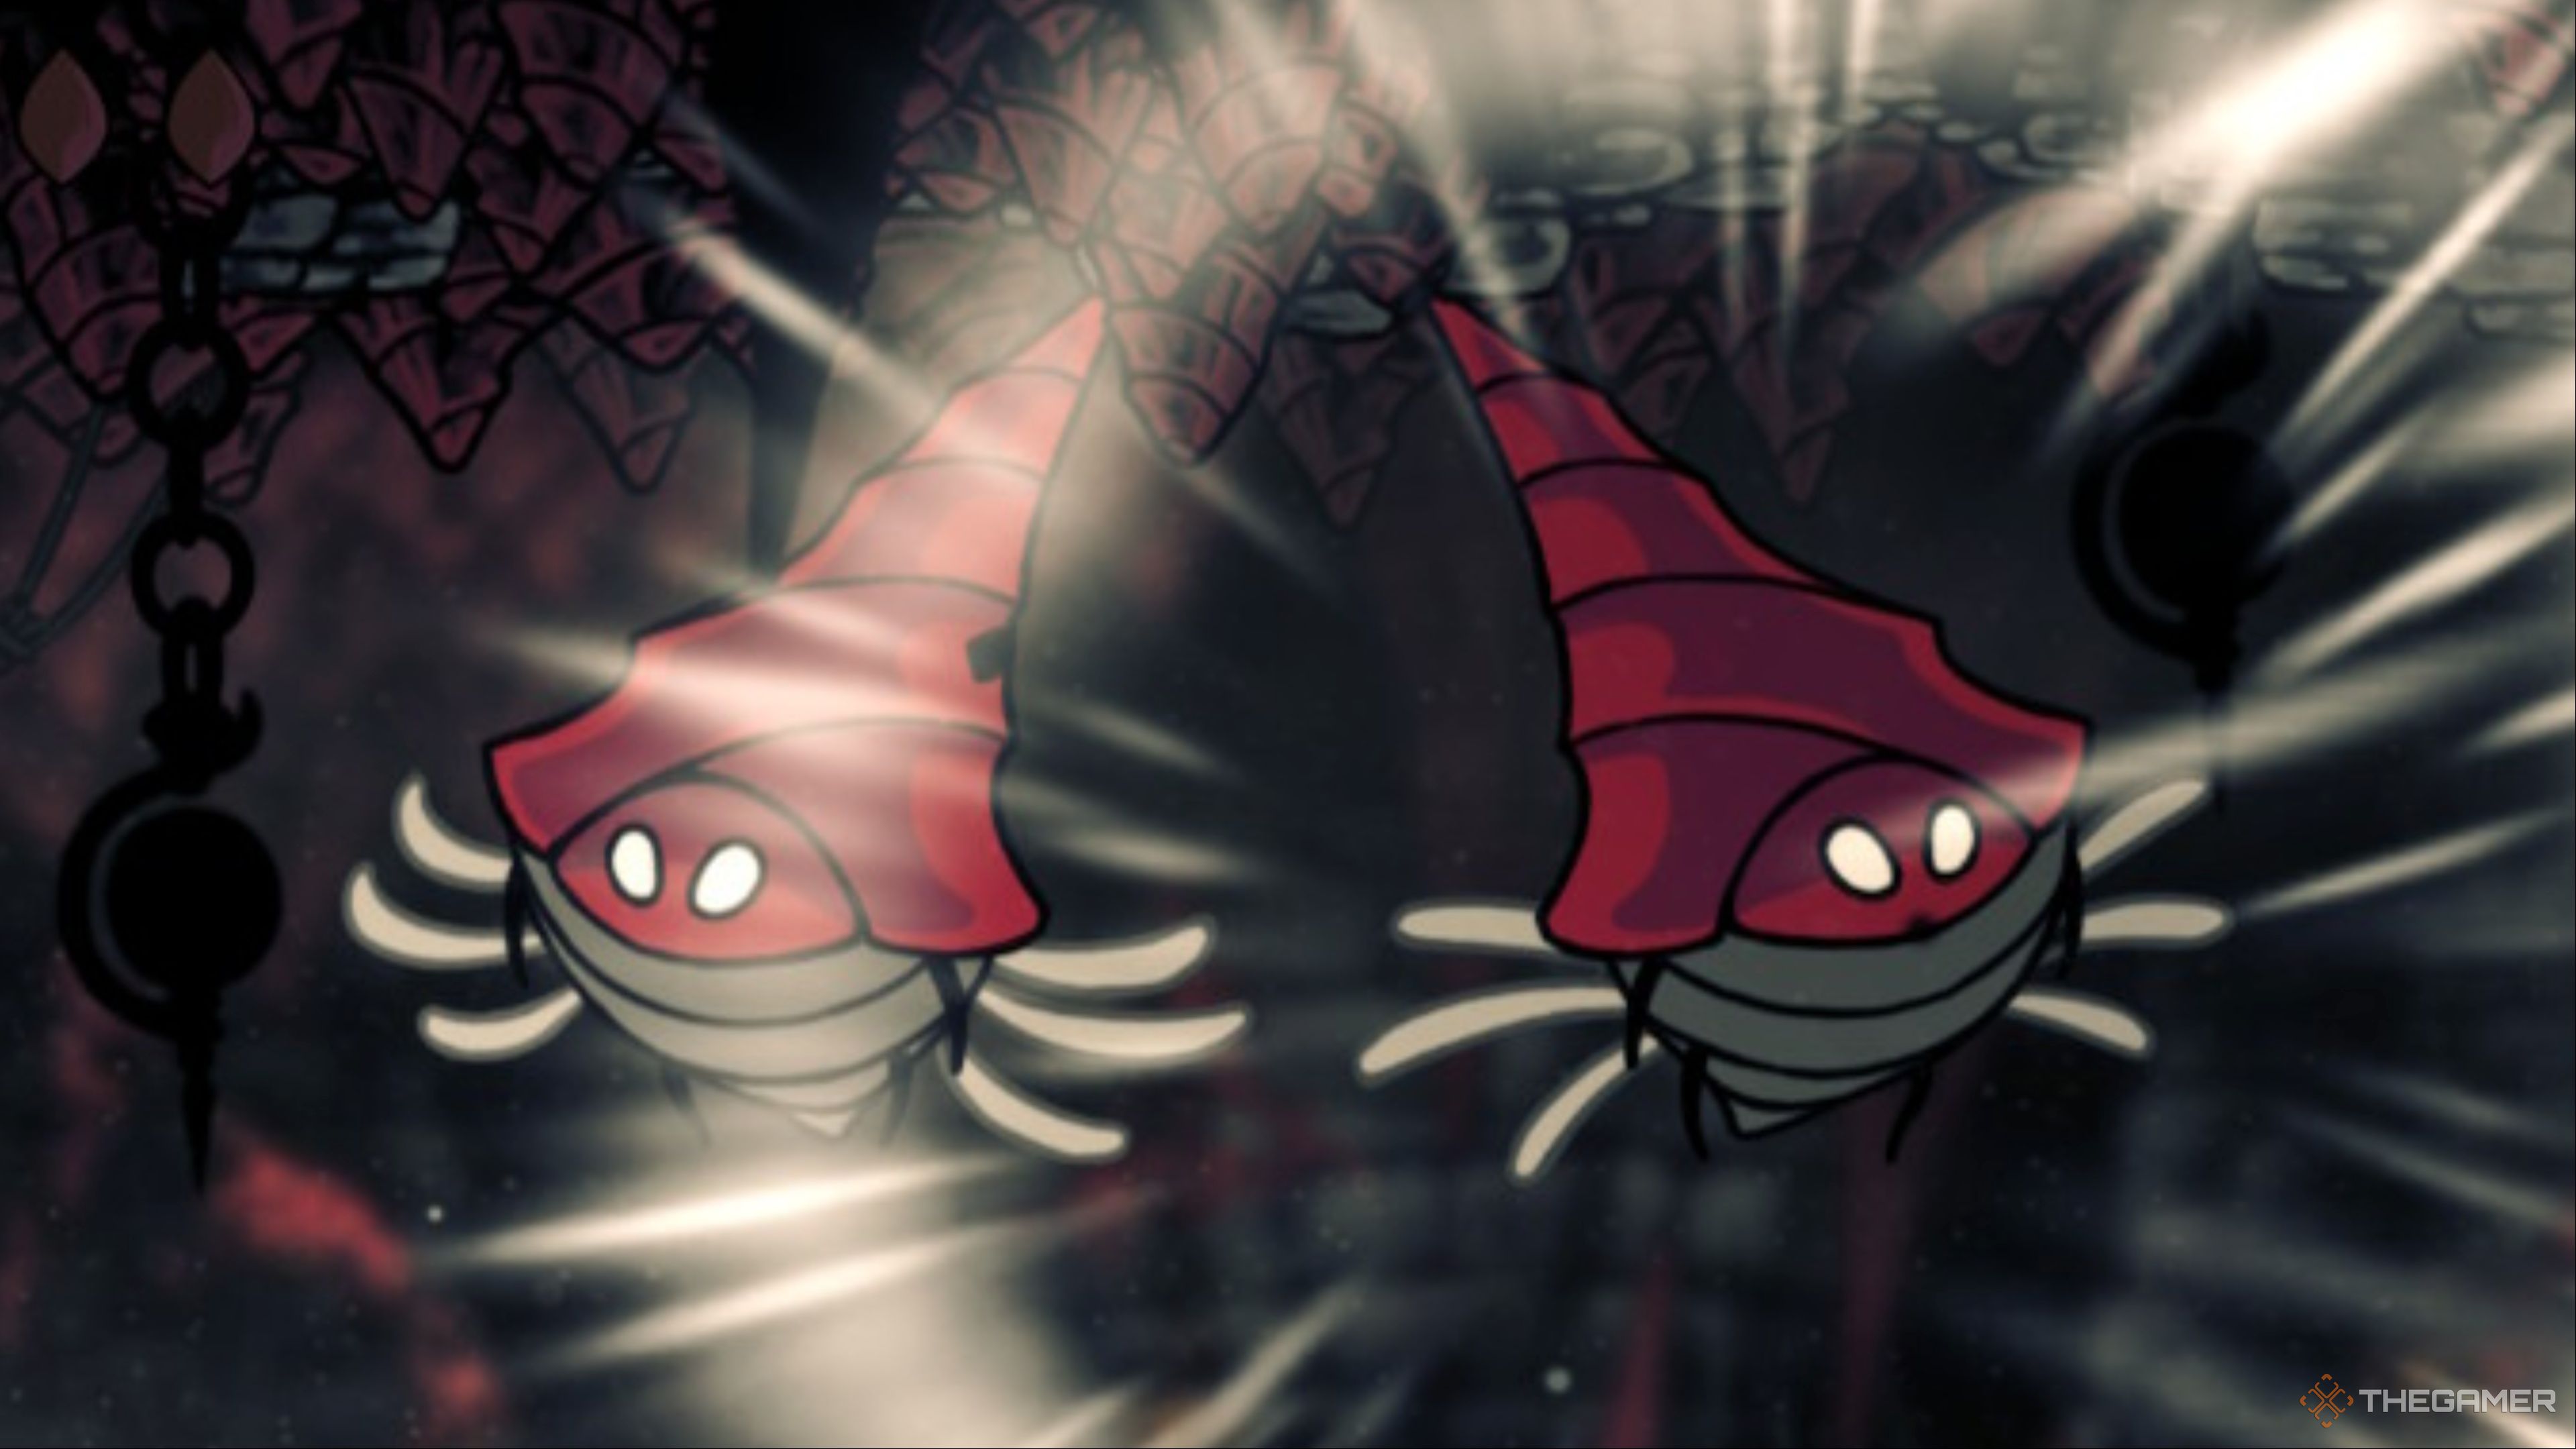
Pinburrow
The conchflies will turn to point their conches toward a nearby wall and begin drilling into it. They will disappear and then reemerge elsewhere in the arena, indicated by dust and the tips of the conches peeking out.
Side-step out of the way of attacks and avoid corners.
Pin Shot
Flying around the arena rather than preparing to burrow, the conchfly waits for an ideal shot on Hornet and then makes an 'o' with its mouth. Then it fires a conch that flies toward Hornet and can bounce off walls up to three times before being destroyed on the fourth collision.
Either side-step out of the conch's way or strike it with a normal nail attack to instantly destroy it.
Rapid Pinburrow
It looks like a normal pinburrow, but it is done at a faster speed and simultaneously between both conchflies. It is performed each time the conchflies are burrowed at the same time.
Stand in the center of the arena and prepare to quickly moveout of the way. This will likely require pogo-ing.
read moreAlthough the run between the Great Conchflies and the bench is long, the boss is thankfully so simple that you need only to learn two (arguably three) moves and not worry about any fancy phases. The fight itself will not take long to grasp.
However, to ensure that you do not have to make that trip between the arena and bench, we highly recommend doing two things:
- Study the table of moves and counters (and compare that to the video) above.
- Practice your ability to deal with the projectiles by fighting the smaller normal conchflies in the area.
The most prolific attack in the Great Conchflies' arsenal is their Pinburrow attack. They can do this individually or simultaneously, meaning you need to be on a constant lookout at each wall of the arena for their possible appearance.
While dodging this move depends on where exactly they appear and what the other is doing, there are a few general tips you should always keep in mind for every scenario:
- Keep your dashing precise and to a minimum to avoid overstepping into another conchfly.
- Do not spend too much time in the air. Floating should be performed only in unique circumstances.
- Traps should be set as soon as the flies are off-screen.
In fact, traps are the easy mode for this fight. Sting Shard is exceptional here as it can be placed even when the flies are not present and triggered when needed. Pair it with the Pollip Pouch for even more effectiveness.
The only other attack the Great Conchflies can perform is the Pin Shot: firing a small conch shell that can ricochet off walls. While you can side-step away from these, you can also hit them to either destroy them or ricochet them back at the conchflies.
During this attack, the other conchfly will typically not appear until after the conch has already fired. Then, the conchfly that did fire will burrow, and they will perform a synchronized Pinburrow within one or two attack cycles.
Continue juggling these two pesky flies until you eventually defeat one of them. For now, that is all you need to do. Its partner will roar and retreat.
There is no reward for defeating this optional boss in this arena. If you want the reward, you will have to continue platforming left of this area to reach the Pinstress for the hidden nail art.
The platforming area to the left is full of heavy winds and sand worms that deal double damage. If you are low on health after this fight and feel unconfident about your platforming skills, you might want to bait some of the small conchflies to the right over and fight them for some silk for the road.