Quick Links
- How To Reach Shelldiver
- Shelldiver First Phase
- Shelldiver Second Phase
- Shelldiver Third Phase
Endless Dungeon is a tough game. You're faced with endless waves of enemies who push relentlessly towards your Crystal Bot and all you have to defend yourself are some guns and turrets. Things get even more complicated when you add complex boss fights into the mix, and Shelldiver may very well be the first boss you encounter.
RelatedEndless Dungeon: How To Beat Red Dead Eye
Red Dead Eye is a ferocious boss with lots of tricks up their sleeves in Endless Dungeon.
PostsShelldiver is a massive enemy with a very large health bar, but it is not an insurmountable obstacle. With the right strategy and ample preparation, you should be able to take down this oversized Blob in no time at all.
How To Reach Shelldiver
Shelldiver is the boss of the Procedural Factory, one of the three second-level floors you can access in Endless Dungeon.
After a pretty standard first zone, unlocking and entering the second zone of the area will place you in a unique room filled with turret spots. There will be one adjoining room that contains something helpful, such as a medkit dispenser or a merchant, but other than that, the only thing you can do here is prepare the obvious arena for the incoming fight.
Shelldiver is a Blob-type enemy, and is thus weak to Acid attacks. When taking a route that pits you against this boss, it's a great idea to pick up one or two Acid weapons for your squad and get suitable turrets.
The Acid Sharpshooter and Amplifier turrets are perfect, especially if you can get the former levelled up at all.
Your Crystal Bot will be mobile and a target for enemy attacks for much of this fight, and you'll need to move it out of large attack radiuses throughout the battle. Try to avoid any Crystal Bot upgrades that give it a decreased movement speed and consider those that make it quicker.
Hopefully, you'll have saved up enough Industry points to set up a fair few Acid turrets around the arena. Your default neutral turrets would also be helpful, just not as much. Find one slot for an Amplifier, and you're ready to start the fight by directing your Crystal Bot to the door to the elevator.
Shelldiver First Phase
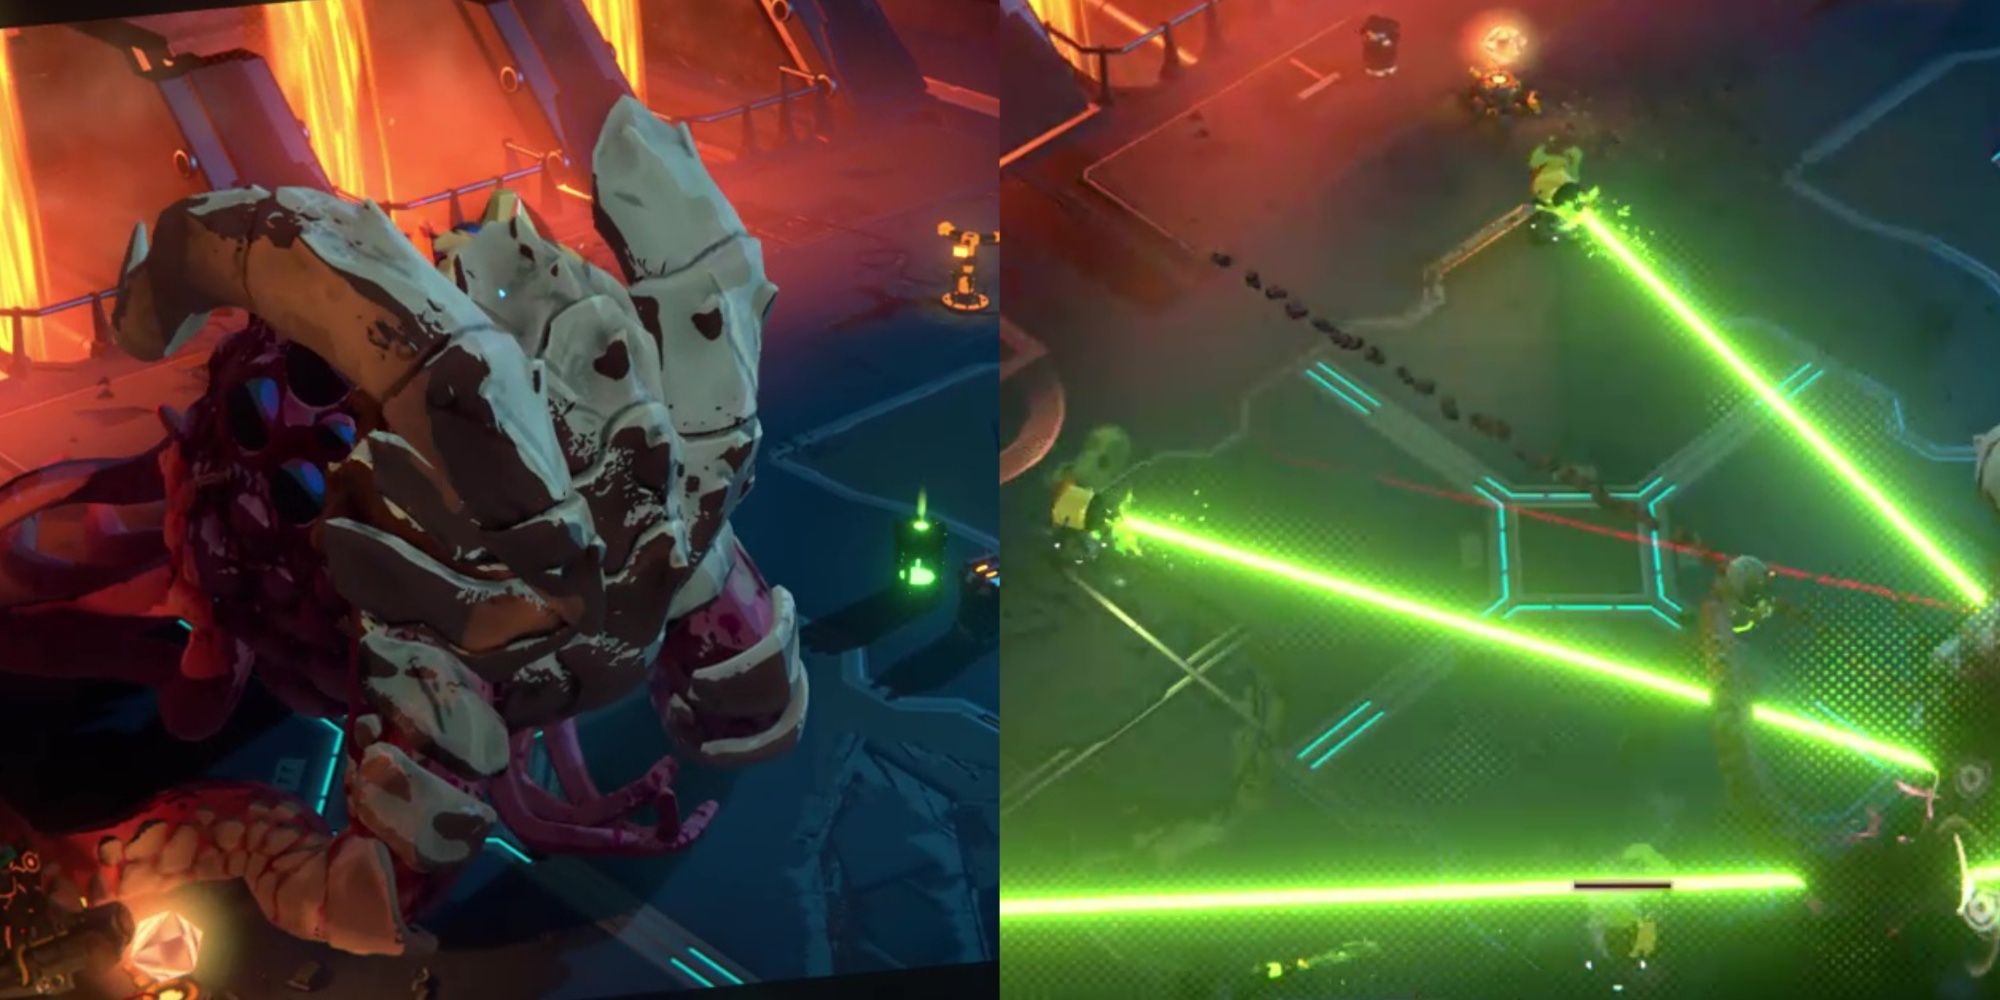
The first phase against Shelldiver is the easiest to deal with. The boss really only has one attack - it will mark a large, circular area for an attack, which will be visible to you. After a few seconds, Shelldiver will jump into the air and crash into the marked area.
As soon as Shelldiver marks a circle for attack, get out of the area quickly, making sure that you take the route closest to the edge so that the Crystal Bot gets out of the circle quickly.
This crash attack will destroy any turrets it hits. You'll need to keep repairing these throughout the fight, so any high-Wit characters will be useful here.
The enemy Blob spawners around the room will pump out weak enemies throughout this phase in small amounts. Take them down then they get too close to you.
While avoiding Shelldiver's attacks, make sure you're also firing at it. You'll notice that Shelldiver has two health bars - the first is a red health bar that gets drained when the boss is attacked by your characters and your turrets.
Once this initial health bar is depleted, Shelldiver will fall over. Approach it and you'll be able to command your Crystal Bot to start 'mining' it. This will take off a chunk of the yellow health bar underneath the red health bar.
While the Crystal Bot is attacking Shelldiver, the enemy spawners will get more aggressive, sending out nastier Blobs in higher numbers. Take this time to eliminate them while healing up your turrets.
Once you've depleted a third of Shelldiver's yellow health, it will heal its red health bar and shake the Crystal Bot off, starting the second phase.
Shelldiver Second Phase
This phase is a lot like the first phase - Shelldiver will make leaping attacks at you, small enemies will spawn to cause confusion and attack turrets, and you'll need to keep an eye on your Crystal Turret at all times.
What's different here is that whenever Shelldiver makes its leaping attack, it will be followed by falling rocks from the ceiling. These will fall in zones indicated by red circles, so you'll need to react fast to these as they appear, keeping in mind that you'll also need to get the Crystal Bot out of the way too.
Overall, though, your strategy should be the same as in the previous phase. Fire at Shelldiver constantly, only pausing to repair turrets - especially your Amplifier turret, if you have one.
Repeat the mining process once you've depleted the boss's red health bar again, and you'll enter the third phase.
Shelldiver Third Phase
As with the transition between the first and second phases, the third phase is only slightly different to the previous phase. In this phase, Shelldiver still only has one attack, but in addition to being followed up with falling rocks, Shelldiver will also place pools of electricity in its landing zones. These will persist long after the impact and cause constant damage to any character caught in them.
The damage is very light, so you can dash in to repair turrets caught in the zone! Just make sure you get out before you take too much damage or the Crystal Bot manages to follow you inside.
Time is of the essence in this phase. You'll need to repeat all the same steps as before, but play hyper-aggressively. Avoid the attacks as best you can and be ready to finish off the last of Shelldiver's yellow health with the Crystal Bot as soon as the opportunity arises.
Once the last chunk of yellow health has been depleted, the fight is over and you can pick up your reward.
NEXT: Endless Dungeon: How To Beat Bug Momma