Alone In The Dark will have you transported through memories and alternate dimensions from time to time. The Hateful Mound is one of the first levels in the game that revolves around entering Jeremy's memory. Your mettle and combat skills will definitely be tested here.
The Best Horror Games Set In Space, Ranked
Horror games in space offer you the best of both worlds. Here are some of the best ones, ranked.
PostsThe objective is to continue looking for Jeremy inside the Hateful Mound, but you will have to get through a couple of obstacles before you can find this strange mound. This guide will detail every enemy and item in your path as well as how to complete this mission.
How To Find The Lever For The Hateful Mound Barn
There are two items you need to find:
- Jetty Key
- Bridge Lever
The first building to your right has nothing except a locked door. After exploring the barn across the mud, you have to go there.
As you walk closer to the barn, you will notice a throwable on a crate on the ground to your left and two more near the entrance. You should save these for later. For now, there are no enemies.
Enter the room to your left inside the barn. The first locker across from you will have the Jetty Key, which unlocks the door inside the other building. Make sure to loot the other lockers for extra ammunition and health potions, as well as unlock the side door from inside.
Loot is RNG-based. All loot locations are the same, but you may or may not get something.
Head back to the first building and unlock the door at the back of the room. There should be loot in a container at the end of the dock, just past the steps. Inside this next room, you will find the Bridge Lever for the barn.
Exit the room and go to the side of it to find a Pipe melee weapon. You can jump down from here, as well.
Once you walk into the center of the mud, an enemy will surface from the ground.
There is an oil spill near where you jumped down, which you can light on fire by shooting at it.
You can lure the monster over the oil and shoot it for fire damage.
Use the Bridge Lever item on the green machine in the barn to repair it. You will lower the bridge and will be able to access the top floor of the barn. Upstairs, you will find another Pipe and potential loot beside it.
How To Defeat The Underground Monstrosities
There will be an automatic cutscene where you fall from the barn, and a monstrosity appears before you. These guys burrow into the ground, where you can track their movement via a dirt line. Back up onto the wooden ramp and kill the monster. There is an axe to the bottom left of the ramp and a throwable to the bottom right you can use.
You can use regular flooring, such as wooden ramps and indoor shelters, to evade these monsters if they are still burrowing. If they have already surfaced, they can follow you out of the mud.
After dealing with the singular monstrosity, do not start running around the mud here. More will spawn if you do. Instead, hug the right side. There is a two-handed oar or paddle to your right that can be used as a melee weapon.
Enter the building in front of you and start looking for extra bullets and health potions. Inside this building, you will also find a Shovelas a two-handed weapon.
Once you are all stocked up, be cautious when leaving. When you walk towards the gate near the last house, two more enemies will spawn.
You should hug the corners and reach the last house before triggering more enemies in the center.
The last house cannot be entered but will have a Pipe, throwable, and potential loot on the porch.
As soon as one toe is off the porch, an enemy will spawn at the gate. You should stay by the porch while using your gun (or the nearby throwable) to avoid spawning other enemies. Once that monstrosity is defeated, walk towards the gate to trigger the last monster, which will appear near the same porch.
There are only three enemies in this area. Once you defeat them, you can use a melee weapon to attack and destroy the gate.
How To Sneak Past The Underground Monsters
This next area will have even more houses to loot from. None of them have required story items. There are no melee weapons to loot in this area, so you might want to go back to the previous houses if your melee weapon broke at this point.
The first house to your right will have one enemy sitting inside at the far end of the room. There is a throwable to the right as you enter. To the enemy's right, there will be loot under the bed. Make sure to check the locker in this house, as well. There is a crate to loot on the outside porch, far right.
The house across from you has only two lootable locations inside. The last house requires you to squeeze through scrap to enter from the backside. An enemy will be sitting on the floor to the left. There are three lootable locations and a throwable on the floor.
You want to go past the first two houses. The game will prompt you to sneak at this point, and you definitely should. Those underground monsters will be patrolling the area. They will not surface unless they sense you. You can either go in guns blazing or sneak past the plus five enemies.
It is hard to track where the enemies are in order to evade them. You can see the dirt line they leave behind to temporarily see their path. To know where they actively are, look for the dirt sputtering out of the ground.
You can walk over the dirt lines, but not over the sputtering of dirt because that is essentially them.
In this first area, there are two enemies circling the crates in an almost figure-eight formation. There are two throwables here, so you could lure out these two to avoid complications or sneak past them.
The monsters will sometimes pause and stay in one area for a while. Your goal is to head to the right, toward the light source. It will be next to impossible to wait until both of them are not near the pathway you need to get to. Your best bet is to follow behind one of them closely.
Make sure you are directly behind the dirt sputter because you can't run to catch up, or you will exit stealth. There is also a sitting, resting enemy behind the crates that is not underground, on the right-hand side. If you stealth past him, he will not aggro.
- Wait until one enemy is crossing through the middle to head back to where you need to be, and the other enemy is making its way toward the middle, like in the image above.
- Follow the first enemy through the middle and to the right.
- The monster will continue circling, and you can leave it and walk onto the wooden bridge.
Down at the bridge, you will find loot and a Pipe. Your character will complain that they want to get to the other side, meaning the broken bridge out in the water. Your next objective is to cross to the red ladder on the right. There are two underground enemies circling this area.
You can stop sneaking and just run to the ladder if you please, they won't climb up there with you. Make sure to use the lever next to the ladder, first. This will ignite the oil around and set the ground ablaze. Head up the ladder and onto the shed.
The shed will soon catch fire, so make your way across the small wood panel and climb the oil rig. Walk around the top to find Tough Cloth and combine it with the rope overhead.
How To Find The Hateful Mound
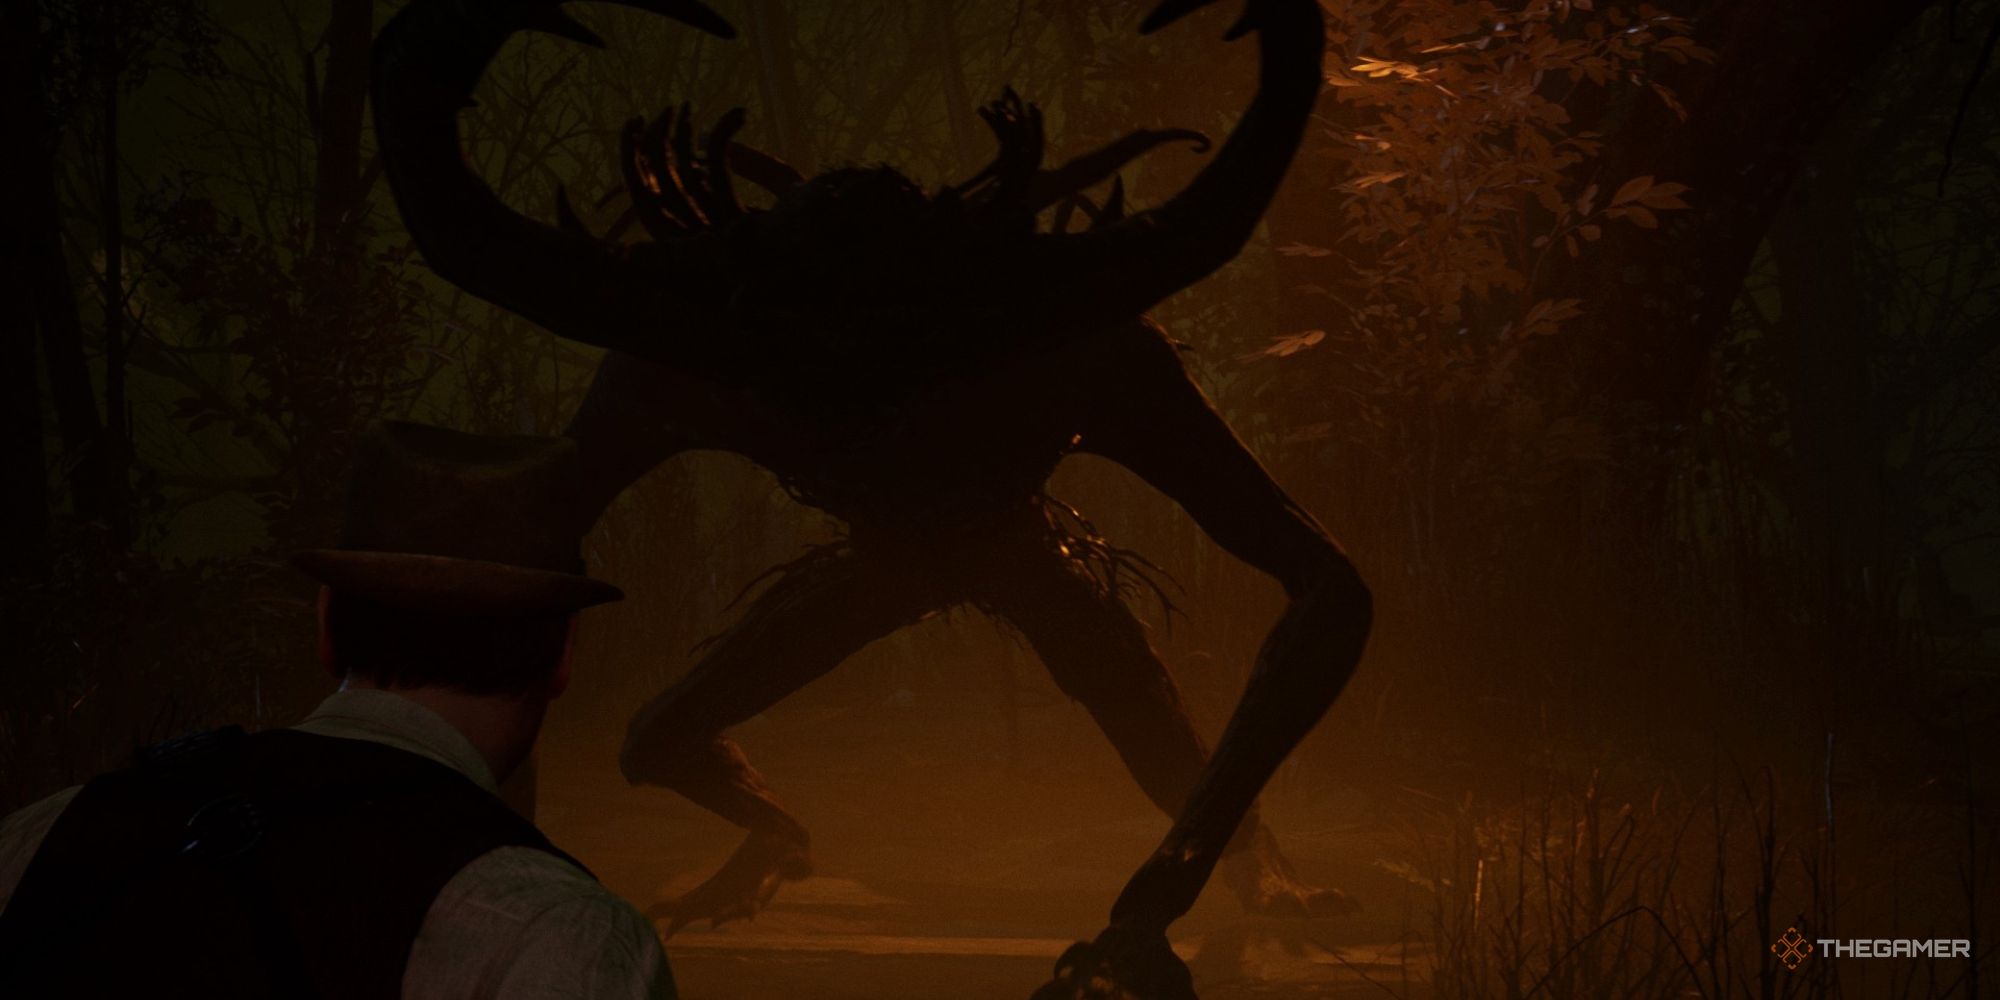
This next section is safe, trust us. All you have to do is keep walking to the end. A large monstrous hound will stop you in your tracks. Don't worry, you don't have to fight it.
Keep walking to the end of the road to find the cave known as the Hateful Mound. A lady will be inside, along with a suitcase Jeremy left behind, and a throne made out of sticks. A cutscene will ensue where that large monster will come back, and you will be knocked back into reality.
Notable Items Received
Once you are back in the Derceto house, the suitcase will be at your feet. Loot it to find the item, Palette Knife, as well as a Clue in book form. The knife will be used to un-wedge stuck doors in the house. There are a maximum of two doors that are wedged shut and require this item.
The display case on the wall containing a shotgun is now open if you have not picked it up yet.
Upon reading the clue "Reflections On The Power Of Verb In Certain Texts", you will receive the Sitting Room Key. This opens the door on the other side of the Astrological Clock on the upper floor.
NextThe Best Third-Person Survival Horror Games
Your resources are low, but the terror is never-ending in these third-person survival horror games.
Posts