Zelda: Tears of the Kingdom Gleeok Boss Locations and Strategy Guide
UPDATE: We have incorporated interactive maps to assist you in locating various Gleeok positions in Zelda: Tears of the Kingdom.
In The Legend of Zelda: Tears of the Kingdom, players will encounter a variety of Gleeok locations, ranging from easily accessible spots to those that are particularly challenging to discover.
While you can navigate around Gleeoks to sidestep confrontations, doing so means potentially missing out on some of the game’s finest fusion items and elixirs.
So far, players have identified a total of 14 Gleeoks throughout Hyrule, including three frost and thunder Gleeoks, four flame variants, and four King Gleeoks, which are notably harder to track down.
Tears of the Kingdom Gleeok Locations
Flame Gleeok Locations
Be sure to equip your Goron armor or pack some flame-resistant meals before taking on these foes.
Below is an interactive map detailing all Flame Gleeok locations in Tears of the Kingdom, followed by specific strategies on locating and defeating each enemy.
Bridge of Hylia (Hyrule Field)
This Gleeok is among the more formidable adversaries, stationed at the southern end of the bridge. Without ample cover, players will need to be creative to approach it. Utilizing non-wooden vehicles or springs for a height advantage will allow you to activate Link’s special slow-motion ability while airborne, enabling you to unleash arrows directly at the Gleeok’s eyes.
Rayne Highlands (Tabantha Frontier)
This Gleeok roams the area near ancient columns, east of Rayne Highlands. Players wishing to avoid combat can sneak by to activate a switch that opens a hidden chamber housing the Tunic of Awakening.
Spectacle Rock (Gerudo Desert)
Found southeast of the desert Skyview Tower, this Gleeok rests on a rocky perch. While there’s limited cover, players can utilize the rock formation for protection against the flames.
Trilby Valley (Lanayru)
This Gleeok hovers above the ground, often parallel to nearby sky islands. Ensure that you’ve packed stamina elixirs and, if you’ve completed the wind temple, bring Turin along. Glide from either the Kadaunar or Igoshon Shrine to rain arrows down on the Gleeok’s eyes, then swoop in for the battle.
Thunder Gleeok Locations
The Rubber Set gear is highly effective against these adversaries.
An interactive map of all Thunder Gleeok locations in Tears of the Kingdom is provided below, with further insights on how to find and handle each foe.
Hyrule Coliseum (Hyrule Field)
This Thunder Gleeok serves as a replacement for the Lynel from Breath of the Wild and offers one of the easier Gleeok battles, thanks to the structure’s multiple levels and pillars that provide cover from lightning strikes.
South Akkala Plain (Akkala)
Located at the back of the Akkala Citadel, this Gleeok has limited space to maneuver, but parts of the citadel can serve as obstacles.
Near Martha’s Landing (Faron)
This Gleeok is positioned south of Herin Lake and north of the sea, sitting on a slight rise westward from the road’s endpoint.
Frost Gleeok Locations
To combat these formidable foes effectively, bring freeze- and ice-resistant meals along.
An interactive map showcasing all Frost Gleeok locations is available below, along with strategies for finding and defeating each foe.
Tabantha Snowfield (Strand)
This Frost Gleeok wanders the Tabantha tundra between the glyph and Hebra stable, near the location of a Lynel from Breath of the Wild.
Biron Snowshelf (Tabantha Frontier)
Nestled just north of the Rospro Pass Skyview Tower, this Gleeok is quite mobile, so players may need to utilize Aerocuda or Keese eyes for accurate shots.
Gerudo Summit (Gerudo Highlands)
Launch from the Highlands’ Skyview Tower, angling your trajectory towards the north.
King Gleeok Locations
There are four King Gleeoks in total. Three inhabit distant islands in the sky resembling arenas, necessitating ample Zonai devices—ideally including batteries—to maintain energy. The fourth King Gleeok resides in the Depths.
Since the aerial Gleeoks are situated far from any fast travel points, consider placing a Travel Medallion to facilitate easier returns if needed.
Here’s an interactive map displaying all King Gleeok locations, complete with further details on strategies for each encounter.
Scourge of Hebra Sky
Locate this arena south of Lightcast Island. If you have extra batteries on hand, start from Ganos Shrine, utilize the fan platform near the Flux Construct boss, and fly to the island.
Scourge of Gerudo Sky
The Gerudo King Gleeok may appear distant from the Skyview Tower, but with a stamina elixir and potentially Turin’s assistance, you can reach it seamlessly. Some players have even employed a Wing device mid-flight for a smooth landing into the boss battle.
Scourge of Necluda Sky
This Gleeok is situated above Eventide Isle. Two methods can lead you to it, both beginning with launching from the Rabella Wetlands tower. Either gather materials in the Necluda Archipelago to build a craft for flight or fuse rockets, a control stick, and fans on a Wing, coupled with a Large Zonai Charge.
Scourge of the Depths
The final King Gleeok rests beneath Thyphlo Ruins in northern Hyrule, just north of the Lost Woods. While the darkness adds an unsettling atmosphere, this Gleeok behaves similarly to the others—remains challenging. Don’t forget to pack meals that counter gloom.
Strategies for Defeating Gleeok in Tears of the Kingdom
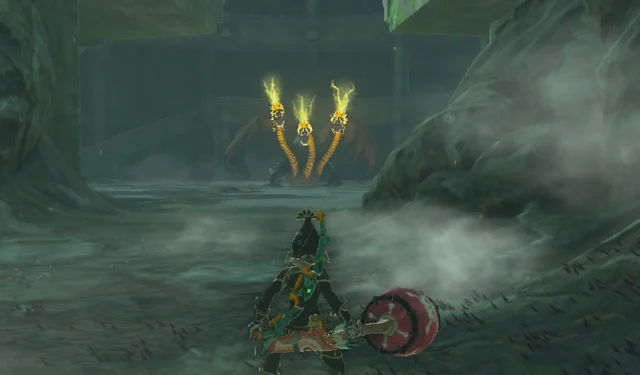
All elemental Gleeoks share similar mechanics. They unleash their respective elemental beams, create explosive effects, and soar out of reach. Your attacks will only inflict harm when all three heads are subdued, causing them to crash to the ground. Shooting arrows at a Gleeok’s eye briefly disables a head. However, be cautious—if you take too long to defeat the other heads, the incapacitated one will revive.
If you struggle with your aim, consider fusing a Keese Eyeball or Aerocuda Eyeball to your arrow. While some players advocate for using elemental enhancements for maximum damage, they aren’t strictly necessary; even weaker bows can secure a takedown in two critical hits to the head’s eye. Stronger bows and enhanced attachments will yield quicker victories.
With the heads down, you have a limited time to charge in and unleash as much damage with your weapons as possible.
Gleeoks tend not to stray far from their original position; for instance, the Thunder Gleeok in the Coliseum remains within its confines. Thus, strategizing within the constraints of the arena is essential. Gleeoks will actively seek you out when you hide, making temporary safe zones only viable for brief moments.
Utilizing verticality can significantly assist your efforts, allowing you to slow down time while launching arrows without worrying about incoming elemental beams. Devices like springs or platforms equipped with balloons or rockets can provide easy airborne access.
However, the most efficient method involves fusing a rocket to your shield. By pressing the shield button, Link will ascend quickly, offering an easier and more straightforward approach than using springs.
Preparation depends on the type of Gleeok you’re facing, but here is a general checklist:
- Health-restoring meals
- Gear or meals offering elemental resistance
- Meals providing additional hearts
- At least 50 arrows
- A strong fused weapon (ideally incorporating parts from Lynels, Hinoxes, or Black Moblins)
Having a few fairies and a secondary stamina wheel would also be advantageous, though they aren’t strictly essential.
While Thunder Gleeoks don’t impact the environment, Frost Gleeoks create frigid conditions, and Flame Gleeoks heat the air. So, consider consuming meals that enhance elemental resistance and also boost attack or defense power. Upgrading these meals to at least level three provides a crucial advantage, as Gleeok attacks can deplete five or more hearts simultaneously.
Strategies for Defeating King Gleeok in Tears of the Kingdom
Taking down King Gleeok generally follows the same approach, though there are notable differences. King Gleeok boasts three elemental heads—fire, thunder, and ice—making it critical not to overly depend on elemental resistances for protection. Moreover, this encounter features a secondary battle phase and introduces an additional point of vulnerability.
The initial phase resembles that of regular Gleeoks—find cover, target the eyes, strike the heads, and repeat this cycle until King Gleeok ascends significantly higher after losing 50 percent health. During this second stage, it unleashes deadly beams of light that inflict severe damage upon contact and create updrafts that can be utilized for gliding and firing arrows.
Using the rocket shield method is still valid, and for enhanced distance, you can attach Aerocuda or Gleeok wings to your arrows to facilitate direct hits.
When all three heads fall, King Gleeok crashes down, taking significant damage as a result. Take the opportunity to attack as much as possible before resuming your strategy until it is finally defeated.
Upon defeat, King Gleeok drops valuable items like horns, guts, and wings that are excellent for fusion and cooking, with the horns providing some of the highest attack buffs available in the game.
For additional guidance, please refer to our helpful articles on acquiring the Master Sword and uncovering Tears of the Kingdom Memories.
Source&Images
Related Articles:
Potential Next Otome Game Plush: Benetti from Temirana
21:01July 14, 2025Yumia Atelier Joins Azur Lane for Exciting Crossover Event
15:02July 14, 2025Top 10 Visually Stunning Nintendo Games in History
13:05July 14, 2025Optimal Archer Build and Team Composition for Honkai Star Rail
9:55July 12, 2025Zelda Tears of the Kingdom: Discover Malanya the Horse God’s Location and Cooking Recipes
AMD Launches Ryzen Threadripper 9000 CPU: 2x Performance Boost Over Intel Xeon, 26% Improvement Over Previous Generation, Features 96 “Zen 5” Cores
Leave a Reply Cancel reply
Your email address will not be published. Required fields are marked *