Elden Ring Nightreign Quest Guide: How to Complete the Guardian Remembrance
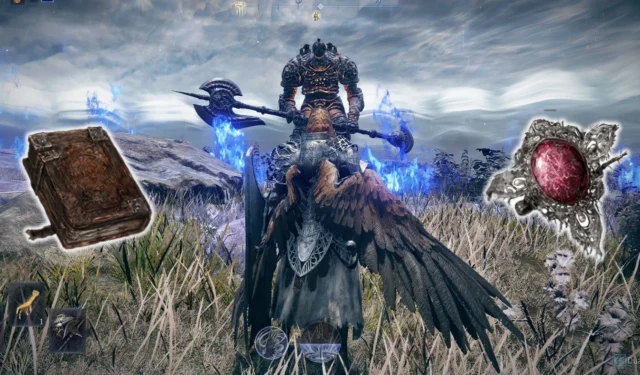
Among the enigmatic Nightfarers in Elden Ring Nightreign, the Guardian emerges as a formidable character when wielded correctly. Armed with a wing-like shield and a thrusting halberd, this avian protector has formidable defenses that thwart nearly any attack.
But what prevents this bird-like warrior from taking flight, tying him to the ground like us mere mortals? What fate befell his former flock? Delve into the narrative and unlock the secrets by completing the Guardian’s Remembrance Quest.
This comprehensive guide outlines the necessary steps to navigate through the quest and acquire the memory fragments indispensable for progression.
Memory Fragments
The memory fragments play a crucial role in unlocking chapters of the Guardian’s memories in the game. While these fragments are not visible in the traditional sense, acquiring them is quite straightforward.
To obtain the first three chapters, engage in solo or co-op expeditions as the Guardian. The deeper you venture, the higher your chances of receiving these vital fragments. However, advancing to Chapter 4 necessitates defeating a Nightlord using the Guardian. For newcomers, I recommend targeting Gladius, as he is notably easier.
Continuing on, you’ll need to take on another Nightlord to unlock Chapter 6. Successfully completing this encounter unlocks Chapter 7, which requires another expedition into Limveld.
Before embarking on your Chapter 7 journey, ensure you have unlocked the Revenant by acquiring the besmirched Frame and locating her ghost in the Journal Room. If you find yourself unclear about how to secure a memory fragment, focus on defeating as many unique Nightlords as possible with your selected character.
Chapter 4 – The Stalwart Giant
To initiate the first remembrance quest, navigate to the Journal Room, located due east of the expedition hall. Browse through the Guardian’s chapters and select “Begin remembrance” under Chapter 4.
- In the western room adjacent to the main hall, converse with the Iron Menial and exhaust his dialogue. This interaction will lead to a quest to retrieve a Stone Stake from Limveld.
- Prepare your relics and proceed on your expedition.The choice of boss is inconsequential here.
- Head to the southwest section of the map, ideally at the start of the second day, or on the first day with a competent team, to find the collapsed Golem.
- Aim for his legs while avoiding his massive slamming attacks.This Golem is significantly tougher than those encountered in churches or castles within Limveld.
- Complete the expedition, whether through success or allowing your team to perish, then return to the Iron Menial.
- Upon returning, you will receive the Second Volume, thereby concluding the first remembrance quest.
- Proceed to the spiral gateway to finalize the remembrance.
On completion, you will be rewarded with the Stone Stake, acquired from defeating the Golem. This Red Slot Relic can be used on the Relic Rite Altar, offering the following benefits:
- Extended duration for Character Skill
- Character Skill Cooldown Reduction +3
This relic is advantageous for early-game players of the Guardian; however, better relics will emerge as you progress. The skill enhancement proved by this relic can be beneficial for quickly dispatching groups of weaker enemies with a charged R2 strike.
Chapter 6 – An Eerie Encounter
If you successfully defeated the Nightlord during Chapter 4, Chapter 6 will unlock automatically. Should you fail the expedition, you’ll need to defeat another Nightlord to access this quest.
- First, visit the dressing room, where the costume mirror is located.
- You’ll encounter a ghostly merchant NPC. Exhaust his dialogue to receive the Eerie Charm.
- (Optional) You may browse his shop, where you can find a selection of relics with single bonuses. However, these are generally underwhelming and offer no quest progression, so you can disregard purchasing them.
- Upon reaching the main chamber, the Guardian will faint and awaken in the room south of the Journal.
- Engage in dialogue with the Iron Menial and the Recluse, then return to the Merchant and choose the option to eliminate him.
- Return once more to the Iron Menial, who will instruct you to locate the Demon Merchant, who possesses the final Volume.
- Enter the spiral gateway to conclude this segment of your quest.
At this stage, you will receive the Guardian’s Chalice, which showcases a new array of colors should you decide to revamp your starting relic loadout.
Chapter 7 – The Maniacal Merchant
After completing Chapter 6, Chapter 7 should unlock seamlessly, priming you for another expedition.
- Start by locating the Iron Menial directly south of the Journal. Present him with the Ledger from the merchant you just defeated, and he will instruct you to track down another merchant to purchase the final tome.
- Before setting off on your expedition, avoid choosing Libra. As the Demon Merchant, selecting him may inhibit his appearance in the overworld.
- Opt for a different boss, then consult your map for the glowing red quest icon.This location is randomly generated for each player.
- Gather 10, 000 runes and seek out the merchant promptly. Do not engage in combat, as this will spark a retaliatory fight which could prove challenging. Instead, select “I want the tome” and proceed with the expedition.
- Return to the Iron Menial with the Third Volume in hand.
- Exiting through the spiral gateway finalizes Chapter 7.
- Generates a whirlwind when charging halberd attacks
- HP Restoration during Halberd Attacks
This relic, while robust, can be surpassed by stronger options due to its limited buff count. Consider equipping it while you search for a relic with enhanced capabilities.
Chapter 9 – To Forgive and Forget
If The Revenant has been unlocked, the subsequent two chapters will unlock upon successfully completing the Chapter 7 boss encounter. If not, make it a priority to unlock her and complete another expedition.
This final part of the quest chain is considerably more succinct than earlier missions.
- Initiate the remembrance chapter and examine the note left by The Revenant on the table.
- Proceed to the library, located west of the expedition room, and seek the glowing light in the northwest corner. Read the note to uncover the truth behind your unfortunate fate.
- Utilize your map to head to the cliffs northwest of the Roundtable Hold, where the Recluse awaits.
- During this encounter, you’ll have a dialogue choice; ask, “Are you the maker of the curse?” and she will confess to cursing you and your former flock.
- You must then decide whether to forgive her or impose punishment. I opted to forgive her, earning the Witch’s Brooch.
- Choosing the alternative option will not remove her from the game; instead, you’ll receive the Cracked Witch’s Brooch, which is identical in function but differs aesthetically.
- Engage in one final conversation with the Recluse before heading to the spiral gateway to conclude the Guardian’s quest definitively.
Upon completion, you will acquire the Remembrance Skin of the Guardian, featuring the Raider-repaired helmet, a far more visually appealing addition than the Wylder’s remembrance skin.
Furthermore, you will also obtain either version of the Witch’s Brooch, which functions as a relic endowed with these beneficial qualities:
- Gradually restores HP for nearby allies while Art is active
- Reflects a portion of damage taken when the ability activates
- Grants Vigor +3
The combination of this relic with the prior two significantly enhances the Guardian’s capabilities. However, if you aspire to serve as a robust tank and provide critical support to your team, consider finding a relic that draws enemies toward you during defense.
One can acquire such relics from the Small Jar Merchant within the Roundtable Hold. Mastering your passive abilities along with this type of relic will elevate your gameplay to new heights.
Source & Images
Related Articles:
Top 10 Survival Games Featuring Soulslike Mechanics
14:03July 13, 2025Top 10 Metroidvania Games to Convert You into a Fan
13:05July 13, 2025Comprehensive Reggie Guide: Master the Art of Dating Everything
18:44July 12, 2025Top 10 Iconic Boss Fights From the PS1 Era
15:03July 12, 2025Comprehensive Guide to the Nightreign Raider Remembrance Quest in Elden Ring
Guide to Obtaining Crafters Seed Pack in Grow a Garden
Leave a Reply Cancel reply
Your email address will not be published. Required fields are marked *