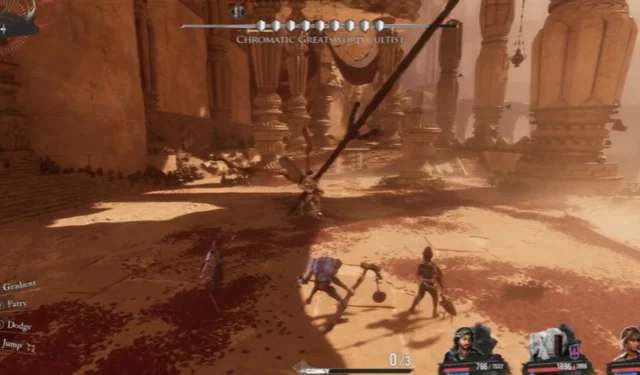
Clair Obscur Expedition 33: Strategies to Defeat Chromatic Greatsword Cultist
Clair Obscur: Expedition 33 stands out as a remarkable blend of gaming genres. It merges traditional turn-based RPG mechanics with quick time events, all infused with a distinctive French flair.
If you’ve already acquainted yourself with the game through numerous positive reviews, let’s delve deeper into the strategies for overcoming some of the game’s toughest adversaries. Among these, the Chromatic enemies present formidable challenges, and we are here to guide you through defeating them with ease.
In this guide, we will specifically focus on the Chromatic Greatsword Cultist. However, with numerous Chromatic foes to face, I encourage you to explore additional guides as each battle can offer its own set of frustrations.
Now, let’s strategize on how to defeat this sword-wielding behemoth and claim those valuable rewards.
Locating the Chromatic Greatsword Cultist
You’ll encounter this candle-headed figure in Sirene shortly after using one of the floating elevators. Ensure you are progressing through Act II, and while it’s technically possible to face this challenge prior to defeating the first Axon, it’s advisable to wait until after you’ve dispatched the Axon for a smoother experience.
To find the Chromatic Greatsword Cultist, start at the Expedition 67 flag. From the flag, follow the path until you notice larger dancers just beyond the railing.
On your immediate left, a dark corridor will lead you downward. Continue along this passage until you find one of the moving platforms, which you’ll need to take.
Once at your destination, turn left, and you’ll see the imposing candle-headed creature waiting for you.
Preparation for the Chromatic Greatsword Cultist Encounter
Bring along skills or equipment that inflict Dark Damage, as the Chromatic Greatsword Cultist is particularly vulnerable to this type of attack. Additionally, consider acquiring Pictos that aid in health recovery or provide bonus damage for counters and dodges.
- – Restores 3% health on parry.
- – Grants a 5% damage increase for each successful Dodge, stacking up to 10 times.
- – Provides +1 AP on successful Parry.
Utilizing these Pictos, particularly with Monoco, can significantly expedite the fight by bypassing shields with his skills.
Be aware that many of the attacks executed by the Cultist target the entire party, meaning even a slight mistake could lead to widespread damage.Additionally, she casts a Curse, which can complicate matters if your team is ill-prepared to cleanse or revive fallen allies.
Bringing Monoco is essential for this fight; without him, the battle will likely turn into a prolonged war of attrition against the shields. Utilize a party setup adept at dealing with multiple shields if possible.
Optimal Party Composition
My successful party combination included Verso, Sciel, and Monoco, creating a highly effective strategy.Given Monoco’s ability to inflict massive damage through barriers, he should be your priority if you can only select one of these three.
Sciel acts as a healer, while Verso contributes additional damage and ensures the team maintains sufficient AP to sustain through the fight. Keeping Monoco equipped for frequent attacks proves crucial as it dramatically eases the challenge presented by the Cultist.
Top Skills for This Encounter
As previously mentioned, the key to victory lies in empowering Monoco to unleash his potential against the Cultist’s shields.Unless you possess a means to nullify or bypass the shields effectively, you may encounter significant difficulties.
Here’s a breakdown of the essential skills to consider:
- Verso: Paradigm Shift and Leadership
- Sciel: Bad Omen and Grim Harvest
- Monoco: Chevaliere Piercing is paramount for this fight.
Party Member
Skill
Description
Towards
Inflicts low single-target damage.5 hits, using the weapon’s element. Critical Hits generate 1 additional Perfection. Rank B increases damage.
Low Physical single-target damage, returning 1-3 AP.3 hits, with Rank C providing an additional AP.
Reduces current rank, providing 2-4 AP to allies. Rank C grants +1 AP to allies.
Recovers 50% Health and dispels status effects, yielding 0-2 Perfection. Rank C boosts healing to 100%.
Delivers very high single-target Light damage.1 hit with potential to Break. Rank S on Break; Rank B costs 5 AP.
Low Light damage to all opponents.1 hit with Break potential. Rank C boosts damage.
Monoco
High single-target Physical damage.6 hits, interrupted if failed. Balanced Mask boosts damage.
Medium single-target Ice damage.4 hits, with significant Break potential. Heavy Mask enhances damage.
Low single-target Dark damage.1 hit with Break potential. Agile Mask fills 20% of the Break Bar.
Physical damage to a single target through shields.6 hits, damage increases with each shield. Agile Mask raises damage further.
High Physical damage targetting all enemies.3 hits, critical hits deal double damage. Heavy Mask amplifies damage.
High single-target Physical damage.3 hits with Break potential. Balanced Mask increases damage.
Sciel
Medium single-target Physical damage.2 hits; consumes all Foretell on a target granting 1 AP to a party member for each consumed.
Medium single-target Physical damage.1 hit applying 2 Foretell; grants an additional 3 if the target has 0 Foretell.
Medium single-target Dark damage.1 hit healing all allies by 30%; consumes Foretell to enhance healing per consumption.
High single-target Dark damage.1 hit consuming all Foretell for increased damage potential. Can Break.
Low Dark damage to all enemies.2 hits with 2 Foretell applied per hit.
High single-target damage.5–7 hits using the weapon’s element, with each hit able to consume 1 Foretell for a double damage bonus. Critical hits maintain Foretell.
This strategy has proven effective for me; however, as long as your approach comprises a solid method for mitigating shields, success should follow.
Understanding the Chromatic Greatsword Cultist’s Attacks
The Chromatic Greatsword Cultist employs two primary attacks, typically executing them in quick succession. You’ll need to remain alert, deciding when to dodge or parry based on your combat strategy.
In my experience, I often opted to sustain some damage rather than counter-attacking, as this would limit the overall damage output from Monoco’s attack. Sciel’s healing skills, particularly using Bad Omen and Grim Harvest, proved invaluable for maintaining team health.
Attack
Description
Action
Chromatic Greatsword Cultist Blood Covering Attack
The Cultist stabs herself, gaining a shield, and then performs a series of attacks: two swings followed by a sweeping attack that requires jumping, concluded with three more swings affecting the entire group.
Parry or Dodge (Jump required)
Chromatic Greatsword Cultist Jump Attack
The boss stabs herself again for a shield boost and then leaps to slam down on a single member of your party.
Parry or Dodge
Each of her attacks can inflict substantial damage, so it’s essential to evade or minimize harm where possible. Always monitor the health of your party members as she frequently targets everyone at once, and the straightforward nature of her attack pattern simplifies memorization and planning.
If you find dodging or parrying hard, here are some tips for effective execution:
- Blood Covering Attack: Try to press the corresponding button as she approaches the first member of your group, and for the jumping attack, wait until the symbol vanishes before jumping, due to its slower animation.
- Jump Attack: Press the button as she descends to ensure a reliable dodge or parry.
Strategies to Defeat the Chromatic Greatsword Cultist
Surprisingly, this encounter may not be as tough as anticipated—my victory was aided by utilizing some clever tactics.If you’re able to endure her attacks long enough, consistently buff Monoco with skills from Sciel and Verso, allowing him to utilize his abilities that bypass shields.
Using these mechanics will let you unleash considerable damage as her shield accumulates, further amplifying your attack power. Adequate survival is crucial; I recommend parrying every attack if capable (especially if you’ve secured the Pictos) or dodging as necessary.
Attempting to counter attacks does not provide much benefit, as it can lead to rapid shield construction. Having a team member dedicated to healing can significantly assist in maintaining your combat effectiveness, allowing Monoco to realize his full potential.
Aim to capitalize on Agile Mask bonuses whenever possible to maximize damage output with each attack. For additional insights, consider referencing this build guide, which provides further assistance.
I may have been slightly underleveled, but if you can mitigate most of the incoming damage, especially from her six-hit combo, you’ll find yourself capable of dealing substantial damage with Monoco’s capabilities.
Rewards for Defeating the Chromatic Greatsword Cultist
Upon vanquishing the Chromatic Greatsword Cultist, you will earn a variety of rewards, including:
- 81, 090 XP
- 5, 288 Chroma
- Level 14 weapon
- X2 items
- X5 items
The obtained weapon is particularly beneficial for Verso, enhancing the damage output of your team. Additionally, the XP and Chroma rewards, along with valuable upgrade materials, assist you in leveling up your weapons beyond level 10.
Since the Chromatic Greatsword Cultist is encountered on the way to your mission objective, it’s worthwhile to defeat her for the added XP and upgrade items—even if you’re not particularly interested in the weapon. There are many other Chromatic adversaries throughout the game that drop excellent loot, so don’t hesitate to continue exploring!
Source & Images
Related Articles:
Top 10 Survival Games Featuring Soulslike Mechanics
14:03July 13, 2025Top 10 Metroidvania Games to Convert You into a Fan
13:05July 13, 2025Comprehensive Reggie Guide: Master the Art of Dating Everything
18:44July 12, 2025Top 10 Iconic Boss Fights From the PS1 Era
15:03July 12, 2025Clair Obscur Expedition 33 Guide: Strategies to Defeat Chromatic Gault
NVIDIA to Launch Affordable “China-Specific” Blackwell AI Chip Priced Between $6,500 and $8,000
Leave a Reply Cancel reply
Your email address will not be published. Required fields are marked *