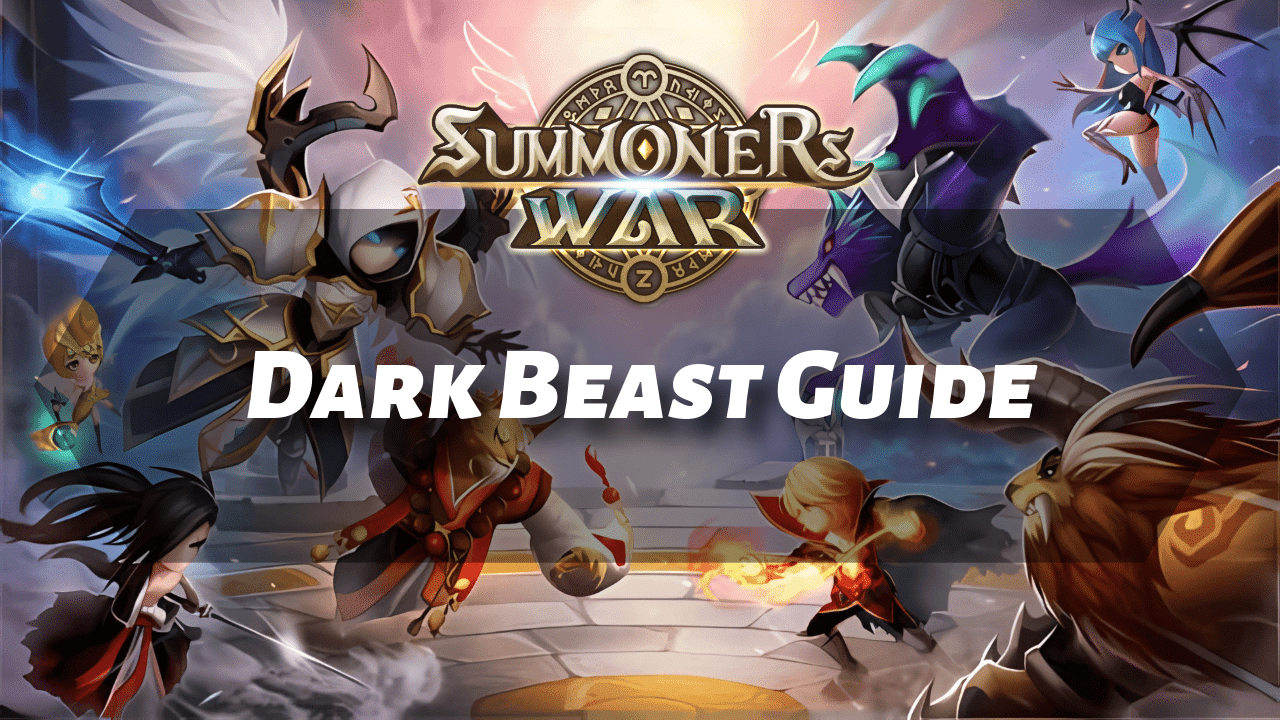
Introduction to the Dark Beast
The Dark Beast is a powerful boss located within the Rift of Worlds, a late-game feature in Summoners War. To access this dungeon, players must progress through specific stages: first clearing all Scenario Maps on Normal difficulty, unlocking the Dimensional Rift, then completing at least one battle there to gain access to the World Boss. Once the World Boss is tackled at least once, the Rift of Worlds—including the Dark Beast stage—becomes available.
The Dark Beast offers a distinct challenge compared to other Rift Beasts, requiring specific team compositions and strategies to overcome its mechanics, which include dealing with debuffs, area-wide damage, and punishing counterattacks. For players seeking in-depth strategies and optimal team setups, this Summoners War Dark Beast Guide serves as a comprehensive resource to navigate and master this challenging content.
Farming the Dark Beast is highly rewarding and is a key part of progression for players aiming to optimize their monsters. The primary reward is the pitch-black dark crystal, a material used in crafting high-end items. It also drops violent gems, which are essential for customizing Violent runes, a staple in many high-level monster builds. The Dark Beast is a source of runes from the Fight, Determination, Enhance, Accuracy, and Tolerance sets, along with corresponding grindstones and enchanted gems that enhance these runes.
Players can also obtain rune pieces, 3-star Rainbowmon, mystical scrolls, summoning stones, and shapeshifting stones. Though the dungeon can rarely yield high-quality gems, farming other areas like the Labyrinth may offer more consistent results for legendary gem drops. Overall, the Dark Beast is a crucial part of rune improvement and late-game resource farming in Summoners War.
Dark Beast Skills and Stats
Dark BeastDark Sweep: Becomes enraged whenever an enemy gains a turn. Attacks all enemies 2 times. Greatly increase damage proportionate to the number of times the Beast becomes enraged, and the rage effect will reset after the attack.
Dark Roar: Attacks all enemies 3 times with a chaotic roar and grants the (Soul Chain) Effect on 1 nearby enemy. The (Soul Chain) Effect will become stronger every time the Dark Roar is used.
Soul Chain (Dark Roar’s Effect): You’ll be under the (Soul Chain) Effect and be completely excluded from the battle. The effect will be removed when you hit the Boss a designated number of times. The amount of damage you receive will increase proportionate to the remaining (Soul Chain) Effect state.
Thorn of Despair: Attacks the enemies in the frontline 2 times with a sharp thorn. The damage increases substantially as the target’s Defense decreases. This attack will target the backline if there are no enemies left in the frontline.
Dark Rageful Breath: Removes all beneficial effects on all enemies and attacks them 6 times with dark breath. The enemies under the Soul Chain Effect will be defeated instantly and will become impossible to revive.
Twisted Body (Passive): Weakens the effect that inflicts damage proportionate to the HP with a twisted power and gains immunity against all harmful effects. The immunity against all harmful effects will be removed during the Groggy State. Additionally, increases the damage dealt to and received from Light Monsters by 50% each.
Dark Beast Stats
StageLevelElemHPATKDEFSPDResPhase 180Dark187,30516404002315Phase 280Dark267,90021816012615Phase 380Dark391,92035918012915Phase 480Dark478,20062716993215Understanding the Dark Beast Mechanics
The Dark Beast in Summoners War, located within the Rift of Worlds, features a unique set of mechanics that require careful preparation, team composition, and tactical execution. Unlike traditional dungeons, the battle involves a structured format and several exclusive mechanics that define both team building and combat flow.
When entering the Dark Beast dungeon, players must form a team of six monsters arranged in a 4×2 grid—four in the front line and two in the back line—alongside selecting a Leader Skill to enhance their team. The front line absorbs most of the incoming damage, and this damage is shared among all monsters positioned there. As a result, using tanky monsters with high HP and Defense in the front is essential. If the front line is cleared, the boss redirects its attacks to the back line. One of its primary skills, Thorn of Despair, specifically targets front-line units and deals more damage as their Defense drops, making sustained durability critical.
The Dark Beast’s combat is paced by an attack bar that gradually fills. At specific points, it uses particular skills, and when the bar reaches its limit, it unleashes a powerful ultimate attack. The boss is immune to all harmful effects during normal phases and cannot have its attack bar manipulated. Once its HP reaches zero, the Dark Beast enters the Groggy State.
In this state, it becomes susceptible to most harmful effects (excluding Stun, Freeze, Sleep, Continuous Damage, and Attack Bar Reduction), and takes significantly increased damage. Players must drive the boss into this state three times to defeat it. Each time the Groggy State ends and the attack bar fills again, the boss fully restores its HP and gains increased Attack and HP stats, progressively raising the difficulty.
A unique mechanic to this battle is Soul Hindrance, also known as Soul Chain. This effect immobilizes one of your monsters, rendering it unusable. To remove this effect, the boss must be struck a certain number of times—approximately 28 to 30 hits. Therefore, multi-hit skills are especially valuable in this fight, allowing players to quickly release their trapped units. While using speed boosters can help the team take more actions and deliver more hits, it also accelerates the boss’s attack bar, making the fight more dangerous as it becomes enraged and deals more damage.
The Dark Beast uses several abilities that challenge different aspects of your team. Scanning the Void hits all enemies twice and scales in damage based on the boss’s level of rage. Roar of Darkness strikes all enemies and intensifies the Soul Hindrance effect on a nearby ally. Thorn of Despair, the front-line-targeting attack, becomes deadlier when Defense is reduced. Dark Breath of Anger removes all buffs and delivers a powerful strike that bypasses damage reduction, instantly killing any monster trapped by Soul Hindrance. The passive skill, Twisted Body, grants immunity to HP-scaling damage effects and modifies damage interactions with Light attribute units—both the damage dealt to and from Light monsters is increased by 50%.
Performance in this dungeon is scored based on the total damage dealt, which determines the rank from C to SSS. Higher ranks reward more and better items, including Pitch-black Dark Crystals, runes, grindstones, and enchanted gems. Reaching the third Groggy State adds a flat bonus of 500,000 damage to your final score. Ranks S to SSS guarantee Pure Magic Crystals and are the only ranks that can yield 6-star runes. While damage score influences reward quality, legendary gem drops remain rare.
Key strategies focus on two main approaches. The first is a multi-hit strategy, using monsters with multiple-hit skills to manage the Soul Hindrance mechanic effectively. The second is a high-damage, or “nuking,” strategy that aims to deal overwhelming damage during the Groggy States to reduce the number of overall cycles required to defeat the boss. This approach demands a robust front line capable of withstanding the Dark Beast’s brutal attacks until enough damage is dealt.
The Rift of Worlds operates under a different system from other dungeons like Cairos. The number of turns in a Rift Beast battle is semi-fixed, so optimizing team animations and action speed can slightly improve run times. However, core mechanics remain consistent, requiring deep understanding and team synergy for consistent high performance in the Dark Beast dungeon.
Strategies and Team Building for the Dark Beast
To effectively defeat the Dark Beast in Summoners War, a clear understanding of its mechanics and careful team building are essential. One of the core challenges of this Rift Beast is the Soul Chain mechanic, which immobilizes one of your monsters during battle. To break this effect, the boss must be hit approximately 28 to 30 times. As a result, incorporating monsters with multi-hit skills into your team is a fundamental strategy, as they help quickly release the chained monster and maintain damage output.
Team composition consists of six monsters arranged in a 4×2 formation, with four in the front line and two in the back. The front line takes the brunt of incoming damage, particularly from the boss’s Thorn of Despair attack, which targets those monsters and scales with their defense reduction. To withstand this, front-line units should be built with high HP and Defense. Meanwhile, your main damage dealers are often positioned in the back line, where they receive significantly less damage and can focus on contributing to damage during Groggy States. A suitable Leader Skill that complements your team’s strengths should also be selected.
Because Soul Chain is such a disruptive mechanic, prioritizing multi-hit monsters across your team helps maintain momentum throughout the fight. Monsters that can hit multiple times per skill or trigger team-ups will accelerate the release of the chained unit, ensuring your team remains effective.
Violent RuneGet Extra Turn +22%
Will Rune
Immunity +1 turn
Revenge Rune
Counterattack +15%
Runes play a critical role in Dark Beast success. Violent runes are commonly used on both damage dealers and support units to allow for extra turns, increasing the chance of breaking the Soul Chain quickly. Front-line tanks like Colleen or the Fire Panda Warrior benefit from rune builds focusing on HP and Defense, typically using sets like Violent/Revenge or Violent/Will with main stats such as HP%/HP%/DEF% or HP% across slots 2, 4, and 6.
Damage dealers are often run on Rage/Blade, Fatal/Blade, or triple Fight sets, with offensive stats like Attack%, Crit Damage%, and Attack% in their rune configuration.
Rage RuneCritical Damage +40%
Fatal Rune
Attack Power +35%
Blade Rune
Critical Rate +15%
Aiming for around 70% Crit Rate ensures more consistent damage, and damage dealers are often optimized with at least 180 Speed and 1500 Attack. Front-line units may need around 25,000 HP and 1,000 Defense, while back-line units can aim for 15,000 HP and 700 Defense. Accuracy is useful on units applying debuffs, such as the Fire Panda Warrior.
Several monsters are commonly used due to their utility and accessibility. The Water and Fire Twins (Sabrina & Talia, Shaina & Maruna) are widely recognized for their multi-hit abilities and coordinated attacks. Colleen is a staple front-line support, offering healing, an attack buff, and multiple hits. Fire Panda Warrior contributes with debuffs, healing, and high survivability. Raoq (2A), Kro (2A), Yen, Lucas, and other multi-hitters like Hwahee, Stella, Xiao Lin, Lushen, and Verdehile are all solid options depending on availability. The Wind and Fire Homunculus, Theomars, Tarq, Tesarion, and Mav also offer varied utility, depending on their skill builds and rune setups.
An alternative strategy focuses on maximizing damage output, especially during the Groggy States. This approach prioritizes strong nukers and less reliance on multi-hits, provided that the team can survive long enough to deal high damage during these vulnerable phases. Lucas, Perna, and Brandia are often associated with this damage-centric strategy, thanks to their ability to deliver massive burst attacks.
The Groggy State is a critical moment in the fight. It triggers after the boss’s HP drops to zero, and during this window, the Dark Beast becomes vulnerable to most harmful effects and takes significantly increased damage. To defeat the Dark Beast, this state must be triggered three times. Each time it exits Groggy, the boss restores full HP and gains increased Attack and HP, escalating the battle’s intensity. Focus your heaviest damage during Groggy to shorten the fight and maximize scoring potential.
Although Rift Beast fights have semi-fixed turn lengths, optimizing your team’s animations and damage output—especially in the Groggy State—can reduce run times. Strategies that utilize fast animation monsters or efficiently trigger team-ups may help with faster clears. Some players experiment with tactics that involve letting a unit die to reduce the length of the Groggy State, though this is niche and not always reliable.
Ranking and rewards are determined by the total damage dealt. Achieving high ranks—S through SSS—not only improves the quantity of rewards but also guarantees Pure Magic Crystals and is the only way to obtain 6-star runes. Reaching the third Groggy State also adds a 500,000 damage bonus to your final score. While higher damage may slightly improve reward quality, the chance of acquiring top-tier items like legendary gems remains low.
With the right team composition—featuring strong multi-hitters, durable tanks, and optimized runes—you can consistently farm the Dark Beast. This provides valuable rewards like Violent Gems, and runes from the Fight, Determination, Enhance, Accuracy, and Tolerance sets, along with Grindstones and Enchanted Gems to improve them.
Example Team Compositions
There are several effective team compositions for tackling the Dark Beast in Summoners War, each built around key mechanics like the Soul Chain and Groggy State phases. Most successful teams fall into two primary categories: multi-hit focused and high-damage (nuking) teams. Multi-hit teams are ideal for reliably breaking the Soul Chain, while damage-oriented teams focus on quickly bursting down the boss during Groggy States.
Eirgar: Runed with Blade/Rapid, using VIT/DCC%/ATK% stats, and functions as an ATB for the entire team.
Colleen: Best runed with a Violent set, paired with either Vengeance or Will for added utility. Recommended stats are VIT/HP%/DEF% or VIT/HP%/HP%. She also provides an Attack Bar boost for the team.
Sabrina: Can be runed with sets like Fatal/Blade or Rage/Blade, using ATK%/DCC%/ATK stats. Paired with her twin, she will deal the bulk of the team’s damage.
Talia: Can be runed with Violent/Blade or Violent/Combat, focusing on ATK%/DCC%/ATK%. Like Sabrina, she plays a key role in dealing significant damage.
Kro (2A): Runed in Rage/Blade with ATK%/DCC%/ATK%. To maximize his potential, he needs to be awakened a second time.
Raoq (2A): Runed in Violent/Blade with ATK%/DCC%/ATK%. It’s beneficial to awaken him a second time, similar to Kro. His skills allow him to team up with another monster, enabling huge damage output.
One approach is the multi-hit focused team, built to consistently manage the Soul Chain mechanic. A typical example includes Eirgar for Attack Bar boosting and damage buffing, Colleen for healing and attack buff, and multi-hitters like Sabrina, Talia, Raoq (2A), and Kro (2A). These units are often runed with sets like Violent, Fatal, Rage, or Blade, emphasizing Attack%, Crit Damage%, and Speed. Eirgar’s attack lead skill and utility make him a popular choice, while Sabrina and Talia benefit from their twin synergy to maximize team-up and multi-hit effectiveness. Colleen also provides reliable healing and can be rune-built tanky enough for the frontline.
A solid F2P-friendly lineup often includes Fire Panda Warrior (Xiong Fei) for tanking, healing, and debuffs, along with Colleen for consistent healing and support. Twins like Shaina, Maruna, Sabrina, and Talia are strong additions to the backline, especially when paired for maximum multi-hit synergy. Alternatives like Lapis or the Wind Nine-tailed Fox can be used early on due to their multi-hit first skills and utility, offering transitional options for players without access to all the Twins.
For those seeking higher scores, a damage-centric team can be built to maximize burst damage during Groggy States. These teams often include nukers like Lucas, Laika, Stella, Brandia, and Perna. Such teams may sacrifice some multi-hit reliability in favor of overwhelming damage output, and typically require a durable frontline—often featuring monsters like Fire Panda or Colleen—to survive the boss’s strong AoE attacks. Some players even use strategies where a unit is intentionally allowed to die early to trigger a shorter Groggy phase and cycle back into high-damage opportunities more quickly.
Other team compositions include combinations like Colleen and Fire Panda in the frontline with strong backline DPS units such as Sabrina, Talia, and Shaina. Some variations include Yen for her passive extra turns and Kro for his branding and bonus damage against debuffed enemies. Raoq is also commonly featured for his team-up mechanics, helping increase the number of hits per turn.
Advanced or hybrid compositions frequently rotate in units such as Wind Homunculus, Tarq, Xiao Lin, Verdehile, or Stella, offering flexibility in team design while maintaining essential roles like healing, debuffing, and multi-hit contributions. Common themes across high-performing teams include the use of support monsters with strong buffs and survivability, consistent multi-hitters to counter Soul Chain, and burst damage to capitalize on Groggy phases.
Teams that repeatedly score S to SSS ranks tend to include a mix of tanky frontliners, at least one or two reliable healers or buff providers, and multiple backline damage dealers optimized for consistent Crit Rate, Crit Damage, and Attack. Whether building toward a multi-hit approach or a Groggy-focused nuking strategy, ensuring proper rune quality, synergy, and stat thresholds is crucial for maintaining consistency and maximizing rewards in the Dark Beast dungeon.
Farming Efficiency and Drop Rates
Farming the Dark Beast in Summoners War is primarily aimed at acquiring valuable upgrade materials like Violent Gems, Grindstones, and rune sets that are otherwise difficult to obtain. While the Rift Beast fights follow a somewhat fixed pattern in terms of turn limits, there are several ways to optimize the speed and efficiency of your runs.
Faster runs can be achieved by using monsters with short skill animations and high burst damage, especially during the Groggy State phases when the Dark Beast becomes vulnerable. Some teams are capable of clearing the boss in under 30 seconds, particularly those built around strong damage dealers and well-coordinated team-up mechanics. Strategies to shorten the Groggy State, such as sacrificing a unit early in the battle, have been noted to contribute to faster clears. Additionally, manually timing team-up skills at key moments during otherwise auto-played runs can shave seconds off your total clear time, though this requires careful planning and execution.
In terms of rewards, farming the Dark Beast grants Pitch-black Dark Crystals, which are essential for crafting certain high-end items. Players can also earn runes from the Fight, Determination, Enhance, Accuracy, and Tolerance sets, as well as Grindstones and Enchanted Gems specific to these rune types. Reaching a rank of S or higher guarantees Pure Magic Crystals, and only ranks S to SSS have a chance to drop 6-star runes. The third Groggy State grants an additional 500,000 damage bonus, which significantly boosts your final score and can help secure higher ranks.
Despite the allure of legendary gems, the actual drop rate from the Dark Beast remains extremely low. Even with a Triple S rank, the estimated chance of receiving a legendary-quality gem is minimal, and obtaining a specific, useful gem—such as a Violent speed gem—can be statistically rare. Most players will find that their farming efforts yield Hero or lower-grade gems more frequently, and any legendary gems obtained may not offer the ideal stat or rune type. As a result, the Dark Beast is still a reliable source of general Violent Gems, but not the most efficient location to target-farm legendary-quality upgrades.
In practice, while achieving higher scores does improve overall reward quality, the impact on rare item drop rates is limited. Optimizing for faster runs is often more beneficial for long-term farming efficiency than solely focusing on maximizing damage output. The Dark Beast remains an important dungeon for progression and enhancement, particularly for upgrading runes on frequently used PvE and PvP monsters, but expectations around legendary gem farming should remain realistic.
Conclusion
In conclusion, the Dark Beast in Summoners War presents a distinct challenge due to its Soul Chain mechanic, which locks one of your monsters until the boss receives a specific number of hits—typically around 28 to 30. Because of this, the most effective strategy involves using monsters with multi-hit skills that can quickly break the chain and restore your team’s full combat capacity. One of the most efficient and accessible setups for many players, especially during early to mid-game progression, includes teams built around the twin mechanics of Chakram Dancers and Boomerang Warriors. Their frequent team-ups and multi-hit attacks make them exceptionally well-suited for this content and often allow players to consistently achieve high ranks like SSS.
Alternatively, teams that focus purely on damage can also succeed, particularly when built around strong nukers capable of exploiting the Groggy State phases for massive bursts of damage. These compositions may choose to ignore the Soul Chain mechanic entirely, compensating with overwhelming firepower. This approach can be especially effective when paired with a durable frontline that absorbs the boss’s targeted attacks, such as the Thorn of Despair, which hits all front-line monsters and increases in damage as their defense weakens.
Free-to-play friendly frontline and support options include Fire Panda (Xiong Fei) and Colleen (Fire Harpy), both of whom contribute healing, attack buffs, and multi-hit skills. Other useful F2P damage dealers include Wind Nine-tailed Fox (Avaris) and Lapis, who provide additional multi-hit utility. More advanced or rarer units like Laika, Stella, Hwahee, and various light attribute monsters such as Lucas, Lio, and Elarion offer high single-target damage and can be integrated into specialized team compositions for faster clears or higher burst damage strategies.
In terms of farming efficiency, focusing on speed rather than maximum damage can be more practical. Since Rift Beast battles follow a set structure and drop rates for legendary gems are very low, it’s generally more efficient to aim for quick clears that maximize the number of runs over time. Violent Gems remain one of the most sought-after rewards, and the Dark Beast is a primary source for them. Although achieving a higher damage rank may marginally improve the quality of drops like runes or gems, the impact is often minimal compared to the time investment required to push damage beyond the SSS threshold.
The core rewards for defeating the Dark Beast include Pitch-black Dark Crystals and runes from the Fight, Determination, Enhance, Accuracy, and Tolerance sets, along with corresponding Grindstones and Enchanted Gems. Pure Magic Crystals are guaranteed at S rank or above, and only ranks from S to SSS have a chance to drop 6-star runes. An SSS rank is earned by dealing at least 3.5 million damage and successfully defeating the boss. Achieving this requires efficient damage during Groggy States, strong team synergy, and well-optimized rune builds.
Overall, the Dark Beast is a critical dungeon for enhancing rune quality and customizing builds through gems and grindstones. While high-rank farming can be rewarding, the most practical approach for many players is to focus on speed and consistency to maximize Violent Gem acquisition over time, rather than chasing rare legendary gem drops that remain difficult to obtain.


