Remnant 2: The Dark Horizon - Amalgam Kel'Roth And Amalgam Relis Boss Fight Guide
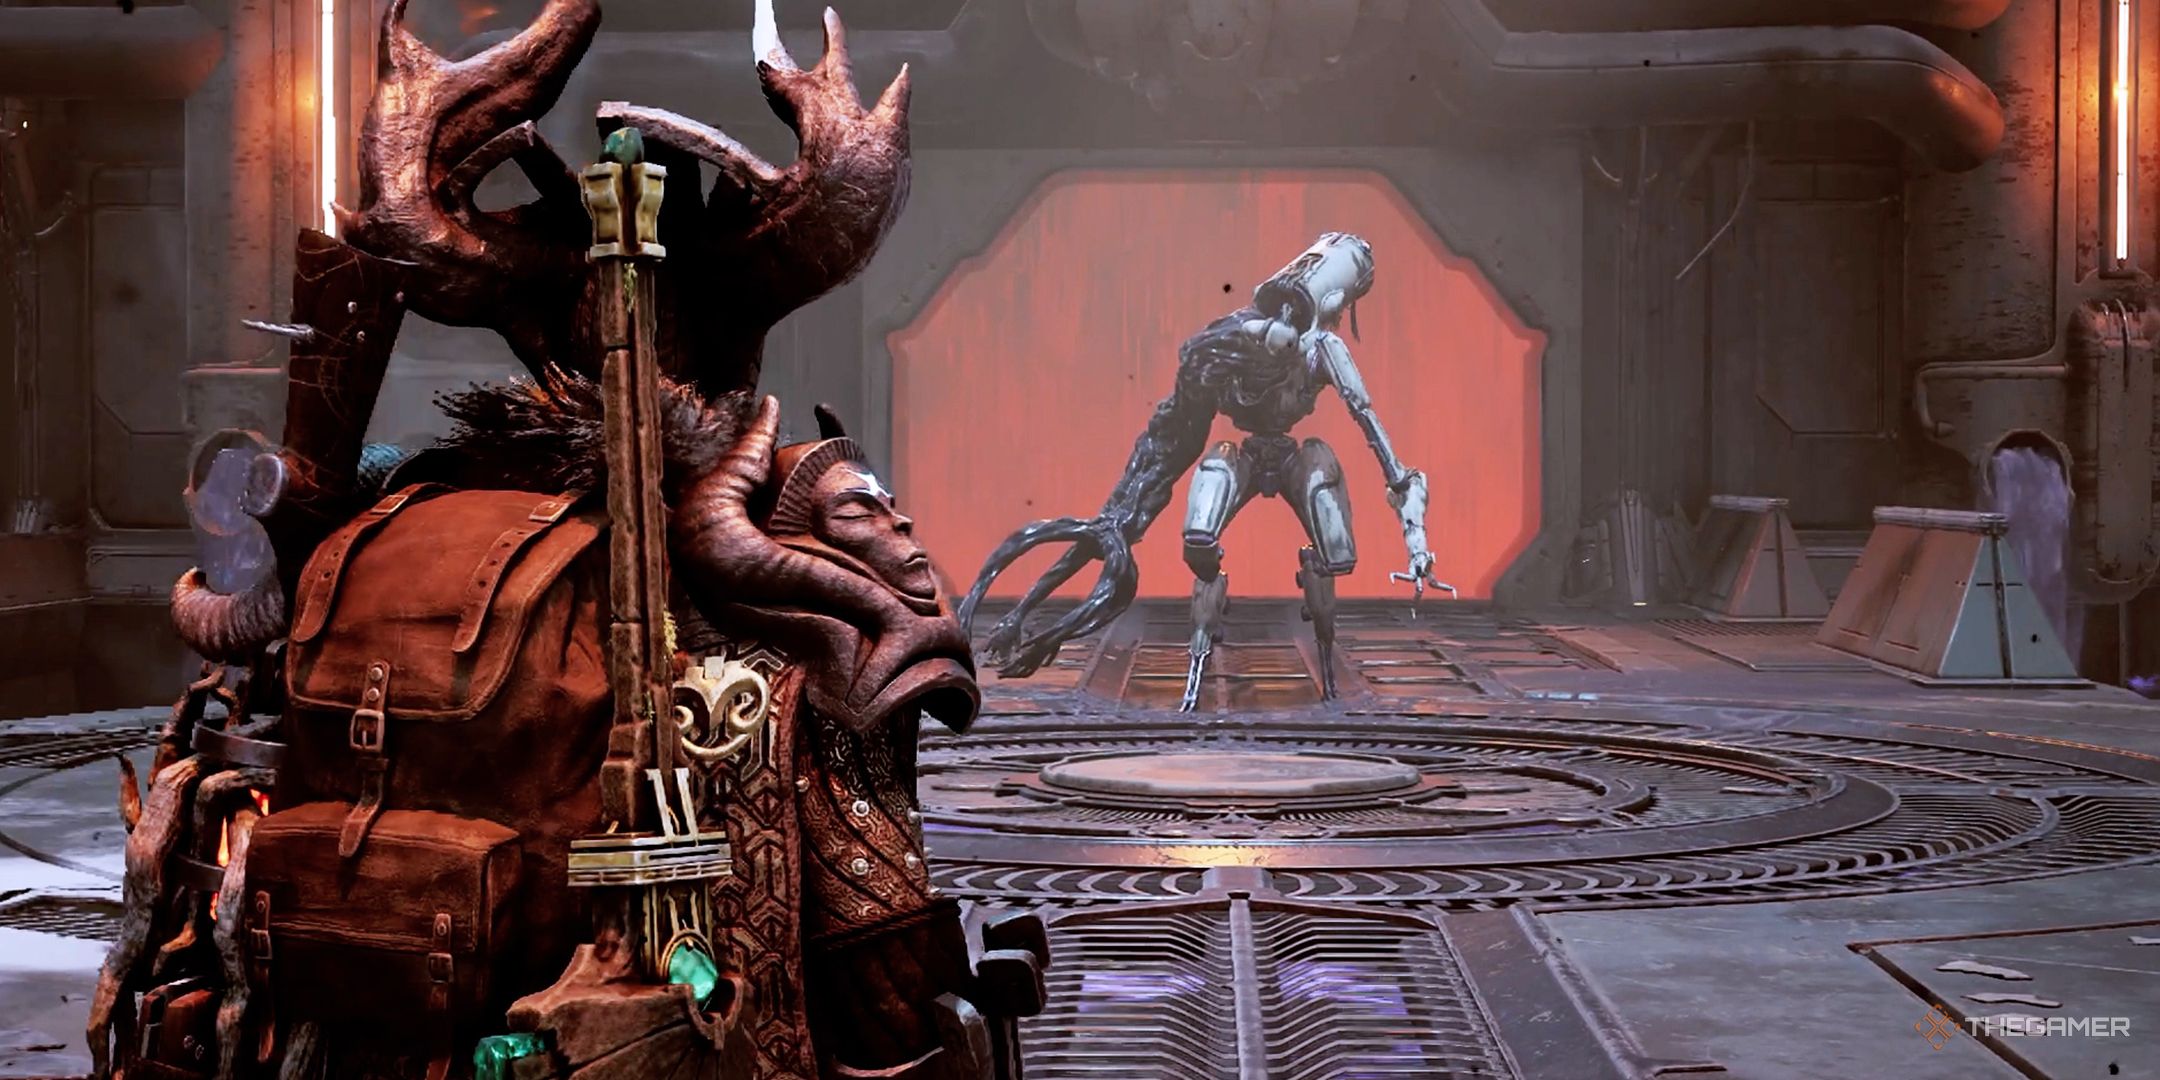
In Remnant 2, the Drzyr built N'erud as a second home, but eventually abandoned it, as revealed in The Dark Horizon DLC. As you progress through the dungeons, you'll come across Kel'Roth, a humanoid amalgamation of flesh and steel. This creature is a corrupted Drzyr that you must defeat to continue the DLC storyline.
RelatedRemnant 2: The Dark Horizon - N'Erudian Reaper Boss Fight Guide
Stock up on consumables and bring high-damage weapons to beat N'Erudian Reaper Boss easily in Remnant 2: The Dark Horizon!
PostsAt first, Kel'Roth fights alone, but the boss fight gets significantly harder halfway through. When Kel'Roth's health drops to about half, it summons Amalgam Relis, and it makes the fight twice as challenging, with both enemies launching similar attack patterns and bombarding you with a variety of assaults at the same time.
Amalgam Kel'Roth And Amalgam Relis Location
You have a high chance of encountering the Amalgam Kel'Roth and Amalgam Relis bosses if you enter the Mucid Terrarium dungeon in N'erud. However, to access this content, you’ll first need to have The Dark Horizon DLC installed; without it, this area wouldn’t be available.
Since the dungeons are randomly generated, the Mucid Terrarium won’t always spawn, and it could take some time before you encounter this boss fight. To speed things up, when you first access the DLC from the World Stone in Ward 13, you can select the "One Shot" Adventure mode for The Dark Horizon. This guarantees the DLC content and increases your chances of facing the boss duo.
Amalgam Kel'Roth And Amalgam Relis Attack Patterns
Attacks
Description
Tentacle Combo
Both bosses run towards you and perform a series of melee attacks using the left arm, typically a three-hit melee attack.
Tentacle Ground Smash
Both bosses can perform this attack as they jump in the air and come down crashing with a tentacle ground smash.
Black Tornado
Both bosses can cast a smaller Black Tornado that moves straight from one end of the boss' arena to another. If one boss is defeated, another can cast three Black Tornadoes simultaneously.
Black Wave
Both bosses can cast a wave that moves toward you. Dodge inside it as it is about to touch you to avoid getting hit.
Giant Tornado
Amalgam Kel'Roth casts a giant tornado, especially after summoning Amalgam Relis at the center of the boss arena.
Gravity Blast
The boss casts an orb from the right hand which pulls you to it, and it blasts after charging for a few seconds.
Flying Dash
Both bosses hover in the air and then perform a flying dash towards you. The attack can be dodged by rolling either the left or right side.
Tentacle Swipe
Amalgam Relis rushes towards you and swipes the tentacle arm in an upper-cut fashion.
Electric Wave
Both bosses can use the steel part at the back of their head to smash the ground, causing a short electrical wave to run through the ground.
Electric AoE
Both bosses fly towards you and smash the tentacle arm into the ground, causing a smaller electrical AoE.
Amalgam Kel'Roth and Amalgam Relis Boss Fight Strategy
You’ll face Amalgam Kel'Roth and Amalgam Relis on a long platform suspended over purple liquid. The center of the platform is circular, with exposed edges lacking metallic covers.
If you accidentally dodge roll into the purple liquid, you’ll die instantly and have to restart the boss fight. To avoid this from happening, it’s crucial to stay aware of your positioning and dodge carefully.
The first phase of the bossfight is easier, as you only face Amalgam Kel'Roth. However, when its health drops to around 50 percent, the boss submerges in the purple liquid and summons Amalgam Relis to join the assault.
Medium to long-range weapons are far more effective in this boss fight than short-range ones, as both bosses hover and fly in and out of range frequently. With a long-range weapon, we recommend you aim for their heads, which are their weak spots, to deal massive damage with each hit.
When you see either boss casting the Black Tornado or Black Wave attacks, try to reposition yourself away from the center of the arena. These attacks will push you slightly, and if you're near the edge, you could fall into the purple liquid, leading to instant death.
Most of the attacks we have mentioned above can be easily dodged by rolling to the left or right. The exception is the Black Wave, where rolling into it gives you a higher chance of avoiding damage.
Make sure to bring a good supply of 'Blood Roots' or use the Medic Archetype to heal passively, as the constant assaults from the bosses will frequently leave your health low.
Focus on one boss at a time and try to deplete their health as much as possible. Amalgam Kel'Roth is a better target since you've been attacking him from the start, so his health should be lower than Amalgam Relis. However, if you happen to kill one of the two bosses, the other one will become aggressive.
All the attacks we have mentioned above will be amplified. For example, instead of casting one Black Tornado, the last boss standing will cast three tornadoes at a time.
We recommend not killing one boss until the other’s health is below 20 percent. Once you reach this point, finish off one boss, leaving the other with low health. This makes the aggressive phase of the remaining boss much more manageable.
Rinse and repeat these strategies, and you should be able to defeat both bosses without much trouble. After defeating both bosses, you will get the 'Voidlight Core' item in the game. Giving this item to Ava McCabe in Ward 13 will allow you to craft a Voidlight Weapon Mod in the game.
NEXTRemnant 2: 10 Best Traits To Level Up First
Unlocking these traits will make your time in Remnant 2 a lot easier.
Posts