Convergence in Dragon’s Dogma 2 is among a series of main quests in Battahl, where you gather clues about the powers of the Godsway, an artifact threatening your status as the Arisen. Fortunately, everything starts falling into place during the course of this quest.
RelatedDragon's Dogma 2: How To Cure Dragonsplague
Here's how to spot if your pawn has Dragonsplague in Dragon's Dogma 2 and what can happen if you ignore their infection.
PostsAfter the events of the sunken temple emerging from the seafloor, another path simultaneously opens up within a nearby cave, connecting both areas. Convergence sees you exploring this dungeon to reach the temple, where you'll meet a crucial figure and learn about the Godsway.
How To Start The Convergence Quest
Convergence picks up automatically after finishing Flickering Shadows. Oracle Luz mentions a power similar to yours emanating from beneath the sea's surface, but that's about as much as she knows. She'll then suggest you track down the Rivage Elder from Harve Village who might be able to fill in some of the missing pieces.
After interacting with the Rivage Elder, he'll speak of a sunken temple located deep in the middle of the sea and an entity residing within it. Soon after, you'll find the temple rising from the seabed.
Rivage Elder can be found at his usual location near the Portcrystal to the south of Harve Village. If not, it's likely that he has somehow gotten himself killed, and you'll have to revive him with a Wakestone by visiting the Vermund Charnel House in Vernworth.
Shortly after, a guard rushes from the nearby Stormwind Cave, pointing out toward a newly opened path inside the dungeon that seemingly offers passage into the Seafloor Shrine.
Even some of your Pawns will recommend taking the dungeon route. However, you might've noticed another piece of land in the distance that connects Battahl with the temple. Ignore this for now as you'll be utilizing it for a later time.
Convergence Quest Walkthrough
The entrance to Stormwind Cave is a hole in the ground located next to where the natural archway leading to the Portcrystal ends. The place is overrun with spear-wielding Saurians, and you must've already been here as part of the Monster Culling main quest as well as Trouble on the Cape to deal with these creatures.
Upon returning to the cave for the Convergence quest, you'll also come across Asps and Rattlers inside, which are more powerful variants of Saurians, but they all have the same weakness - the tail.
CloseThat said, you'll want to work your way toward the south of the cave until you reach a slightly blue-lit area with a metal gate. This is the same gate that is barricaded by the collapsed pillars, but the recent turn in events caused it to open up as shown in the above image.
Past the gate is the Seafloor Shrine that you set out to find, and the path beyond is fairly simple with no further encounters. Once inside the shrine, head down the stairs to the right to reach a compartment, while ignoring the locked door.
There's alot of loot to be found beyond this door in Seafloor Shrine, but it won't open by itself unless a skeletal undead from the other side of the door does it for you. These spawn during the nighttime, and if you visit the shrine at this time it is possible to access it. But they'll have already spawned, nonetheless, if you return to the location after completing Convergence.
You can find a similar door if you head up the other stairs in the room, but both these doors connect to the same hallway.
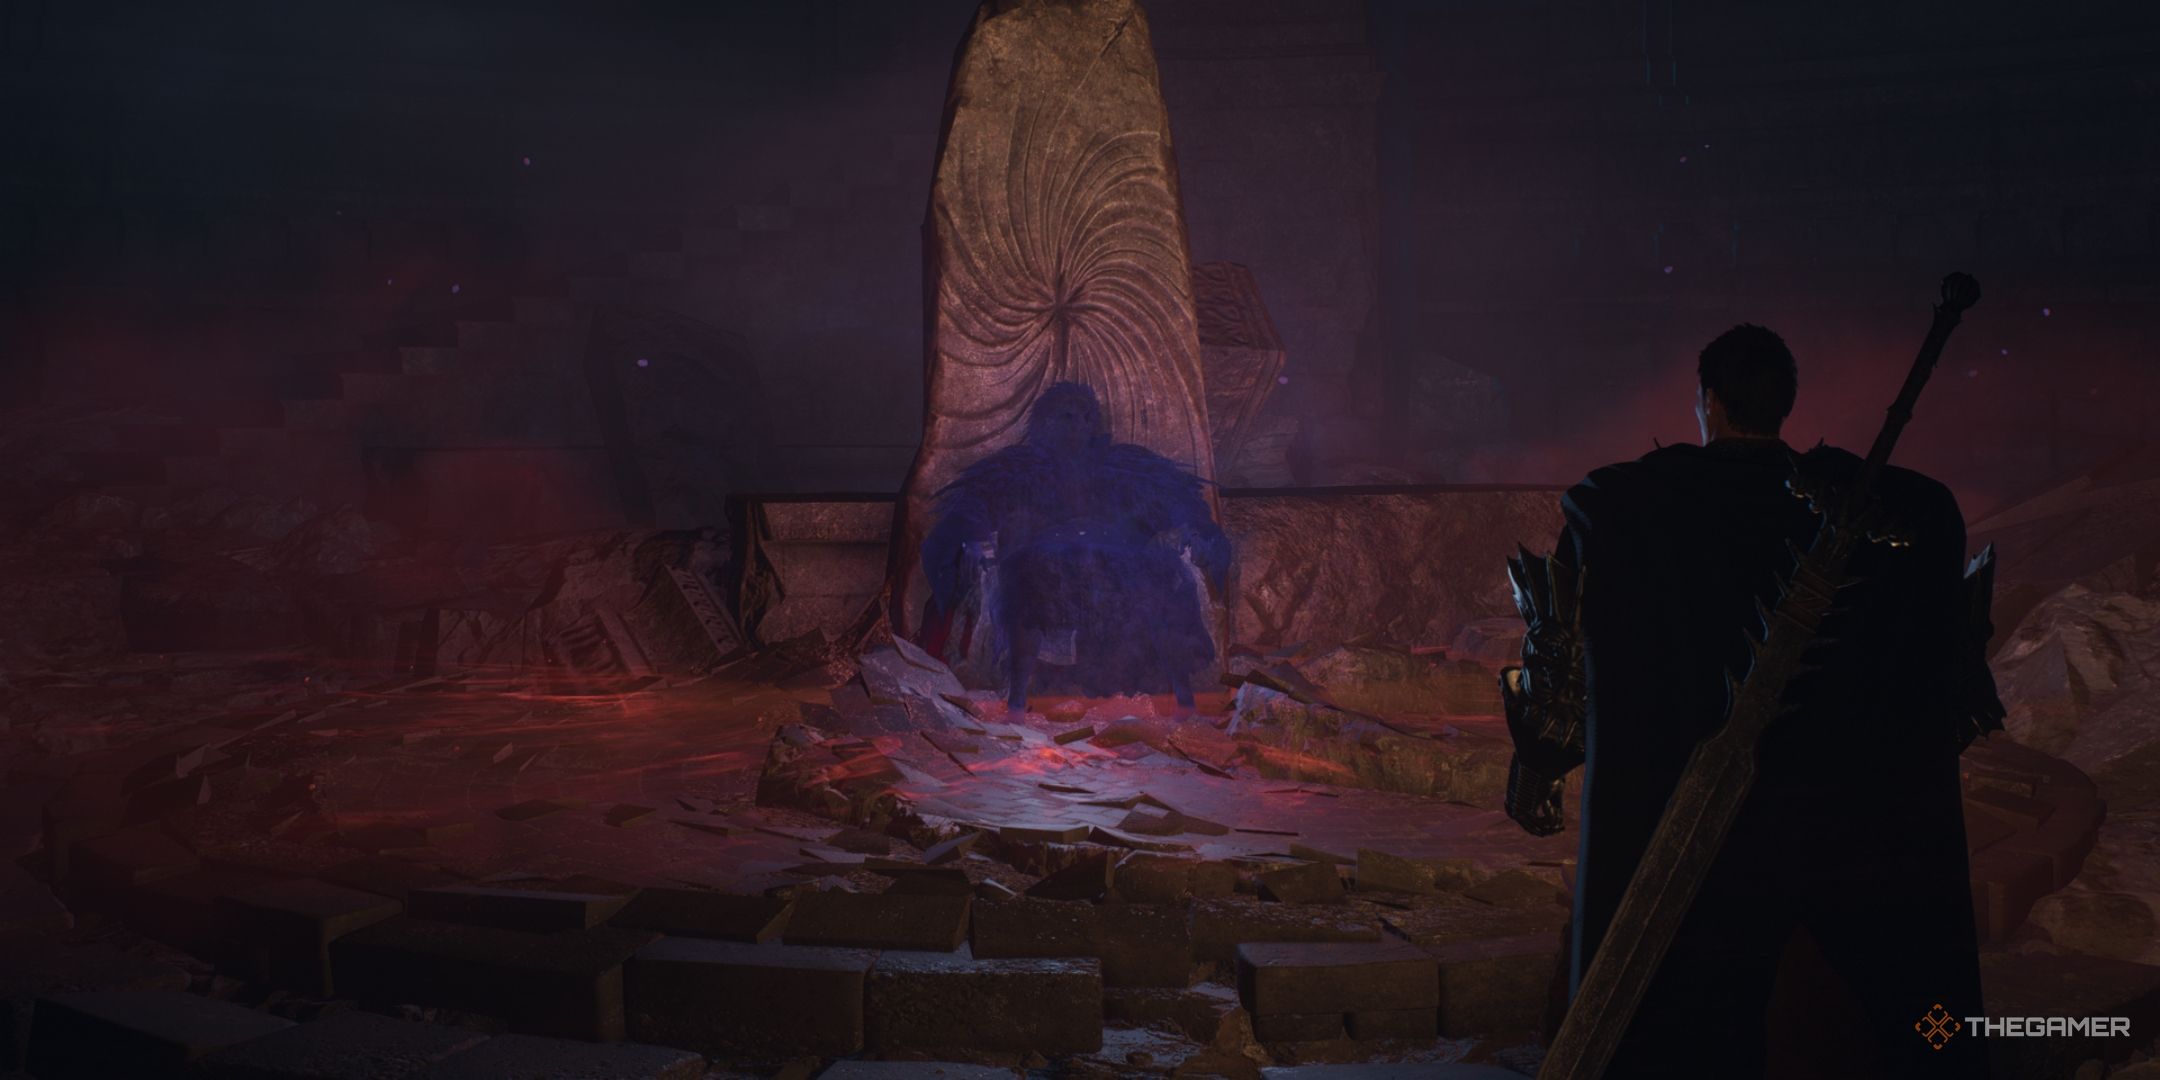
That said, head along the doorway to the south, grab a Panacea from a chest along the way, and you'll eventually make it to a circular throne room where you find an eerie-looking shadow sitting in the middle of it.
This figure is none other than the soul of Rothais, the Beastren Arisen and founder of the kingdom of Vermund. While mistaking you for an enemy at first, he cools down once he realizes your purpose for approaching him.
Inquire him about Godsway using either of the dialogue options. You'll then learn that the reason this trinket is able to impart Arisen-like powers to its bearer is that it is crafted from the soul fragments of past Arisens.
This conversation ends with Rothais handing over the Dulled Godsbane Blade, a weapon that, though legendary in status, is meaningless in its current form. After this, you'll also have completed Convergence, and you'll earn 4,000 XP as well as 15,000 Gold.
How To Leave The Seafloor Shrine
Now you can leave the Seafloor Shrine as there's nothing much to do now. However, if you head back the way you came in from, you'll find the area crawling with undead enemies. Unless you're considering going back that way to loot the areas locked behind the doors, you'll also have noticed a broken wall after your conversation with Rothias.
That right here is your other ticket out of the Seafloor Shrine, and quite a scenic one at that! You can reach it by heading up the flight of stairs and then climbing the collapsed pathway behind Rothais's throne. Besides the entrance, you can find a chest holding a Ferrystone item.
Head through it, and you'll come across a platform with a lift of sorts, which operates using the newly acquired Dulled Godsbane Blade. Examine it, and it'll take you up to the ruins that rose from the sea in no time.
After taking the lift, head through the broken wall where the path diverges into two. The one to the right leads to a dead end with skeletal enemies that spawn after looting a chest containing the Incanter's Coat you find here.
Continue pressing on by taking the path to the left, and you'll find yourself in a compartment with many prison cells, each holding treasure chests. One of these cells, however, is locked, but the Makeshift Gaol Key that opens it can be found just up ahead in the debris next to the stairs.
After that, head up the stairs, and you'll make it to the Sacred Grounds of the Seafloor Shrine.
Feel free to take a breather here and take in the breathtaking view, but bear in mind that there's water all around you, and you can easily lose some of your clumsy Pawns to the Brine.
The route toward the exit is pretty simple from here on. From the center staircase, take the stairs to the left to reach a tilted tower.
Climb the stairs to the top of that tower to reach a battlement connecting another tilted tower. You can also find a Wakestone Shard inside a chest that is hidden behind some wooden crates here.
Head on over to that other tower, where you can grab the Stargazer's Garb from a chest inside. At this point, you can jump off the tower's window, and you'll find yourself on the same piece of land connecting the sunken ruins with Battahl. It'll take you straight into that region of Battahl where you find Ambrosius and the Dragonforged.
NextDragon's Dogma 2: A New Godsway Quest Walkthrough
Help Ambrosius restore the Godsbane Blade in Dragon's Dogma 2.
Posts