In Chained Together, jumping straight into the normal mode might not be the best idea. Mistakes, whether yours or your friends', can cause you to fall, and you might have to replay sections repeatedly. Improving your skills and gaining insight into obstacles in Beginner Mode can be beneficial for this long journey.
RelatedChained Together: How To Play Solo
If you’re daring enough to ascend through hell without any companions, here’s how to play Chained Together solo.
PostsOne feature available in Beginner Mode but not in normal mode is Checkpoints, which allow you to teleport to specific locations. It's crucial not to miss any of them. We’ve compiled this guide to help you find all of them.
How To Use Checkpoints
Remember that the checkpoint system is only available in the game's Beginner Mode. Playing in Beginner Mode will also prevent you from being added to the Leaderboard.
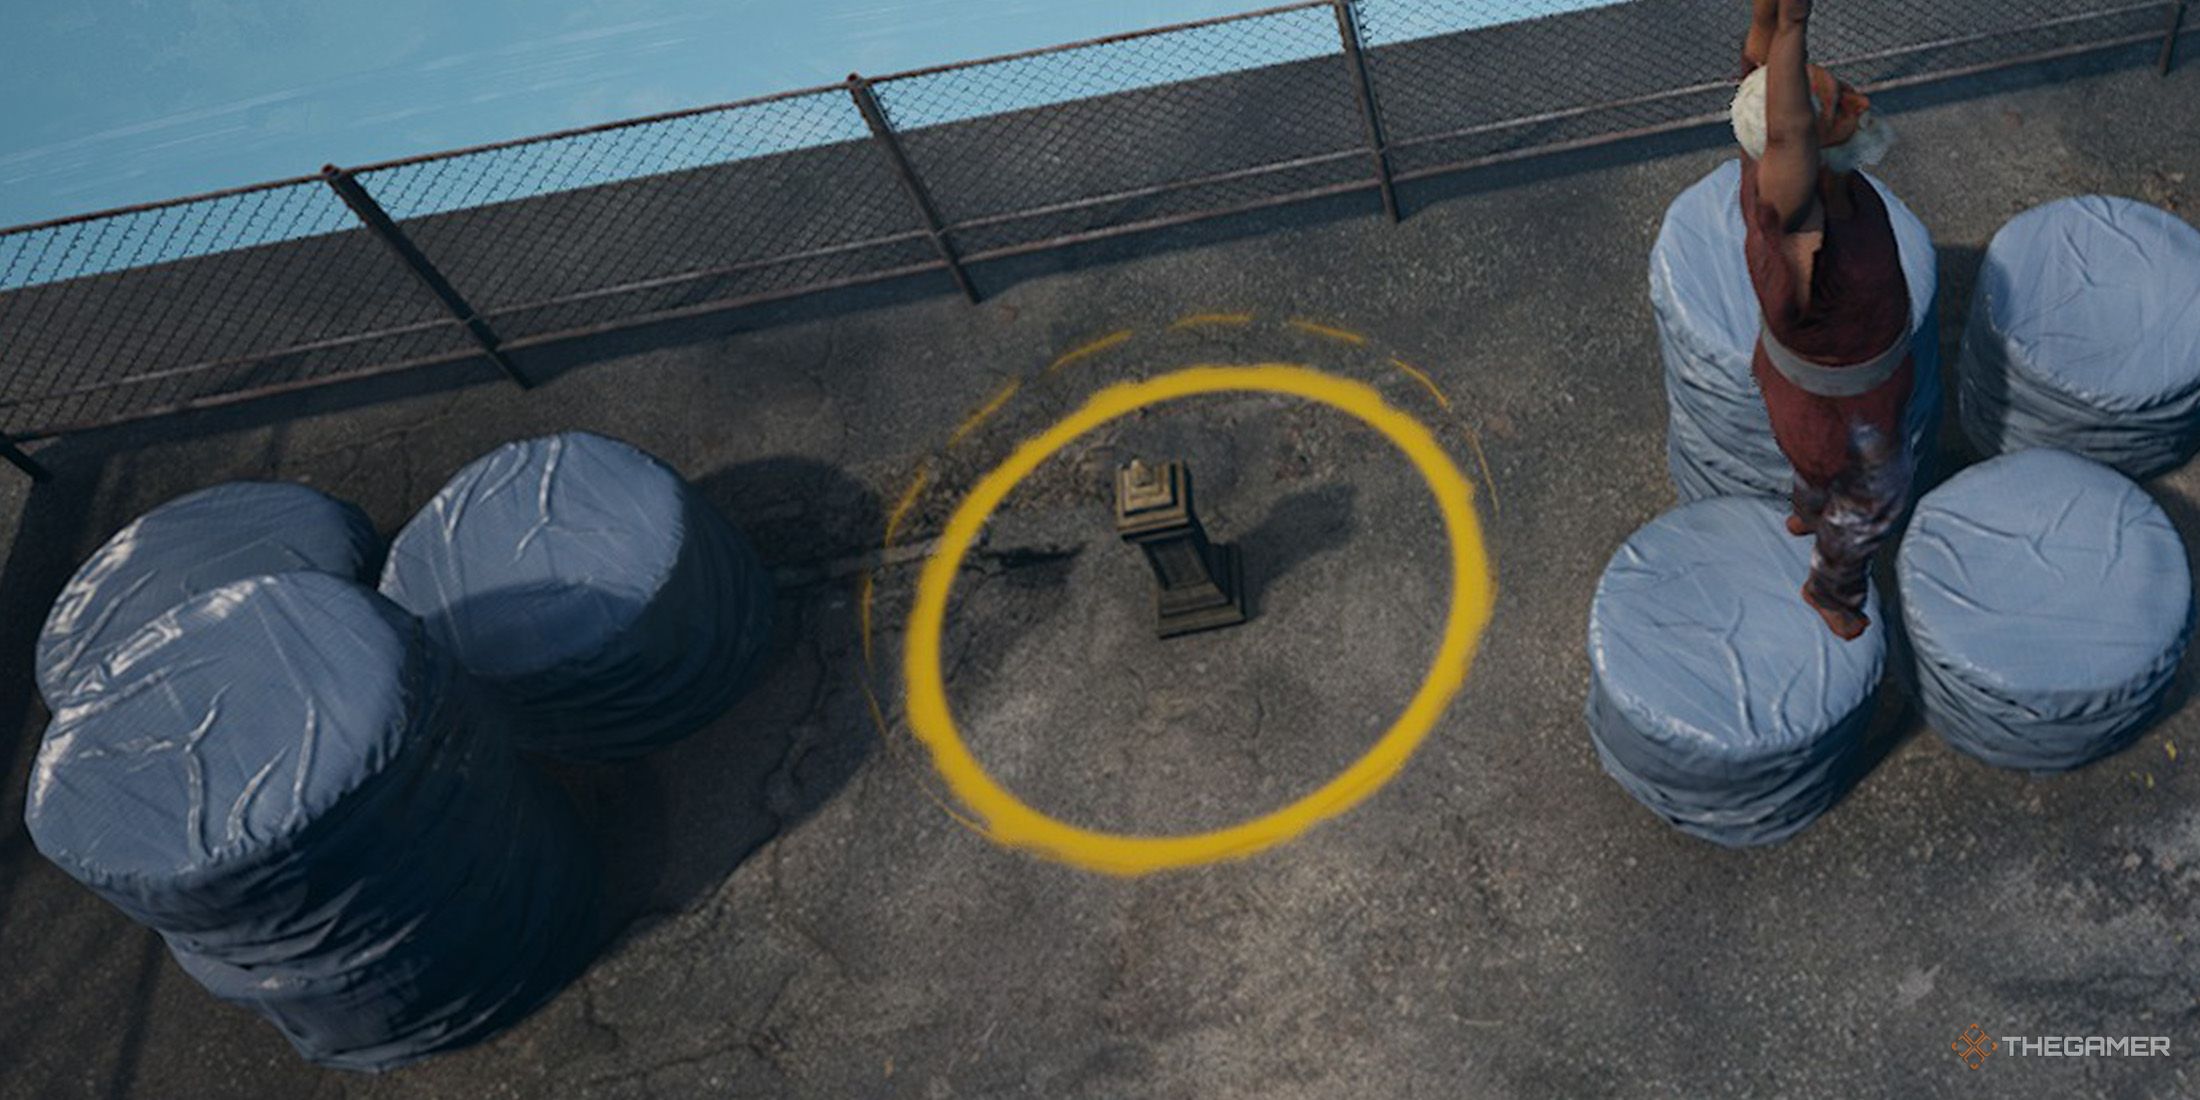
Checkpoints, as the name suggests, allow you to start from the location where they are placed, which can be helpful for finding Wings of Freedom. To activate a checkpoint when you first find it, you need to enter the yellow ring around it and it will turn to green.
Additionally, checkpoints only serve to teleport to specific areas and do not help with saving your game. To save your progress, simply return to the main menu and select 'Save and Quit Game' in the bottom right corner. From the main menu, you can select Solo Mode and then choose your saved files from the 'Load Save' File section.
In addition, the game's Settings menu offers some useful teleportation options:
Option
Description
Nearest Safe Location
If you’re stuck, this option will teleport you to the nearest safe location.
Highest Unlocked Point
If you’ve fallen too below and don’t want to climb back up, this option will teleport you to the highest unlocked point.
Load Checkpoint
From the dropdown menu next to this option, select one of the unlocked checkpoints to teleport to it.
Where To Find The First Checkpoint
Height
576
Area
The Whispering Vault
When you first enter the Whispering Vault by lift, proceed straight down the corridor in front of you. When you reach the area with the pool, dive into it and swim to the other side. After the large doors in front of you open, use the lift ahead to go up. In the room you arrive in, there are four buttons you need to press to open the door.
Once you’ve pressed all the buttons, you can exit. Hold onto the wires outside and be cautious of the spike traps. After passing the first spike trap, you can jump down to the area below from the wires. Proceed up the long ladder and avoid being hit by the rotating gears. You'll reach an area with rotating cages.
Here, you need to move to the area on the right of where you started without touching the yellow lasers. Then, balance yourself on the logs without rushing, and after the last log, you'll reach a floating rock island. Climb onto the cross on it and proceed by jumping from the floating objects to reach an area with a brazier.
Climb up the sword ahead and move across the floating columns. In the new area, move steadily and calmly across the long log, and you’ll reach the Aqua Maze. In the Aqua Maze, enter the pool and swim toward the top left. After swimming for a while, the path will split into two: one going straight and one going to the top right. Swim toward the top right opening.
In the room you enter, you’ll see an opening below and one above; swim toward the one above. In this final room, avoid swimming near the center, as the hole will pull you in and cause you to fall. Use the corners to exit the room, and you’ll find the checkpoint outside.
Where To Find The Second Checkpoint
Height
1675
Area
The Harbor
When you first enter the Harbor, proceed straight ahead. Pass by the water silo and jump across the planks. After passing the forklift, climb onto the structure on the left. Climb over the overturned trucks and continue forward. You will see rotating platforms ahead. Jump onto the closest platform to you.
Next, jump onto one of the panels on the platform in front of you. Finally, jump onto one of the rotating panels near the floating white trailers ahead. Move across the white trailers and enter the warehouse.
Inside the warehouse, time your movements carefully to avoid being hit by the rotating panels. After exiting the warehouse, grab onto the crane hook and swing across to the other side. You will find the checkpoint on the opposite side.
Where To Find The Third Checkpoint
Height
2757
Area
The Deities
After finishing the Asian Shrine area, proceed to the Deities area. As you move straight ahead, you will see this checkpoint in the middle of the path. You'll spot it on your way to the temple, and it's impossible to miss.
NextChained Together: 10 Beginner Tips
Some helpful tips to keep in mind as you climb in Chained Together.
Posts