Ultimate Charge Blade Guide for Monster Hunter Wilds: Best Builds & Combos
The Charge Blade in Monster Hunter Wilds stands out as an incredibly versatile weapon, combining formidable power with excellent mobility and elemental capabilities, making it suitable for a wide range of combat scenarios.
For newcomers, however, mastering the Charge Blade can be daunting due to its intricate mechanics amidst a game filled with complex combat options. Nevertheless, by simplifying its fundamental mechanics, players will find that the Charge Blade offers a seamless and exhilarating experience that can be both fun and effective.
This guide aims to help you optimize your use of one of the most powerful weapons in Monster Hunter Wilds. Here, we will explore essential strategies, insightful builds, and effective combos to navigate through the early and mid-game phases and prepare you for the challenges of the endgame.
Comprehensive Guide to Charge Blade in Monster Hunter Wilds
Combos with the Charge Blade
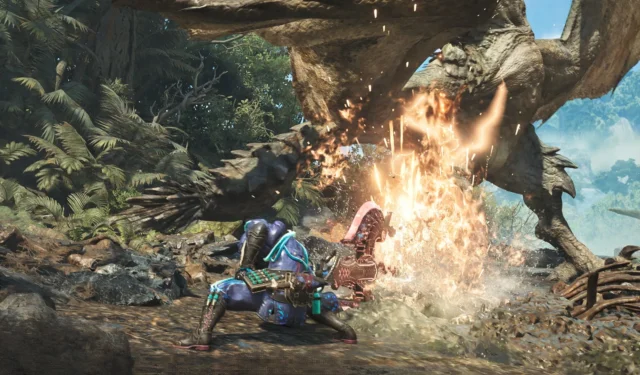
The Charge Blade operates by accumulating elemental energy in its Sword and Shield form, which can then be unleashed through powerful Axe attacks. Here’s how you can execute various combos effectively:
Start by executing basic combos using the Sword. Simultaneously press Triangle and Circle to initiate, followed by rapid Triangle attacks. For a quick barrage, holding Circle is effective.
Once your Sword begins to glow, it’s crucial to execute a Charge (using R2 + Circle) to store the accumulated energy. Failing to do so can result in your attacks bouncing off the creature you’re battling.
From there, you can switch to Axe mode for a series of powerful attacks by pressing Circle and Triangle in various combinations. A noteworthy strategy is to target monster wounds, which enhances your weapon’s damage output with additional chainsaw blade effects. To find and break wounds, hold L2 and press R1.
- Initiate with the “Basic Sword Combo”:
Triangle+Circle, followed by twoTrianglepresses and anotherTriangle+Circle. - After the Sword combo, execute a strong Axe attack by using
Triangle+Circleagain, then revert to Sword withR2. - Watch for your Sword’s glow, indicating it’s time to Charge (
R2+Circlein Sword mode) to bank elemental energy. - Transition into Axe mode by pressing
Circle. - Depending on the monster’s positioning, select
Trianglefor vertical swings orCirclefor horizontal attacks. - Trigger a Circle combo by pressing
Circlethree times, execute the Amped Element Discharge withTriangle+Circlefor an overhead slam, and follow up with anotherCircleattack. - When you deplete your elemental energy, revert to Sword mode to recharge.
- Regularly check for monster wounds by holding
L2and pressingR1to break them.
Charge Blade Builds in Monster Hunter Wilds
As you embark on your journey through Monster Hunter Wilds, focusing excessively on refining your build before rolling credits is unnecessary. As long as you avoid wide elemental vulnerabilities relative to the monsters you face, you should find success.
That said, developing an understanding of how your equipment Skills interact is beneficial. Below are some Charge Blade builds designed to enhance your gameplay experience, especially during the early and mid-game phases.
Early Game Strategy
During the initial stages, particularly for those new to the franchise or the Charge Blade, mastering movement in Axe form may prove challenging. Finding yourself vulnerable after an enemy attack—flying through the air and landing on your back—highlights the importance of responsiveness when healing.
To mitigate this risk, consider prioritizing the Quick Sheathe Skill in your early-game build. This Skill allows for rapid weapon stowing, facilitating quicker healing opportunities and smoothing out the learning curve of the Charge Blade despite the initial lenience of Monster Hunter Wilds.
The initial recommendation is to utilize the Quematrice set along with the Balahara for better survivability, especially before facing the Uth Duna to avoid significant Water resistance penalties.
- Weapon : Lala Barina Shield
- Helm: Alloy
- Cuirass: Quematrice/Balahara
- Gauntlets: Quematrice/Balahara
- Waist: Quematrice/Balahara
- Greaves: Alloy
- Talisman: Defence Charm
Mid-Game Enhancements
Rey Dau set and stacking Latent Power. This Skill activates after taking damage, enhancing your Affinity and dodging capabilities, especially when wearing four pieces of the set to prolong its effect.Alternatively, leveraging the 4-piece Arkveld set allows you to heal substantially each time you break a monster’s wound. This feature encourages aggressive play while maximizing the Charge Blade’s ability to create wounds efficiently.
In this build, consider integrating the Guardian Rathalos legs for the Weakness Exploit ability, amplifying your damage against wounded areas.
Mid-Game Attack Build
- Weapon: Guardian Rathalos Albirath Blade
- Helm: Rey Dau
- Cuirass: Rey Dau
- Gauntlets: Rey Dau
- Waist: Hirabami
- Greaves: Rey Dau
- Talisman: Defence/element of the monster being hunted
Mid-Game Wound Build
- Weapon: Guardian Rathalos Albirath Blade
- Helm: Arkveld
- Cuirass: Arkveld
- Gauntlets: Arkveld
- Waist: Arkveld
- Greaves: Guardian Rathalos
- Talisman: Defence/element of the monster being hunted
Source & Images
Related Articles:
Optimal Archer Build and Team Composition for Honkai Star Rail
9:55July 12, 2025Becoming a PlantSim in The Sims 4: Enchanted by Nature Guide
16:28July 11, 2025ZZZ Ju Fufu Build Strategies and Optimal Team Compositions
2:33July 11, 2025Elden Ring Fia Questline Guide: Utilizing the Carian Inverted Statue Effectively
15:56July 8, 2025Top 8 Ranked Historical Figures in Billy Bat
Ultimate Guide to Dual Blades Builds & Combos in Monster Hunter Wilds
Leave a Reply Cancel reply
Your email address will not be published. Required fields are marked *