Doom: The Dark Ages is replete with hidden secrets, offering players a variety of unlockable items and essential resources for weapon upgrades. These secrets range from those easily accessible to those requiring persistent exploration and puzzle-solving skills.
Among the most perplexing challenges are the secrets found in the Dragon stages, which present to players vast areas to scour, often extending the game’s length unnecessarily.
It’s worth noting that not every chapter in Doom: The Dark Ages contains these mysteries. Chapters that center on the Titan, specifically Chapter 3 – Barrier Core, Chapter 13 – From Beyond, and Chapter 21 – Final Battle, do not feature any secrets and will not be included in the following discussion.
Chapter 1 – Village Of Khalim
Close
In this introductory chapter, there are six secrets to uncover, all of which are straightforward to find.
- Life Sigil – Break through the wall to access the corridor beyond where the Life Sigil awaits.
- Toy – After obtaining the Blue Key, return to the nearby door to discover the Imp Toy.
- Weapon Skin – Utilize the blue jump pad to reach the opposite side, then turn and leap into the open cave within the cliff.
- Toy – Leap off the cliff edge and navigate the ledge to locate the Soldier Toy.
- Life Sigil – After acquiring the Secret Key (which is hard to overlook), unlock the door to find another Life Sigil.
- Codex – As the chapter nears its conclusion, there’s a path to the right where the Codex can be found.
Chapter 2 – Hebeth
Close
This chapter hides nine secrets, with the initial ones being relatively easy to find, while the last poses a considerable challenge due to inadequate sign-posting.
- Toy – Drop down the shaft to discover the Imp Stalker toy.
- Life Sigil – Identify the door marked with a blue circle, which can be shield-bashed open.
- Gold – The gold is simply located in the room.
- Gold – Look for another door with a blue circle on it.
- Gold – Find the blue circle on the grate.
- Gold – Defeat all enemies in the area to unlock the door that leads to additional gold.
- Life Sigil – This is a challenging one; approach the wall of flames, turn back to see a breakable red shield spot above, smash it, climb the ramp, and jump into the resulting hole. You’ll find a pressure wheel that you must spin to extinguish the flames.
- Weapon Skin – Locate the stack of three crates, leading to a climbing wall above. This will bring you to a ventilation shaft containing gold and a weapon skin.
- Chest – Proceed through the hole in the wall and follow the path to uncover the gold.
Chapter 4 – Sentinel Barracks
Close
Chapter 4 includes six secrets to discover.
- Toy – Break through the wooden wall marked by a blue shield bash to land in an area with a Hell Knight toy and gold.
- Chest – Observe the ledge, then navigate to the left corridor to spot a green shield point that allows you to zip upward. Drop down into a new section where you can use a shield bash on a crate, which will enable you to reach the chest.
- Life Sigil – Search for a door with an interactive button pad; behind it lies a path with demons that you must defeat to gain access to the gold.
- Life Sigil – Find a Life Sigil hidden behind wood; you can jump over the ledge to access a platform on the left, where the Life Sigil awaits along with a bashing door.
- Gold – Drop onto the collapsed bridge, turn around, and jump into the area filled with fireballs while fighting enemies; you’ll notice a path leading to the gold cache.
- Weapon Skin – Simplistically located; continue through the level until reaching the spiral staircase, where the gold and a weapon skin can be found.
Chapter 5 – The Holy City Of Aratum
Close
This chapter contains nine secrets to locate.
- Gold – After defeating a helicarrier and landing, follow the map to a small town. Drop into the hole indicated on the map for a treasure trove of gold.
- Gold – Retrieve the Blue Key, which is easy to find on a cliff in the graveyard, then go to the door marked on the map for more treasures.
- Gold – Visit the tower shown on the map, defeat the creature while riding the dragon, opening up a landing area to battle more foes. Upon defeating them, you can access a gold cache.
- Toy – Climb down to the gold area, eliminate the monsters, and follow the path around to discover the Serrat toy.
- Ruby – This secret is behind a locked door. Locate the green switch and look up to find a breakable red lock. Destroy it with the shield, which will cause a stone to drop onto the switch, holding the door open for your prize.
- Gold – Outside the building, there are two wooden platforms. From the entrance, navigate to the right, break the red chain, and use the shield to bash the crate across to the other side, allowing you to jump onto the left platform and access more gold.
- Chest – As you progress, reach a blue shield bash point for access to a Chest (along with more foes).
- Ruby – After eliminating four ships and the big demon, fly down into the citadel’s base. Destroy the two turrets and locate a green switch that lifts a red breakable link. Smash this to access a water area; swim around to discover a pressure wheel that, when activated, will lower the water and provide access to a Red Key card, leading you to a chamber with a Ruby.
- Weapon Skin – In proximity to Secret 8, follow the gold bars’ path in the arena to locate a skin.
Chapter 6 – Victories – Part 1
Close
Chapter 6 is filled with secrets, offering a total of 11 for players to uncover.
- Life Sigil – Visit the little path near the map location to find it.
- Ruby – Follow the gold around the corner, smash the blue shield point, and hit the switch to open the door leading to the Ruby.
- Weapon Skin – In the same area as the previous secret, use the Secret Key to unlock a skin.
- Toy – Once you have the Secret Key, you can access this area to reveal the Slayer Toy.
- Ruby – Return to this location equipped with the Secret Key to obtain an additional Ruby.
- Chest – In the preceding secret area, navigate through the tunnel until you reach an outside platform featuring the Codex. Before jumping, turn right and follow the path to find the Chest.
- Gold – Advance through the story to reach a blue portal leading to a dungeon filled with red locks. Among the aforementioned areas, there’s a blue bash point that reveals a stash of gold.
- Gold – Head to the area depicted on the map, defeat all enemies to activate a blue portal. Proceed through the mini-dungeon until you encounter a blue smash point; destroy it to drop into an area filled with gold.
- Gold – Spot a small locked building without entry. Facing the door, head to the water body on the left to find a darker patch indicating deeper water. Dive down, dodging fireballs, to secure the gold.
- Gold – Not far from the prior area, locate the cliff’s climbing spot, scaling it to find a blue shield bash point that leads to more gold.
- Gold – In one of the Gore Portals, navigate through the dungeon until you knock down the bridge. Cross it and turn left to discover a hidden cache.
Chapter 7 – Siege – Part 2
Close
In Chapter 7, nine secrets await discovery.
- Chest – An easy find as this area is part of your objectives. Ascend the platforms and seek the climbing wall leading to the chest.
- Life Sigil – Yet another simple secret found in the same area. Locate the blue shield bash spot on the wall, charge through it to enter a chamber with a Life Sigil.
- Toy – Break through the blue panel on the wall to access a platform above the courtyard. A large tunnel is visible to the left; use it as a runway to reach the opposite wall with a climbing area bearing gold and the Pink Rider Toy.
- Life Sigil – Around the corner, notice a small blue shield bash point that grants access to another Life Sigil.
- Gold & Secret Key – Navigate to the designated map area and identify a blue shield smash point. Gold lies on the other side, alongside a jump pad leading to the Secret Key.
- Ruby – Once possessing the Secret Key, descend into the courtyard to unlock the door concealing a Ruby.
- Codex – With the Secret Key, head to this point on the map to unearth the Siege Part 2 Codex.
- Ruby – As you continue, a Ruby will be visible on a crane. Spot the crates supplying climbing points at the base.
- Life Sigil – Look for the red lock amid the debris-filled room. This will clear the crates, providing access to a Life Sigil.
Chapter 8 – Abyssal Forest
Close
In this chapter, players can discover 11 secrets.
- Life Sigil – Located above the Yellow Key, reachable by jumping over the preceding path.
- Ruby – Drop from the ledge indicated on the map into an underground area containing water. Across the way is a Ruby statue, marked by a smashable red lock that can lead back to the main path.
- Codex – Identify the faint blue marking on the wall of thorns, which can be broken to expose the Abyssal Forest Codex.
- Chest – Discover a wall of thorns that can be shield bashed, granting access to a chest.
- Gold – Drop from the ledge and look up to find a red breakable lock; shield toss to open the gate.
- Toy – Jump off the ledge to find an area with gold and the Witch Toy. However, the Toy is trapped within a cage. Investigate the surrounding walls for a small gap to access a red breakable link, smashing it will reveal a blue charge spot that lifts the cage.
- Life Sigil – Locate the crate leading to the platforms in this section, which leads to a Life Sigil.
- Ruby – Upon reaching two broken towers, look for platforms yielding gold; tracing these will lead you to a Ruby.
- Chest – Identify the red breakable lock pictured above, which breaks the floor below, revealing a chest-laden passage.
- Gold – Simply leap off the edge and head backwards to find more gold.
- Chest – Spot the green slime dripping from the wall; above is a green shield point capable of launching you up. Navigate carefully along the path, avoiding any gaps unless you wish to fall back down. Eventually, this leads to an area containing a chest.
Chapter 9 – Ancestral Forge
Close
This chapter has nine secrets awaiting discovery.
- Chest – After receiving the Secret Key, unlock the door leading to a gold chest.
- Wolf Statue – A door requiring the Secret Key leads to one of the Wolf Statues.
- Gold – Easily found by looking up for the green shield point that grants access upwards.
- Chest – Identify a passage in the wall directing straight towards a chest.
- Ruby & Toy – These secrets necessitate a bit of jumping to reach but remain fairly straightforward.
- Ruby – Hidden behind a locked gate, look to the right wall for a blue shield bash spot that opens a new corridor with a red breakable link. Throw the shield here to lift the gate and claim your Ruby.
- Gold – Simply drop off the platform’s back, landing on a walkway lined with gold.
- Codex & Weapon Skin – Upon reaching the stage’s end in the futuristic section, search for the red breakable link above. Shatter it, turn around, and use the blue shield spot powered lift, leading to a climbable platform. Ascending here reveals two areas containing a Codex and a Weapon Skin.
- Chest – Give a push to the lower platform just before the chest’s location. Spot a blue shield point on the base, throw the shield to elevate the platform, bringing it within jumping distance of the chest.
Chapter 10 – The Forsaken Plains
Close
This chapter contains 10 secrets to uncover.
- Life Sigil – Head to the marked area on the map and search for the green shield point to zip to an area teeming with Life Sigils and gold.
- Chest – To obtain the Secret Key, navigate into a building via a green shield hook point, then shatter the red barrier with your shield. Follow the path around to climb up towards the chest.
- Ruby – Utilize the Secret Key to unlock this door; it leads to a battle where you earn access to a Ruby.
- Toy – At the indicated map location, drop onto a ledge containing a blue jump pad, sending you to a platform where the Cyberdemon toy is found.
- Ruby – Enter here using the Secret Key to find another Ruby.
- Life Sigil – Within the building, a green shield point allows ascent to an area containing another Life Sigil.
- Codex – Use the Secret Key to access this area and locate the Codex hidden within.
- Life Sigil – Drop off the ledge to procure an additional Life Sigil.
- Ruby – Modify the smashing grates as a lift to ascend to the next level and claim the Ruby.
- Secret Area – One of the simplest secrets to reach, requiring only the climb of one wall.
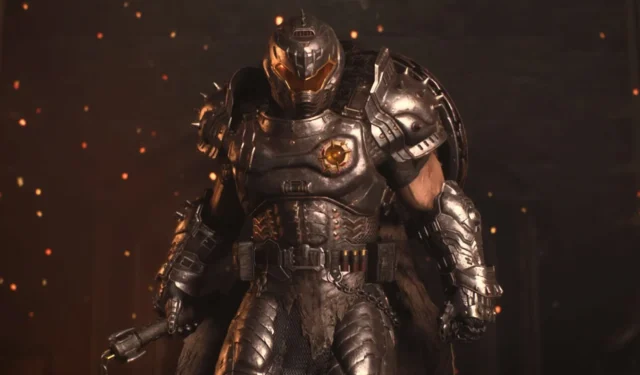
Chapter 11 – Hellbreaker
Image Via DualShockersThis stage features only one straightforward secret. Once you reach the monumental broken mech suit, climb onto its head to obtain the Atlan toy.
Chapter 12 – Sentinel Command Station
Close
Chapter 12 contains nine secrets ready to be discovered.
- Codex – Traverse through the stage to a chamber with available gold and the Sentinel Command Station Codex.
- Weapon Skin – In the chamber housing the glowing red command center, find the blue shield bash point on the grate leading to an area with both gold and a weapon skin.
- Life Sigil – In the vents near the Upgrade station, there’s a segment filled with fireballs that need blocking. Reversing your path leads to a hidden Life Sigil.
- Ruby – Continue advancing through the level and drop through the indicated hole on the map.
- Chest – Locate a blue jump pad in the shattered wall to access an area where a chest is located.
- Life Sigil – Following the previous secret, navigate through the vents until you reach a climbing wall. Turn around to reveal a Life Sigil.
- Secret Key Area – Capturing the Secret Key and eliminating all enemies in the room will count as finding a secret.
- Wraithstone – Upon entering this room, you’ll be locked in, needing to defeat a boss to earn the Wraithstone.
- Toy – Use the Secret Key to gain access to the room containing the Kreed Makyr toy.
Chapter 14 – Spire Of Nerathul
Close
This chapter harbors 11 secrets for players to find.
- Chest – Proceed to the marked area, dropping off the world edge to land on a ledge where a Soul Sphere awaits. Continue through the corridor to reach a chest.
- Life Sigil – Directly head to the marked area to find gold and a Life Sigil, both conveniently exposed.
- Toy – Upon entering the ship, seek a blue shield smash point on the wall leading to a corridor harboring the Arachnotron Toy.
- Ruby – Inside the ship, drop to the lower floor indicated by the map to find a blue jump pad, elevating you to a ledge with gold and a Ruby.
- Chest – Locate a blue jump pad at the mapped location; by blow up the wall behind it with a shield against the red barrels, you will unveil an area containing a chest.
- Life Sigil – Follow the map to the marked area where you will find a Life Sigil, but be cautious for a monster that might attack upon arrival.
- Ruby – After reaching the first dragon section, divert into the water, swimming downwards to find a secret room with a Ruby.
- Life Sigil – In the second dragon area, head to the Upgrade station to unlock the next “secret” area, revealing a Life Sigil.
- Secret Area – Such a secret is nearly impossible to overlook; progress through the previous secret into the blue portal.
- Wraithstone – Continue through the arena from the preceding Secret to locate another Wraithstone.
- Wraithstone – Mount the dragon and ascend to the far mountain in the distance, where you can confront a giant demon. Defeating it opens a landing pad granting access to yet another Wraithstone.
Chapter 15 – City Of Ry’uul
Close
In this chapter, there are 10 secrets available for uncovering.
- Life Sigil – Seek the Life Sigil by peering over the ledge of the platform to spot a small ledge to drop down onto, which leads into a corridor filled with tentacles that need to be eliminated. The Life Sigil resides at the end.
- Chest – Reach the mapped point and gaze upward for a green shield point, which launches you toward the chest.
- Codex – This secret isn’t far from the previous one; return to the chest area, drop down onto the ledge, and follow the mapped route to the City of Ry’uul Codex.
- Ruby – Continue progressing through the level until you unlock the Dreadmace, entering a chamber (as detailed in the map) containing a blue shield point on the ceiling. Throw the shield; the floor will slide away, revealing water. Swim into the water to reach a chamber featuring a Ruby statue.
- Life Sigil – Upon reaching the section that requires swimming around the area (marked on the map), track the path to the Life Sigil while evading fireballs.
- Toy – Continue advancing until you reach the Upgrade station. There’s a blue shield bash point on the wall to the right, providing access to a drop where you can find the Aggadon Hunter toy.
- Gold – Go to the area location marked on the map, break through the blue shield mark on the wall, and ascend the newly revealed area, acquiring gold at the summit.
- Soul Sphere – At the designated area on the map, drop onto the ledge below, finding a circle to shield bash into, propelling you to a platform housing a Soul Sphere.
- Ruby – Attend the marked location to retrieve the Ruby during the latter section of the stage.
- Chest – Ascend further until you reach the point illustrated on the map, drop off the ledge onto the platform to uncover a chest.
Chapter 16 – The Kar’Thul Marshes
Close
Chapter 16 contains five secrets, with one involving the discovery of multiple Wolf Statues, detailed in a mini-guide below.
- Ruby – Find the Wolf Statue, then drop down to the ledge beneath. Enter the door adorned with green lights that can be accessed without a key to enter a new area. Swim to the pool’s bottom, teleporting above the center block in the room. Smash the red lock above the gate with your shield, allowing access to the eye lock. Align it with the green eye, throwing the shield to move aside the gate, revealing the ruby statue.
- Chest – Reach the location indicated on the map. Enter the tunnel, discovering an area with spinning platforms. Utilize the shield on the blue spot to halt the platforms momentarily. This agility test requires you to jump on them, hit the blue shield point, and stay ahead of their movements. Once you’ve gained height, approach a green shield spot that transports you to the chest.
- Chest – Arriving at the marked location will lead you to an unlocked door entering an infinite looping tunnel. To find the chest, simply pivot and return to the entrance.
- Codex – Visit the indicated area on the map and discern a blue shield point peeking through the wall; using the shield opens the door to The Witch Codex. Beware, as monsters will spawn upon your entry.
Chapter 16 Wraithstone & Wolf Statue Locations
Close
A secret within Chapter 16 requires breaking four wolf statues to unlock a Wraithstone. Their mapped locations are visible in the accompanying image gallery.
Chapter 17 – Temple Of Lomarith
Close
This chapter contains nine secrets awaiting revelation.
- Life Sigil – At the marked location, a green shield point rests on a higher ledge. Utilize this to zip upward to the area where a Life Sigil is positioned.
- Life Sigil – At the point depicted on the map lies a concealed tunnel underwater leading up to an area containing a Life Sigil and gold.
- Chest – Head to the area marked on the map, where a blue shield bash point unveils the Chest.
- Secret Area – Once reaching the ship, eliminate all monsters to trigger a blue shield bash point. Destroy it and drop into a concealed area.
- Weapon Skin – Search the cliff’s bottom left side until you find a water portal. Dive deep to locate a giant tentacle; eliminate it to proceed and secure a weapon skin.
- Wraithstone – Approach the area indicated on the map, breaking down the blue shield wall to reveal a monster-rich area devoid of Map Data. After clearing the enemies, drop into what appears to be an out-of-the-way zone to find the Wraithstone.
- Ruby – Once armed with the Secret Key, unlock the door near the Upgrade station to attain a Ruby.
- Codex – Upon entering the underwater ships segment, you should spot the Codex easily on the map.
- Chest – Reach the mapped location beyond the blue shield bash point. Identify an eye gate. Align it with the distant door until it lights up, and throw the shield to activate it, unlocking the path to the chest.
Chapter 18 – Belly Of The Beast
Close
This chapter features six secrets for players to uncover.
- Chest – This secret is nearly visible; you’ll find a chest after defeating one of the green tentacles.
- Life Sigil – Locate the green shield spot in the walls where you eliminated the tentacle to zip up to a place containing gold and a Life Sigil.
- Ruby – Rather than continuing towards the objective, turn around and dive into an area revealing a Ruby.
- Chest – Search for the green shield spot adjacent to the glowing tentacles to access the Chest.
- Toy – Head to the designated area on the map, locating the blue shield spot. Throw the shield to open a passageway into a new area where you’ll battle foes to acquire the Komodo toy.
- Life Sigil – This secret is arguably the most vexing; there exists a tunnel lined with insatiable monster mouths. Instead, inspect the ceiling in the preceding chamber for a blue shield spot. Throw the shield there to stop the munching walls.
Chapter 19 – Harbor Of Souls
Close
Chapter 19 holds a total of 10 secrets to unearth.
- Gold – Simply leap onto the ledge and collect the gold.
- Life Sigil – Proceed through the stage to reach the area marked on the map.
- Ruby – In this section, jump onto the collapsing metal platforms. Identify the blue shield point and throw a shield to open the door beneath, leading to the Ruby.
- Chest – Navigate to the depicted area on the map and plunge downwards. There awaits a ledge leading to the chest.
- Toy – Continue through the stage until obtaining the Blue Key, allowing access to the area shown on the map for further gold and the Acolyte Toy.
- Life Sigil – Search for the blue elevator behind the rock indicated on the map, which will propel you to the Life Sigil.
- Wraithstone – Within this area lies a circular platform. Defeat all enemies, then find the blue shield spot around the corner. Prepare to throw the shield and quickly jump, for the platform will start to move! The Wraithstone awaits at its elevated position.
- Chest – You’ll notice the chest hidden behind a locked door. The key indication lies in the green shield spot behind it. Follow the cliff’s left route from the door (this involves dropping down further and navigating right after the elevator) until spotting the green climbing spot, which will lift you into the green area.
- Life Sigil – Once stepping onto the ship, drop to the lower ledge located at the area on the map to retrieve the item.
- Chest – Plunge through the hall marked on the map and perform an air shield bash against the green symbol, leading you to the Chest’s location.
Chapter 20 – Resurrection
Close
This chapter contains 12 secrets; the final one revolves around breaking four Wolf Statues to unlock a Wraithstone. Below, you’ll find a mini-guide detailing all statue locations.
- Gold – Head toward the marked spot on the map and hit the blue shield bash point to uncover gold.
- Gold – Wait to navigate between two crushing platforms, discovering the blue shield bash point on the wall.
- Blue Key – This isn’t much of a secret. Advance through the stage into the indicated area on the map. Continue navigating the paths, operating pressure wheels to raise water levels, and using blue shield spots to lift grates until you find the key’s corpse.
- Gold – After obtaining the Blue Key, head to the specified map location to unlock the door and collect gold.
- Ruby – Once you possess the Blue Key, return to this location, unlock the door, and eliminate monsters to claim the Ruby.
- Weapon Skin – Drop into the area through a hole in the ground above, near the mapped location.
- Secret Area – At the marked spot on the map, uncover the lever that opens a grate, leading to an area where you will proceed by manipulating pressure wheels to elevate water and lift grates using blue shield spots.
- Toy & Codex – With the Yellow Key in possession, unlock the door at this location for both a Toy and a Codex.
- Gold – Use the Yellow Key to access this area where you can find a chest.
- Life Sigil – Keep progressing through the stage, moving along this side path to locate the Life Sigil.
- Codex – After completing the dragon stage and landing on the ship, simply walk backward to find the Commander Valen Codex.
Chapter 20 Wraithstone & Wolf Statue Locations
Close
One of the secrets involves breaking four wolf statues to unlock a Wraithstone. You can view their locations marked on the map within the image gallery above.
Chapter 22 – Reckoning
Close
Chapter 22 – Reckoning presents players with 11 secrets to discover. Being the final stage, these secrets are predominantly straightforward to locate.
- Chest – Proceed through the stage until acquiring the Blue Key. Look for the pit with blue light; drop in for a boost upwards. Follow the green armor shards until encountering a wall with a blue shield bash point, leading beyond to the chest.
- Ruby – Instead of pursuing the green armor shards, follow the fleshy path leading to an area with a Ruby statue.
- Chest – Search for the blue shield bash point on the wall to find this chest.
- Chest – Identify another blue shield bash point on the wall. This reveals a blue energy spot; throw the shield to drop down a climbing spot, proceeding along the path above to locate the chest.
- Ruby – Devise a detour towards seeking the Life Sigil, encountering a blue panel puzzle that unlocks climbing spots leading you to the Ruby.
- Secret Door – After acquiring the Secret Key, drop down two ledges to reach one of the doors it unlocks.
- Secret Door – Post-acquiring the Secret Key, navigate to this map point to unlock a door revealing a chest.
- Wraithstone – After obtaining the Secret Key, go to find a hidden Wraithstone.
- Gold & Life Sigil – Following the retrieval of the Secret Key, head to this map location to unlock the door for some loot.
- Ruby – After securing the Secret Key, direct yourself to this point to unlock a door housing a Ruby.
- Life Sigil – Simply progress through the latter section of the stage to locate the Life Sigil.
Source & Images
Related Articles:
Top 10 Survival Games Featuring Soulslike Mechanics
14:03July 13, 2025Top 10 Metroidvania Games to Convert You into a Fan
13:05July 13, 2025Comprehensive Reggie Guide: Master the Art of Dating Everything
18:44July 12, 2025Top 10 Iconic Boss Fights From the PS1 Era
15:03July 12, 2025Download the Enhanced Devil May Cry 3 Crimson Mod: Experience Major Improvements and New Features Like a Full Remake
Optimal PC Settings for DOOM: The Dark Ages
Leave a Reply Cancel reply
Your email address will not be published. Required fields are marked *