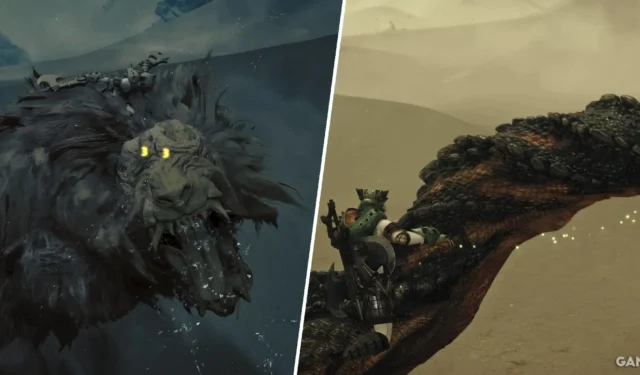
While players might be tempted to dive into Monster Hunter Wilds with a relentless hack-and-slash playstyle, adopting a more strategic approach can lead to superior outcomes. As the saying goes, there’s more than one way to take down a Rajang, emphasizing the necessity of mastering monster mounting techniques for optimal results.
Understanding the mechanics behind mounting monsters is crucial, but equally important is knowing how to maximize the time spent on the beast after succeeding in a mount. This guide covers essential controls and strategies for effective mounting in Monster Hunter Wilds, ensuring players are well-prepared for the challenges ahead.
Mastering Monster Mounting in Monster Hunter Wilds
To successfully mount a monster, hunters must execute a well-timed jump from an elevated position onto the creature’s back. This can be achieved by utilizing the environment for height or leaping directly from their Seikret. Players should press the attack/reload button—Triangle on PlayStation, Y on Xbox, or Right Click on PC—at the moment of landing. If performed correctly, the hunter latches onto the monster, initiating a tense struggle where the creature tries to shake them off. The stamina bar located in the top left corner of the user interface indicates how long the player can remain mounted before needing to dismount.
Comprehensive Guide to Mounted Controls
Action
PlayStation
Xbox
PC
Light Knife Attack Circle B Left Click Strong Knife Attack Triangle AND Right Click Weapon Attack R1 RB R Move X A — Brace (Hold) R2 RT Left Shift Dismount (Hold) Square X ANDBoth Xbox and PlayStation users can maneuver using the left analog stick while mounted, providing additional mobility during gameplay.
Rather than instinctively attacking the moment they secure a mount, players in Monster Hunter Wilds should first assess their positioning. It’s advantageous to relocate to a safer area where they can initiate an attack on a specific part of the monster without being exposed to its retaliation. Light knife attacks are reserved for times when bracing is necessary; the focus should primarily be on wielding a main weapon to deliver substantial damage. This approach is far more effective for damaging monster parts crucial for crafting materials and gear. Continuous movement may be required to dodge attacks, and bracing is crucial during the monster’s aggressive thrashing to conserve stamina more effectively.
When mounted, the primary objective is to inflict damage efficiently while managing the stamina bar, which acts as a critical resource that players need to monitor vigilantly throughout the encounter.
Source & Images
Related Articles:
Top 10 Survival Games Featuring Soulslike Mechanics
14:03July 13, 2025Top 10 Metroidvania Games to Convert You into a Fan
13:05July 13, 2025Comprehensive Reggie Guide: Master the Art of Dating Everything
18:44July 12, 2025Top 10 Iconic Boss Fights From the PS1 Era
15:03July 12, 2025Avowed: Discover the Location of the Earthly Aegis Treasure
Crunchyroll Announces Solo Leveling as the Most-Watched Anime of 2024
Leave a Reply Cancel reply
Your email address will not be published. Required fields are marked *