Complete Guide to All Zombie Intel Locations in Black Ops 6 Zombies: Liberty Falls
The quaint town of Liberty Falls, West Virginia, has become the epicenter of a terrifying zombie apocalypse. Players are challenged to join Requiem in their fight against the undead in Black Ops 6 and explore secrets that may lead to either redemption or ruin.
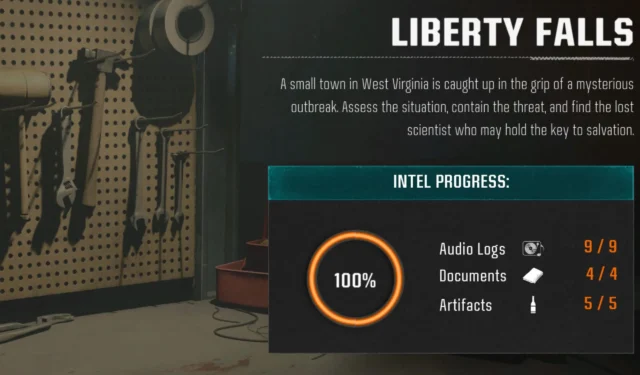
Set within the Black Ops 6 Zombies map of Liberty Falls, players can discover a total of 18 pieces of Zombie Intel, which encompasses Audio Logs, Documents, and Artifacts. Each item narrates a unique story, enriching a player’s collection as they delve deeper into the mysteries of the game. A comprehensive collectibles guide for obtaining every item in Liberty Falls is provided below.
Updated on February 10, 2025, by Jake Fillery: This guide lists all Intel locations in Liberty Falls, aiding players in completing their compendium to elevate their status as Zombie experts. With a wealth of Zombie Intel to uncover, this article offers detailed insights and images to simplify the process of gathering every Audio Log, Document, and Artifact.
Complete Audio Log Listings in Liberty Falls
Audio Log #1 – Quantum Mechanical Failure
Upon spawning, proceed right through Riverside and enter Olly’s Comics, located at the back left of the Arsenal. Inside this comic shop, the Quantum Mechanical Failure radio can be found in the display window.
Audio Log #2 – Conspiracy Theorist
From Riverside, head towards Washington Avenue, where near a table beside the Speed Cola Perk Machine, you can find the Conspiracy Theorist radio resting beside an ashtray.
Audio Log #3 – One Lit Match
After activating the SDG Generator in the Church and engaging with Doctor Panos, players should navigate to the Groundskeeper’s Yard. There, behind the house next to a woodpile, they can uncover the One Lit Match radio.
Audio Log #4 – The House Josiah Built
Within the Cemetery, players will find this radio perched on the West wall, adjacent to the Tier 3 Armor wall-buy.
Audio Log #5 – The Scientist and The Moonshiner
Ascend to the second floor of the Motor Lodge Motel, specifically in Room 202 where players can find the radio behind the Jet Gun crafting bench, next to a box of pizza.
Audio Log #6 – Limited Run
After collecting all 9 Aetherella figurines with the Jet Gun, return to Olly’s Comics, where this audio log awaits on a wooden table by the blue door on the South West wall. Check out this guide for locating all 9 Aetherella figures:
Audio Log #7 – Steel Mountain Rescue
In West Main Street, located outside Fuller’s Bowling Alley, players can find the Steel Mountain Rescue radio atop a garbage can, next to a bench by the South West wall after passing a damaged Liberty Falls Transit bus.
Audio Log #8 – Bear Witness
Inside the Dark Aether Church, look for the Bear Witness radio situated on a bench next to a bouquet of flowers, behind Melee Macchiato on the wall.
Audio Log #9 – Money Talks
To discover the Money Talks radio, players must first unlock the bank vault at the Savings & Loan Bank by inputting the requisite codes found in Fuller’s Liberty Lanes, Savings & Loans, and Olly Comics. Inside the vault, it can be found to the left of the floor.
Complete Document Listings in Liberty Falls
Document #1 – We Only Take Cash
Search the map for a black vehicle featuring a gold roof. Inside, the blue bunny known as Mr. Peeks can be seen. Players need to either use the Mangler Cannon Support weapon, available for 1, 250 Salvage, or shoot the living Mangler to incite the car’s explosion which will eject the We Only Take Cash Document from the trunk.
Document #2 – Politics, Politics
Utilize Loot Keys acquired from Manglers and Abominations to unlock lockboxes located in the Bank Vault for a chance to secure the Politics, Politics Document. Unlocked loot boxes may contain this document regardless of the Loot Key rarity.
Document #3 – Fine Man
Head over to the Backstreet Parking area in Riverside and look at the back of the VHS store. Shoot three VHS tapes visible through an open window on the East side and the Fine Man Document will drop.
Document #4 – Final Issue
In Olly’s Comics, directly opposite the Quick Revive in the North East corner, interact with the white cardboard boxes filled with comics to retrieve the Final Issue Document.
Complete Artifact Listings in Liberty Falls
Artifact #1 – Limited Transdimensional Gateway Device
To craft the LTG Device, progress through the Liberty Falls Main Quest, specifically on “The Alamo, ” located on the rooftop of Savings & Loans Bank. To facilitate this, players must obtain the Jet Gun first and collect three components:
- Located to the right of Dr. Panos in the Church
- In the ceiling of Olly’s Comics
- Inside the Barbershop window on Washington Avenue
Combine these three components to craft the LTG Device on The Alamo rooftop, which is reachable via a zipline from the front entrance on West Main Street.
Artifact #2 – Aetherella Statue
Utilize the Jet Gun to locate and collect all 9 Aetherella figurines scattered throughout Liberty Falls. The locations of these figures are as follows:
- On the South West wall of Olly’s Comics, near the open blue door to the alleyway.
- North East wall of Olly’s Comics, on a shelf adjacent to the Origins poster.
- South wall, adjacent to the display window in Olly’s Comics.
- On a shelf at the West wall of Olly’s Comics, right next to the Aetherella trap.
- Behind an A/C unit on the Yummy Freeze Rooftop, accessible from the Savings & Loans bank rooftop.
- On the top of the Motel sign in East Main Street, facing the South wall of the Motel.
- On an A/C unit, facing the North wall on Washington Avenue, located in the building where the Jet Gun valve can be found.
- Look East when on the bus in West Main Street towards the Liberty Lanes sign, where the statue is beneath the second ‘L’.
- Located on the nearest right window of the Church when looking West in the Forecourt.
Artifact #3 – Aetheric Bowling Ball
During the bowling minigame with Mr. Peeks, simply pick up the bowling ball and throw it at the zombies in the lanes to automatically gain this artifact.
Artifact #4 – Thrustodyne Model 23
Obtain the Jet Gun, known as the Thrustodyne Model 23, from the Mystery Box (ideally with the help of the Wunderbar GobbleGum) or through the free crafting quest explained below.
Artifact #5 – Mr. Peeks’ Misplaced Bowling Shoes
To acquire this collectible, players need to find and shoot any one of the five pairs of Mr. Peeks’ bowling shoes located throughout the map. The specific locations are listed below:
- Northeast wall inside Pump & Pay, near the cash register.
- On a broken shelf inside the Riverside store at the East wall.
- In the groundskeeper’s house, under a chair facing North on Hill Street.
- Attached to a branch of a tree outside the Cemetery, facing West, to the right of the Tier 3 Armor wall-buy.
- On top of a casket inside the funeral room in West Main Street, positioned on the West wall.
Note that there are no rewards for collecting all Zombie Intel in Liberty Falls.
Source & Images
Related Articles:
Top 10 Survival Games Featuring Soulslike Mechanics
14:03July 13, 2025Top 10 Metroidvania Games to Convert You into a Fan
13:05July 13, 2025Comprehensive Reggie Guide: Master the Art of Dating Everything
18:44July 12, 2025Top 10 Iconic Boss Fights From the PS1 Era
15:03July 12, 2025Upcoming 5 Community Day Dates Announced for Pokemon GO
The Apothecary Diaries Season 2 Episode 5 Recap: Recreating an Unexpected Masterpiece
Leave a Reply Cancel reply
Your email address will not be published. Required fields are marked *