Complete Guide and Walkthrough for Hollow Knight: Silksong – The Slab
If you’ve been on the lookout for a hidden gem within Hollow Knight: Silksong, known as The Slab, or if you’ve found yourself intrigued by the curious, bare sprites of Hornet, this guide is designed to provide you with all the necessary information.
To access The Slab, you must advance significantly in the Flea Caravan quest. This includes moving the caravan into Greymoor, collecting more fleas to facilitate their departure, and engaging in battle with the Moorwing if you haven’t done so yet. It’s also crucial to liberate the thief located in Deep Docks.
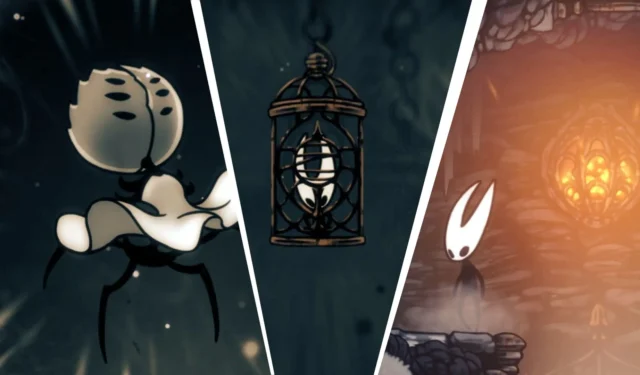
After completing these steps, peculiar enemies resembling bulky flies donning suits of armor and brandishing cages will begin to appear. One of these foes will spawn right at the previously occupied Flea Caravan area in Greymoor.
Instead of immediately defeating this armored creature, allow it to capture Hornet in its cage. Once it ensnares her with silk binding, the screen will transition to black, quelling any initial fears and signaling your entry into The Slab.
The Opening
Upon starting, after a flurry of button-mashing to escape your cell, it’s evident that Hornet is devoid of both her nail and attire. While this renders her combat prowess limited, she retains the ability to punch, perform dashes, and cling to walls.
You may encounter a few doors; however, they are all locked. Navigate down and left to discover another locked entrance beneath a breakable ceiling, which serves as the first step toward your prison break.
After breaking through, you’ll come face-to-face with the gang of thieves who have appropriated your cloak and nail, leading you to an exterior passage. Be wary of the frigid environment; Hornet lacks any means of warmth, so make your visit brief before diving into the first door on the right.
This room contains a couple of enemies that are relatively easy to dispatch. Once dealt with, drop down through the hole in the floor to reunite with your companion, Grindle, just on the other side of a door.
Key of Indolent
Grindle offers minimal assistance, but freeing him is a requisite for proceeding. Head towards the left while maintaining a brisk pace to evade several traps lying in wait.
Here you’ll spot a key dangling from a chain; grab it, but expect an ambush from more enemies immediately thereafter. This Key of Indolent can be used to unlock the Door of Indolent to your right, so open it promptly.
Engage Grindle again at the right entrance, though he provides no tangible help. A nearby bench offers a welcome respite, and don’t forget to leap into a hole in the rightmost wall where you can collect a map of the area.
Feel free to break the debris above to create a shortcut and head left to free a flea. Once done, return to the rightmost door and venture through another Door of Indolent.
Take caution, as the last pressure plate here will secure the doors and unleash a swarm of foes. They can be dispatched with ease, especially by intentionally triggering traps to eliminate them quickly.
Upon exiting, ascend the wall while carefully using your dashes to avoid spikes. Before reaching the top, when the left side converges towards the center, break the rocks in the alcove to reveal a hidden tunnel.
This detour leads to some shards, a frayed Rosary String, and reopens a shortcut to the central room, making the effort well worth it. Continue your ascent up the tower, keeping an eye out for the large pressure plates along the way.
Freezing Cold
Upon ascending, Hornet will quickly succumb to the cold, so it’s best to avoid combat and move swiftly. Dash left, perform a brief upward dash, and take refuge at the flaming coals, which will help keep her warm; be sure to return to them as needed.
From the first flame, continue left past a spike trap and drop down to find another safe zone. Advance left across the lower path to avoid damage from the guards, as they hit hard and Hornet is not currently equipped to confront them.
Make a quick retreat to observe the guard’s movements, then leap up the right wall. Dash through the corridor, either taking the upper path or jumping over the guard to reach the next safe zone, which is actually a loading zone.
Descend the pit, moving further down and left until you encounter a bench, where you’ll want to rest up for what lies ahead. To the right, you’ll find the portion of the room where your clothes and needle await, but a confrontation will be necessary to reclaim them.
Key of Heretic
Hornet immediately gains an edge over the enemy who has taken her attire, regaining her abilities and needle. However, be prepared for a fight, as an escape from this area won’t be easy!
Initially, the first foe is straightforward to defeat, but the larger flies demand more finesse. Dodge their ground slams, hit them a few times, and be observant of their next moves, counterattacking appropriately.
Being ensnared in the gray goop is not catastrophic; though it temporarily immobilizes you, the situation can lead to unexpected damage if neglected. Once you’ve overcome all adversaries, claim the Key of Heretic.
Now on the hunt for the Key of Apostate, your only option is to head directly south, so drop down. Remember that your tools have been unequipped, so be sure to reclaim them at the nearest bench.
The Underbelly
Unlock the floor at the base of the central room, flipping a few switches to access a door on your left. There’s a shard bundle to collect in this room, allowing you to jump on chain-bound platforms leading to an exit in the ceiling above, transitioning into an outdoor area—be swift!
Ascend the wall to obtain a spool upgrade, then quickly drop down and re-enter the hole below, as there’s nothing of note at the bottom of this room. Next, travel to where the Bellway sign guides you. Combat your way through to locate the station, but rest assured that these enemies are now quite manageable.
Another Apostate-locked door blocks further progress, but you can continue down. Look to your left where you’ll find the Bellway toll for 50 Rosaries, ready to let you exit if needed. Further left lies the frostbitten Mount Fay, but you cannot progress there without a grapple.
Take the tunnel on the right for a quick rest at a bench. Above this location, there is a flea; however, you will need a double jump to reach it. With everything done, head over to Bilewater via Sinner’s Road to collect the Key of Apostate, but prepare as this part will pose its challenges.
Key of Apostate
Arrive in Bilewater and prepare to climb. If you haven’t already, move to the right, ascend, then explore all the way to the left to activate the Bellway—this will be your single bench for quite some time.
From that bench, ascend right and scale the enormous room, choosing either the left or right exits at the top. Traverse using wall jumps and grapples, then head through the top right exit. Beware of an infuriatingly timed bench that may test your patience!
Advance slowly, retreating whenever enemies appear, and strive to avoid damage. Before wall jumping up the tunnel’s end, remember to break through the wall in the bottom right, leading to a secret bench that can make challenges considerably easier.
Shifting left, brace for a combat room filled with surprise bush enemies. It’s advisable to summon or use projectiles; these foes are elusive and tricky to dodge effectively.
At the end of this gauntlet, face Groal the Great. This antagonist hurls explosive projectiles and tries to suck you in with an unwieldy hitbox, complicating your ability to close in for nail damage. Save some projectiles and summons for this encounter and aim to out-distance him.
As Groal withstands your initial attacks, proceed with caution. Watch for his projectile assaults, dodging effectively to inflict damage when the opportunity arises. In his second phase, he will launch soul blasts reminiscent of the original game; use this as a chance to retaliate effectively.
Once this lengthy battle concludes, a bench awaits as your reward. Proceed left to procure an unrelated item from a house, then drop down the adjacent wall, leaping up to your left.
Continue upward into the tunnel on the left. This area features a significant Moss Charger-esque enemy, or you can be ensnared by a Rain World-esque vine to access the above tunnel. Ultimately, you’ll break open a cage, bringing you back to the focus of this guide.
Apostate Doors
Return to The Slab, ascend, and you’ll now encounter the Apostate door that had previously barred your access from the map’s lower right sector. Use your newly acquired bile-drenched key to unlock it, and climb the walls to secure a shortcut back to the primary room.
Backtracking into your newly accessed cave, venture right and open the scroll detailing the sins of individuals. You can then glide upward into a ceiling hole. Ascend through this passage and ensure to break a crumbling wall on your right to recover a Memory Locket.
At the conclusion of this cavern is straightforward access to the trap-laden room, and there’s more to explore while you’re here. Enter through the large circular door and play your mandolin inside. This summons the Old Penitent, who will share enriching lore with you the longer you perform for him.
Upper Door
Head into the Apostate door near the top, which was previously inaccessible at the beginning of this area. Stay alert for pressure plates; spike balls here follow a predictable path but can still inflict damage if you’re not cautious.
You will need to pogo off this mechanism repeatedly to ascend, triggering the plate when necessary. Master dive kicking to make your climb successful. Ascend to the middle platform and wait for a lift to return.
You’ll need to employ dive kicks, a double jump, and another dive kick to ride up the spike until you can quickly wall jump right, timing your next wall jump to land an upper ledge.
With enough height, you can grapple to secure your safety, and as long as you effectively ledge grab, success is within reach. This section provides a Mask Shard, an essential reward for your effort here.
Lower Caverns
After dropping back down to the central room, discover a right-side door locked by a Heretic mechanism, but it won’t impede you significantly. This route leads to continued progress, so descend further for now.
In this expansive pit, journey left and dismantle the red crystals, cross the water, and scale the tunnel to confront some thieves. After dealing with them, breach the wall on the right to reopen a shortcut to the main room before heading downward.
Backtrack into the water at the central room’s base and break the right-sided crystals with care, as numerous spikes and crumbling floors are present. At the end of this section, you’ll collect a Weaver Effigy, which can be presented to the collector in Bellhart later.
Return through the central room by utilizing the path unlocked earlier, and step into the Heretic room. Inside, you’ll discover approximately 150 Rosaries—a worthwhile prize after the slim rewards from the Bilewater foes.
While you’re here, jump atop the chest and soar up to another ceiling hole. In this cavern, you’ll encounter the first Penitent, perpetually bound for their transgressions. Naturally, your goal is to sever the chains by attacking their anchor points into the wall.
The Penitent
Within this cage, you’ll find a Weaver statue, leading to a boss encounter with the First Sinner. This battle will mimic the Dream Bosses of Hollow Knight, drawing you out of the arena if defeated, enabling you to engage repeatedly. Be mindful to replenish your tool ammunition accordingly.
Although her attacks may seem swift and brutally hard to avoid, remaining airborne is key; most of her moves will miss you if you stay elevated. Evade her needle assaults, then look to position yourself behind her for strikes when opportunities arise.
Whenever she begins her binding animation, act decisively to interrupt it. Not only does this provide a free hit, but it also prevents her from executing her ritual. With her defeated, prepare for a second phase as things ramp up in difficulty.
During this segment, she will generate explosive circles throughout the arena; once these appear, retreat immediately and halt your attacks for a moment. While she’s vulnerable and generating needles, you’ll also need to beware of the white lines that manifest on-screen whenever you decide to engage.
Upon her demise, you’ll be able to connect with her spirit, engaging in straightforward platforming to utilize your grapple and double jump, ultimately earning a new Silk Skill. Congratulations, you have successfully navigated The Slab and uncovered all its hidden treasures!
Source & Images
Related Articles:
Complete Guide and Walkthrough for Blasted Steps in Hollow Knight: Silksong
4:51September 8, 2025How to Obtain Sharpdart in Hollow Knight: Silksong
1:07September 8, 2025Hollow Knight: Silksong Guide – Obtaining Needle Strike Ability
23:06September 7, 2025Top 10 Video Game Franchises with the Most Mainline Sequels Ranked
23:03September 7, 2025Complete Winners List of the 2025 Roblox Innovation Awards
Microsoft Prepares Windows 11 25H2 Installation Media for Upcoming Public Rollout
Leave a Reply Cancel reply
Your email address will not be published. Required fields are marked *