Clair Obscur Expedition 33: Strategies to Overcome Chromatic Glissando
In the immersive world of Clair Obscur: Expedition 33, players encounter the formidable creature, Chromatic Glissando. While engaging in this boss battle is optional, it provides valuable insight into the story, particularly regarding Lune’s parents. Completing this encounter enhances both gameplay and narrative depth.
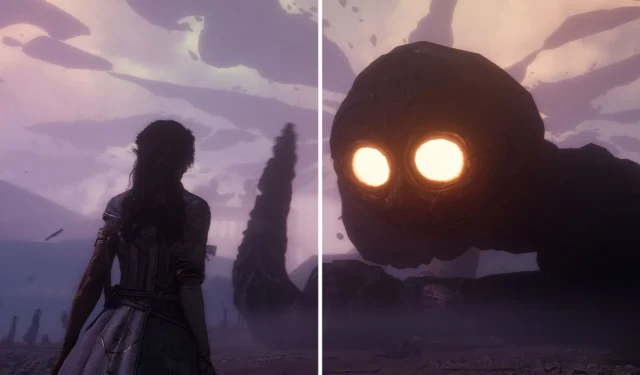
This colossal worm may lack limbs, but it compensates with powerful headbutts and sweeping tail strikes. Carelessness can lead to losing an expedition member, which adds a thrilling layer of strategy to the encounter.
Fortunately, the majority of its attacks follow predictable patterns. With the right strategy and preparation, you can emerge victorious. This guide offers a comprehensive overview of finding Chromatic Glissando, understanding its moves, and devising an effective strategy to defeat it.
Locating the Chromatic Glissando
Close
The Chromatic Glissando resides at Sirene’s Dress. To reach this destination, players must harness Esquie’s flying ability.
Sirene’s Dress is situated on the far side of the desert. Aerial navigation around Sirene will lead you to the right spot, identifiable by the NPC Pearo stationed outside the entrance.
Upon entering, proceed straight until you encounter an Expedition 46 Flagpost. Interact with the gate, select the option to “look around, ”then opt for “Playing Music”to unlock the passage.
Continue onward after the door opens. You can pause at the Glissando Expedition Flag 46 to enhance your weapons and skills.
As you advance, be prepared; Chromatic Glissando will leap down from above and situate itself between you and the 46 Journal. Initiate the boss fight by launching an attack.
Preparation for the Chromatic Glissando Encounter
The Chromatic Glissando is particularly vulnerable to Ice and Dark elemental damage. Therefore, Lune and Sciel are optimal choices for your party.
It’s advisable to avoid Light and Earth element weapons, as the boss exhibits resistance to these types.
Equipping your team with the best Gestral Monoco is recommended due to its potent skills in Ice and Dark elements. Alternatively, Verso can be a solid choice if wielding a powerful Ice or Dark weapon, as he possesses multiple damage-dealing skills consistent with the weapon type.
Regarding Maelle, her skills predominantly inflict Fire, Physical, or Void damage, making her less effective for this encounter unless she offers your team the most damage output.
Chromatic Glissando employs a diverse array of attacks, some of which warrant close attention when deciding between dodging or parrying. Below is a breakdown of its moves and the best party configurations for the battle:
Optimal Team Composition
For my battle strategy, I assembled a team consisting of Lune, Sciel, and Monoco at levels 71, 71, and 79. This configuration allowed for a well-rounded approach where all members had multifunctional capabilities as both support and damage dealers.
Lune specializes in Ice damage, utilizing skills such as Ice Lance and Typhoon. For healing, her ability Rebirth is essential during the second phase. Equipping her with Revitalization or Healing Light offers reliable emergency healing options.
Sciel boasts an arsenal of Dark damage skills. In my experience, a level 15 weapon proved effective. His strongest abilities include Final Path, which delivers extreme Dark damage, Dark Wave for high damage to multiple targets, and Marking Card to inflict medium damage.
For Monoco, either Ice or Dark damage can be dealt effectively, and I chose a level 15 weapon for this battle as well. His skills are versatile, including Obscur Sword for Dark damage and Chevaliere Ice for Ice damage.
Be sure to equip Pelerin Heal to ensure party members are continuously restored during the fight.
Recommended Skills for the Encounter
Party Members Skill Description Sciel Extreme Dark damage to a single target, applies 10 Foretell cards (Can Break). High Dark damage to all enemies, consumes Foretell cards for extra damage. Medium Dark damage to a single target, applies a Mark debuff. Medium Dark damage to a target and heals all allies; consumes Foretell cards to enhance healing. Moon Medium Ice damage with Slow debuff; can consume Earth Stains for increased damage. High Ice damage to all enemies and heals allies over multiple turns. Heals allies significantly; applies regeneration based on Fire Stains. Heals one ally and dispels debuffs; costs 0 AP under certain conditions. Revives an ally with a portion of their health; reduced AP cost with Earth Stains. Monoco High Dark damage in multiple hits; additional damage to Powerless targets. High Dark damage with health restoration; enhances heals based on wheel status. High Ice damage with Slow debuff. Medium Ice damage with high Break damage element. Applies Regen to allies; heals self under certain conditions.Chromatic Glissando Attack Patterns
The battle with Chromatic Glissando is divided into two distinct phases: the initial struggle against the worm, followed by a confrontation with three Dark Ballet dancers. Chromatic Glissando features six unique moves while the dancers employ three distinct attacks.
Enemy Attack Description Recommended Action Chromatic Glissando Head Smashing The Expedition Raising its head, Chromatic Glissando smashes down on the party. Dodge or Parry 7-Hit Tail Combo Swipes its tail in multiple directions, concluding with a slam. Dodge or Parry 6-Hit Gradient Tail Combo Similar to the previous move, but adds a Gradient tail slam. Dodge or Parry 3-Hit Weakened Tail Combo Slower versions of the normal tail combo attacks. Dodge or Parry Regenerating The Tail Uses its turn for tail regeneration. Wait for an opportunity Blinding The Expedition Swipes tail at party, inflicting Dizzy on hit. Dodge or Parry Dark Ballet Dancer Swiping Slash A lunging attack from the right side with a sword. Jump on the yellow indicator 5-Hit Projectile Attack Launches multiple projectiles quickly. Dodge or Parry Blight Attack Inflicts a damaging Blight debuff. Dodge or ParryStrategies for Defeating Chromatic Glissando
To successfully defeat Chromatic Glissando, focus your attacks on utilizing your most potent Dark or Ice skills. A strategic approach involves targeting its tail first to weaken it, facilitating easier combat.
Attacking the damaged tail not only simplifies subsequent tail combos but also mitigates the damage output. Be mindful, though, that targeting the tail requires considerable AP; thus, balancing character attacks is key for efficiency.
If you possess confidence in your parrying abilities, prioritize attacking the worm directly. This helps generate AP faster, as its tail combos can be lengthy and taxing.
If you miss your chance to break its tail, focus on dodging initial tail swipes while adjusting to the fight’s rhythm. The head smash attack, conversely, is notably easier to parry; aim to capitalize on it to build strategy.
Maintain careful vigilance to avoid falling party members. Should an expedition member fall, Chromatic Glissando will consume them, restoring a significant portion of its HP.
It is impossible to revive a member that is devoured, but if you manage to break the boss, it will regurgitate them, allowing for revival.
At the onset of combat, the boss will boost its own power with a self-applied Powerful state and trigger a Rage state once its health drops below 25%.Upon exhausting its HP, it will perish, revealing the dancers for phase two.
This phase is relatively more manageable; target the dancers with free aim for effective eliminations, as they tend to evade standard strikes and abilities.
Optimal targeting on dancers’ heads results in increased damage outputs.
Rewards for Defeating Chromatic Glissando
Upon successfully vanquishing Chromatic Glissando, players can anticipate a rewarding loot drop, including:
- 567, 000 XP
- 13, 724 Chroma
- (Level 20)
- (Level 20)
- x2
- x5
The Choralim serves as an exceptional Fire weapon for Lune, boasting a level 33 power of 3551, with S scaling for Defense and A scaling for Agility.
This weapon features a 100% critical chance when four Stains are active at level 4 and a 20% damage boost for each consecutive turn without taking damage, stacking up to five times. At level 20, critical hits apply a burn effect.
If you prefer alternative passive abilities, consider using Braselim or Angerim for Fire capabilities with Lune.
Source & Images
Related Articles:
Top 10 Survival Games Featuring Soulslike Mechanics
14:03July 13, 2025Top 10 Metroidvania Games to Convert You into a Fan
13:05July 13, 2025Comprehensive Reggie Guide: Master the Art of Dating Everything
18:44July 12, 2025Top 10 Iconic Boss Fights From the PS1 Era
15:03July 12, 2025Nintendo Switch 2 Display Issues: Motion Quality Concerns and Comparisons to Predecessor
Death Stranding 2 Review: Following an Echoed Journey
Leave a Reply Cancel reply
Your email address will not be published. Required fields are marked *