Team Composition Breakdown: MVP Black's Doppleganger Dive Composition
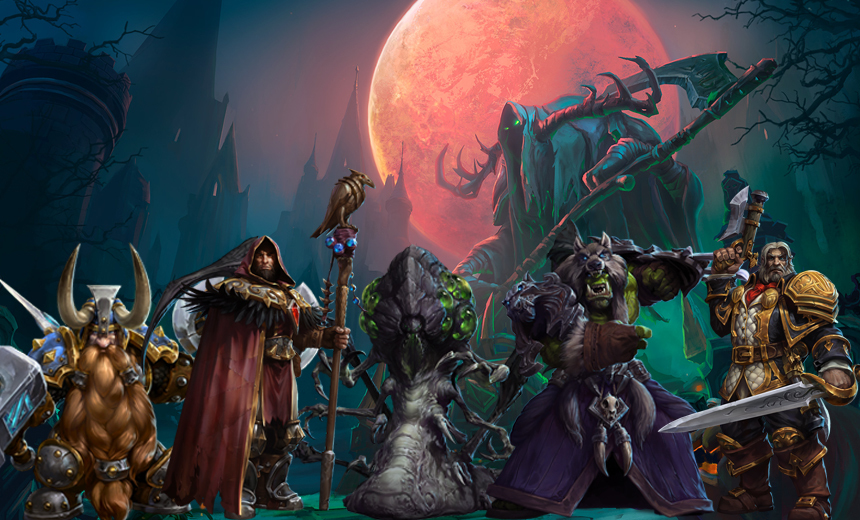
This composition was drafted to protect Greymane and the Ultimate Evolution Clone of Greymane while they dove with Muradin and Rehgar to kill the enemy backline.
Here is the game this composition was played if you want to watch it
Innate Hero Synergy
This team composition is built to be completely synergistic. Examples of this are:
- Abathur can clone Greymane to create two diving wolves
- Muradin can dive with the two wolves to help stun targets for them to pick off
- Rehgar has the highest mobility of supports and can also help slow targets with Earthbind Totem
- Medivh can protect the divers with Force of Will and can use Portal to get them into the backline
- When Abathur isn't in Ultimate Evolution he can augment Greymane's damage and speed
All members can gap close in some form and all have tools to empower Greymane to do what he does best, delete squishies. How does this composition fit Towers of Doom?
Picking according to the map
Mobility is important on this map because the shrines generally spawn far enough away from each other that rotating to them can take time. The examples of mobility for this team are:
- Greymane has Razor Swipe, Disengage/Darkflight, and Go for the Throat. All are solid gap closing abilities
- Rehgar has his instant mount form in Ghostwolf and can also close gaps with the bite from the passive
- Muradin has Dwarf Toss to help him get around
- Abathur can burrow to different places on the map
- Medivh has portals and his Raven form to help him move from objective to objective quickly
Poke is critical on Towers of Doom because it delays the altar channels so your team can get to the fights. This isn't the best poking team ever, but here is the poke they do have:
- Muradin has Stormbolt to interrupt altar channels from a distance and because he is so tanky he can use Dwarf Toss to jump in and interrupt as well
- Greymane can poke with Gilnean Cocktail to interrupt altar channels and do high damage as well
- Medivh can use portals to jump in and interrupt and quickly get out afterward
- Rehgar can poke from relative safety with the Earthbind Totem Lighting Shield combo
- Abathur can poke with Toxic Nests and Stab as long as his Symbiote target gets close enough
Taking mercenaries is crucial on this map because they can help you steal enemy forts and can even lead to shots on core if left to push. The boss also gives a team free shots on core so it is important that you can take it quickly. This team has efficient mercenary potential with:
- Greymane because his Worgen form basic attacks do massive damage and his Razor Swipe does solid AOE damage on a short cooldown
- Abathur- he can't do the mercenaries on his own but he can turn anyone into a strong mercer with his Symbiote
- Rehgar, he might be the best support mercenary killer in the game. Lightning Shield in combination with his Ghost Wolf form basic attacks make him an efficient mercer.
Pushing potential is useful on this battleground because it leads to less shots fired on core for the enemy and more for your team. This demonstrates effective pushing by:
- Using Abathur's locusts to AFK push a lane while he helps his team
- Having Greymane clear waves quickly with Gilnean Cocktail and Razor Swipe
- Rehgar doing his Lightning Shield on Earthbind Totem combo to push waves
- Muradin Thunderclapping waves
- Medivh spamming out Master's Touch boosted Arcane rifts to destroy minion waves
All of these reasons are why this composition is picked for one of MVP Black's best maps. They had a plan going in and they executed it.
Playing the Composition
Playing this composition requires a high skill level. Abathur and Medivh are some of the most difficult heroes to play in the game and using them in combination with the other heroes on the team requires stellar coordination.
This is not a team I would recommend for you to take into Team League or Hero League. This comp takes practice to perfect the portal engages, the timings on Ultimate Evolution, when to use specific cooldowns like Ancestral Healing and Force of Will to save allied heroes, and great map awareness to know where to be on the map at what times. Playing this composition is all about practice.
If you don't take the time to master this composition it will blow up in your face. I caution you, please work on this composition before playing it.
Win Conditions
This team composition has really only two win conditions, superior team fighting, and smart rotations.
- The heroes they have excel at fighting in five on five because of the protection they have for the Greymanes. Two Greymanes jumping in on an enemy target with protection from allies spells doom for any squishies.
- They also have solid crowd control to set up targets to be nuked by the terrifying Worgen. It requires a lot of coordination to pull off, but when done right this composition is a team fighting force to be reckoned with.
- This team can also force the enemy team into bad situations by rotating their pressure points around the map. Abathur can build a massive split push that makes the enemy team answer it while the rest of the heroes rotate to apply pressure somewhere else. They can be in so many different places so quickly that they can make the enemy team pick between two bad outcomes.


