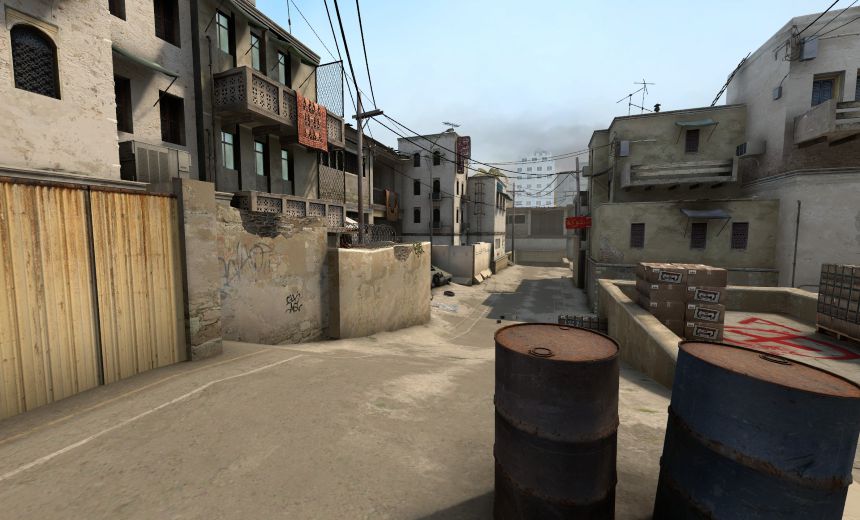
Now that you are familiar with callouts on the map, we will need to look at some useful smoke grenades that you can use to your advantage. It may seem overwhelming at first, but with frequent use you will remember each and every one of them. Some of the smokes that you will see below are rather situational, some are elementary and some fairly technical, so make sure to practice those that you are unfamiliar with, whilst keeping in mind those that you recognise.
T Spawn to Mid doors
This smoke doesn’t really need an introduction as its fair to say most people are acquainted with it. Don't take the video below as a rule, as in most cases you will need to throw it fast, as to not get sniped. It is merely a demonstration of the trajectory that needs to be used in order to land it. Its main use is to block off any CTs close to mid doors/lower tunnel that are looking for an aggressive push into lower tunnels. It can also be used to cover your teammates at lower mid, however they can get spotted out if the CTs rotate further back.
T Spawn to Long corner
An incredibly useful smoke that will take practice to master. Two versions of it will be presented and both have respective merit. One is a running smoke that will require extensive practice to master; the other is a static smoke, that can be consistently recreated without much practice. If said smokes are executed correctly, they can greatly increase your chances at an entry frag on A long, as it will force the defending CTs to move out of position, exposing them to Ts that are advancing from double doors. In the demo you will see the player running towards double doors, aiming in-between the two buildings. As he runs, there is a section that requires the player to shift-walk and during this split second, the smoke grenade must be thrown. Practice this smoke grenade till you throw it consistently.
The running smoke
The static smoke
A Long to Elevator
This smoke is literally a life saver. Practice this till you land it consistently, as it can make or break every single round that your team decides to go through A long to A site. As demonstrated in the video, it is highly effective in terms of smoke coverage, leaving all but small slits either side of it, greatly reducing the chance you or your teammates will get picked off while crossing into A site from long. Conventional smokes leave large gaps either side of the passage, which simply gives the CTs a higher chance of reacting to someone crossing onto A ramp.
T Spawn to Xbox
Another fairly technical smoke that will require some time input to perfect. As you can see in the video below, you must let go of the mouse button as soon as you hit level ground upon descending from the small mound in the corner. This smoke allows your team to pass through catwalk without being detected by the CT watching mid. It can be giveaway of your intentions to enter A site through Short, unless you will be faking an execute, so make sure to coordinate well for an effective entry onto A. Also beware of smoke-banging as it is common practice at this angle.
CT to A Site
This is a rather technical jump smoke that can be used in a variety of situations. It allows you to smoke off a crucial peeking angle, namely goose, effectively rendering AWPing useless from that position, subsequently forcing the defending opponent out of position. Communicate with your teammates and this smoke can be a game changer.
CT to Mid
This is also a common smoke that is simply used as a means of crossing onto B ramp/B site. If you're playing at a decently high level, chances are you use this smoke constantly, due to its capability of protecting you from getting tagged through mid doors by the T snipers. Let your teammates know in advance that you will be smoking off middle, as countless times situations arise where multiple players throw it, wasting the valuable resource that is the smoke grenade.
Mid to B Car
It is worth pointing out straight away that this smoke will predominantly be used in retake situations. B car is a very common position to hold as a T defending B site from retakes, so it is crucial that you add this smoke to your repertoire, as it may be the difference between a dead terrorist, that was forced out of position or a dead teammate that had to cover one too many an angle when advancing into the B bomb site.
Mid to B Tunnel
A smoke that allows you to cut off enemies covering B site from upper tunnels. This will mostly be used in B site retake situations; however it can be decent when going for a B push through mid, especially if you have info on CTs that have pushed into tunnels.
Mid to Lower Tunnel
Straight off the bat you'll notice how exposed this smoke spot it. Make absolutely sure that you will not get picked off by a T running down catwalk whilst throwing this, because in said situation it simply isn't worth dying for. This smoke can be good if your teammates want to aggressively push out onto mid catwalk to try and peek the Ts that have assumed angles at upper middle. Much like the xbox smokes it greatly diminishes the chances your teammates will get picked off whilst trying to frag opponents.
A Long to Double Doors
A pretty nifty smoke if you are anticipating an A long rush. Enemies that advance through the smoke cannot effectively aim you down, making it easier for you to gain multiple frags as they emerge from the smoke.
Upper tunnels to B site (slow/fast versions)
After some consideration, the decision was made to include two versions of this smoke, as both are important. Much like the T spawn to Mid doors smoke, don't take either of these as a rule, as you must manipulate the trajectory to suit your needs. Try to analyse the enemy team's positioning, figure out patterns from where they peek, and depending on said factors, position the angle at which you throw your smoke. Adapt an acute angle of throwing if they constantly assume a B site hold, and an obtuse one if you frequently see them peeking from plateau.
The slower version
The faster version
Double Doors to Xbox
This crafty smoke allows you to cover your teammates at mid from double doors, where perhaps you are holding to prevent a push from long. One of the best things about this particular smoke is the fact that it allows your teammates to save their smokes for other positions/situations as they enter A site through short.
Outside T to Short
This smoke won't see a lot of use and is highly situational. Its function is to block off CTs aggressively pushing through short and peeking mid catwalk or lower tunnel. Keep this one in mind, as one day you might need it.
Lower Tunnel to Xbox
A fairly simple smoke that allows you to cover your teammates running up mid catwalk and further advancing into short. Nothing too complex here, just make sure your back is stuck right into the box behind you, otherwise it will rebound too far away from the wall. This smoke effectively nullifies any decent chance the enemy AWPer/rifler has at picking off your teammates that are running towards short. Obviously you will occasionally get picked off by the lucky smoke-bang, but don't despair is this won't be happening too often.
Xbox to CT
A commonly known smoke that is essential when executing a B site split. Very easy to land, however, there are factors that need to be taken into account when throwing it. There are certain positions that you are vulnerable to whilst pushing onto B ramp, both from CT spawn and elevator, be wary and try to stick to the right side of the ramp whilst ascending it, here you are more shielded. Watch for CTs defending from window and B doors, as you are way out in the open when running up to B site.
*As a quick ending note, the list presented to you in this guide is not a comprehensive list of all smokes on the map. I've tried to include all meaningful and game changing smokes in it, however, I encourage you to research further and perhaps you will find other smokes that can drastically improve your gameplay.


