Introduction to Punisher’s Crypt
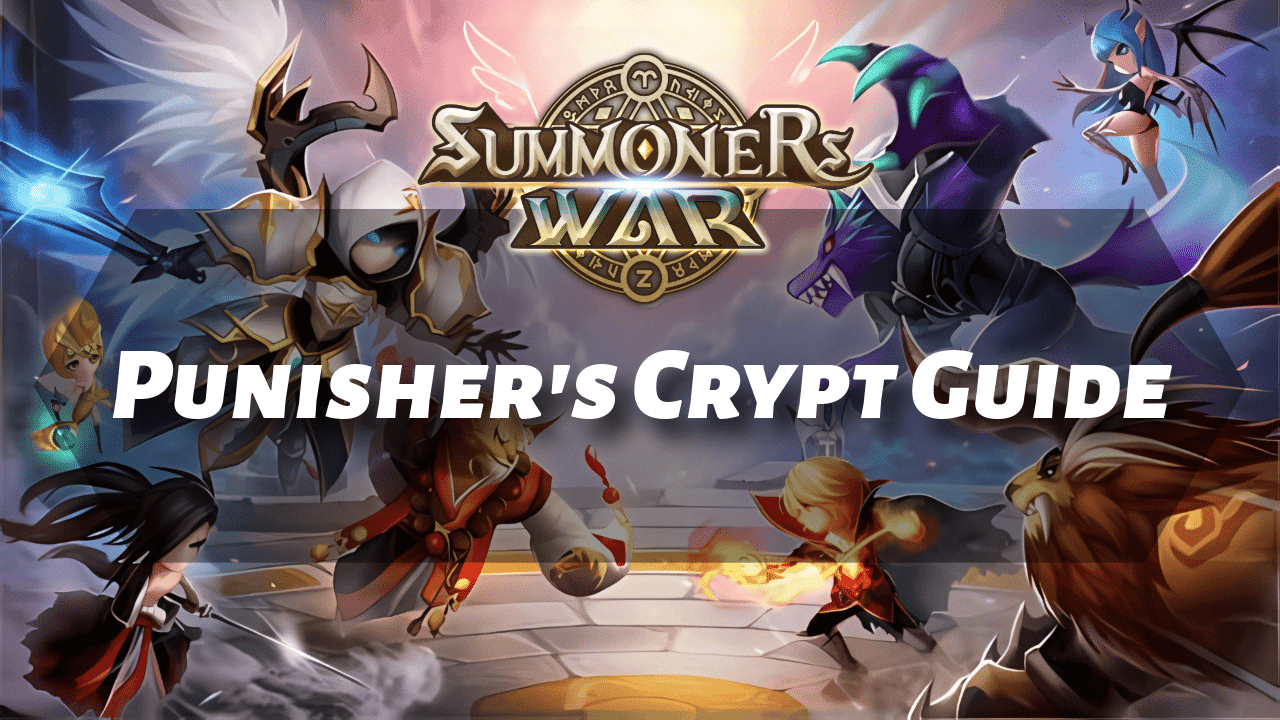
Welcome, brave summoners, to the definitive Summoners War Punishers Crypt Guide, one of the most challenging dungeons within the Cairos Dungeon in Summoners War. Unlike other dungeons, Punisher’s Crypt introduces a unique boss mechanic centered around speed scaling, making it a distinctive test of strategic team building and combat readiness. The primary objective of this dungeon is to acquire attribute-specific artifacts. These artifacts offer valuable stat boosts tailored to the role of your monsters—attack, HP, support, or defense—regardless of their elemental attribute, provided the artifact matches the monster’s role.
HPAttackDefenseSpeedResistance181,9504942233817539The dungeon comprises ten escalating floors, from B1 to B10, with B10 being the optimal level for farming artifacts due to its superior drop quality. Each floor features four sequential waves of enemies, culminating in a boss fight against one of the most formidable enemies in the game. For advanced players seeking heightened difficulty and superior rewards, Abyss and Abyss Hard versions of the Punisher’s Crypt are also available. The entire dungeon is aligned to the light element, meaning team composition should consider attribute advantages and disadvantages.
At the heart of the dungeon stands the Ancient Judge, widely recognized as the fastest boss in Summoners War. Victory hinges on understanding and countering its speed-based abilities. The Ancient Judge wields the following key skills:
Dance of the Swords: A full-area attack with a 30% chance to reduce each enemy’s attack bar by 30%. This skill cannot be counterattacked. In the Abyss version, it may also inflict continuous damage for 2 turns, again with a 30% chance.
Conviction: A devastating single-target attack that strikes seven times, absorbing 20% of the target’s attack bar with each blow.
Punisher’s Sword (Passive): This passive ability causes the boss’s skills to scale in power as it takes more turns, directly influenced by its attack speed. On the 5th turn, Dance of the Swords can hit up to three times. By the 10th turn, Conviction can deal up to 100% more damage. On the 20th turn, all of the boss’s attacks can ignore up to 100% of the target’s defense, all based on its current attack speed.
Retrograde (Passive): Grants up to 70% damage reduction, scaling with speed. Additionally, the Ancient Judge will instantly gain a turn whenever an attack bar reduction effect is used against it. Allies of the boss may also receive up to 50% attack bar boosts based on their own speed when attacked.
Before confronting the Ancient Judge, players must progress through four distinct waves:
Wave 1: Contains four high-damage crystals. Eliminating these quickly is crucial to preserving your team’s health and cooldowns for the later stages.
Wave 2 (Mini-Boss): Features a mini-boss with two dangerous abilities: Rotary Blade, an AoE that reduces enemy attack gauges by 30%, and Rain of Blades, a four-hit single-target attack that absorbs 10% attack gauge per hit. Two additional devices support the mini-boss—one increases allies’ attack gauges, and the other strips beneficial effects. Focusing on the mini-boss first in Abyss Hard is a commonly used strategy.
Wave 3: Mirrors Wave 1 with another set of crystals, reinforcing the need for consistent damage output and enemy control.
Wave 4 (Boss Stage): Features the Ancient Judge flanked by two crystals. The Purification Device attacks all enemies with a chance to reduce attack power for 2 turns and removes all debuffs from the boss. The Acceleration Device increases the attack bar of the ally with the lowest HP by 50% and grants attack speed for 2 turns. The recommended approach here is to eliminate the Purification Device first, then the Acceleration Device, before targeting the boss directly.
Conquering the Punisher’s Crypt, especially on B10 or higher difficulties, marks a significant milestone in strengthening your monsters. The artifacts obtained here play a crucial role in enhancing your team’s combat effectiveness, helping you tackle even greater challenges across Summoners War.
Key Concepts and Strategies for Punisher’s Crypt B10
Punisher’s Crypt is designed primarily for acquiring attribute-specific artifacts. These artifacts enhance monster stats based on their role—attack, HP, support, or defense—and are applicable to any monster whose type matches the artifact’s category. This makes the dungeon an essential part of late-game progression, especially for improving performance in PvE and PvP content.
The boss of this dungeon, the Ancient Judge, is known as the fastest boss in the game. Its speed-focused skillset introduces a unique challenge, particularly through the passive ability Retrograde. This passive causes the boss to instantly gain a turn whenever it is targeted by attack bar reduction effects, making such strategies ineffective and potentially dangerous. Retrograde also reduces incoming damage based on the boss’s speed and increases the attack bar of its allies when they are hit, based on their own speed.
The Ancient Judge’s active skills add further complexity. Dance of the Swords is an area-of-effect attack that decreases enemy attack bars and cannot be counterattacked. In the Abyss version, it also applies continuous damage. Conviction is a powerful single-target attack that hits seven times and absorbs 20% of the target’s attack bar with each strike. The boss’s second passive, Punisher’s Sword, causes its abilities to scale over time. On the 5th turn, Dance of the Swords can strike up to three times; on the 10th turn, Conviction’s damage may increase by up to 100%; and on the 20th turn, all of the boss’s attacks can ignore up to 100% of enemy defense, depending on its attack speed.
Punisher’s Crypt B10 consists of four waves. Waves 1 and 3 feature high-damage crystals that need to be eliminated quickly. Wave 2 presents a mini-boss that uses AoE and multi-hit attacks to reduce and absorb your team’s attack gauge. It is supported by two devices—one boosts allies’ attack gauges and the other strips buffs.
The final stage, Wave 4, includes the Ancient Judge and two crystals: the Purification Device on the left, which removes harmful effects from the boss and weakens enemy attack power, and the Acceleration Device on the right, which boosts the attack bar and speed of the ally with the lowest HP. A common strategy is to eliminate the Purification Device first, then the Acceleration Device, before focusing on the boss.
Speed and damage are key to success in this dungeon. Because attack bar reduction effects trigger the boss’s passive, using continuous damage (also known as “dots”) is a highly effective approach. These effects bypass the risk of turn gain while chipping away at the boss’s HP. Fire Homunculus is a popular option for dot application. Instead of trying to control the boss’s turn bar, teams benefit more from attack bar boosting, allowing them to take more turns. Verdehile is commonly used for this purpose due to his passive ability to increase the team’s attack bar with each critical hit.
Survivability also plays a role, especially when building early teams. Bringing monsters that can heal and sustain your team through the boss’s damage helps ensure consistent clears. Monsters like Colleen and Fran are valuable for their healing and support capabilities. Applying defense break and attack buffs further accelerates the boss takedown by significantly increasing your team’s damage output. Speed tuning your team so that attack bar boosters move first, followed by defense breakers and then damage dealers, can further improve consistency. Some setups have Verdehile moving last to maximize team-wide turn cycling.
Various team compositions can be used to clear or farm B10, depending on available monsters and rune quality. Popular and accessible teams include Verdehile, Raoq (second awakened), Fran, Jultan, and Fire Homunculus. Jultan can be swapped with Jubelle or a second Raoq for faster clears. Another composition includes Verdehile, Raoq, Colleen, Jotun (second awakened), and Yen, where Jotun brings defense break and tankiness, and Yen provides damage and dots.
A dot-heavy team using Veromos, Melia, Sath, and Riley focuses on damage over time, with Fran as a potential alternative support unit. Faster teams may use monsters like Kro and Pang to burst through the dungeon quickly, while others incorporate Yen for consistent multi-hit damage. For beginners tackling Abyss Hard, a team of Urar, Iaru, Rayo, and Crow offers a strong foundation with defense break and reliable damage output.
Efficiently farming Punisher’s Crypt B10 requires strong synergy between your monsters, optimized runes, and an understanding of the boss’s mechanics. With the right approach, you can consistently clear the dungeon and collect powerful artifacts to boost your monsters’ performance across all areas of the game.
Monster Recommendations and Team Compositions
Here are the refined monster recommendations and team compositions for tackling Punisher’s Crypt B10 in Summoners War. This dungeon demands a focus on efficient damage dealing, survivability, and synergy to overcome the speed-scaling mechanics of the Ancient Judge. Below is a comprehensive breakdown of notable monsters and proven team setups.
VerdehileTYPE: ATTACK
Verdehile (Fire Vampire): A core unit for most teams, Verdehile passively increases the attack bar of all allies with each critical hit. He performs best when built tanky and positioned to move last to maximize team turn cycling. He’s often runed with Violent/Vengeance or similar combinations, using HP%, Crit Rate%, and HP% stats.
Raoq (2A)TYPE: ATTACK
Raoq (Fire Inugami, 2nd Awakened): A strong single-target attacker with the ability to chain attacks alongside allies. When used in pairs, two second awakened Raoqs can significantly increase damage output and speed up runs. Typical builds include Violent/Blade or Rage/Blade with ATK%, Crit Damage%, and ATK%.
FranTYPE: SUPPORT
Fran (Light Fairy Queen): A versatile support unit offering healing, immunity, and attack buffs. While her first skill reduces attack bars, which can trigger the boss’s passive, her overall utility makes her a common pick. She is typically runed Violent/Shield and built for speed and survivability.
Jultan (2A)TYPE: ATTACK
Jultan (Dark Werewolf, 2nd Awakened): A tanky frontliner with reflect damage and defense break. He adds value by applying damage over time and can provoke the boss. Jultan benefits from high HP, some speed, and accuracy, often runed with Energy/Endurance or Energy/Destruction.
FireHomunculus
TYPE: ATTACK
Fire Homunculus (Attack/DoT Build): One of the top units for Punisher’s Crypt due to his ability to apply four continuous damage effects per attack. A well-optimized skill path enhances his DoT potential. He is commonly built with Fatal/Blade or similar sets, focusing on ATK%, Crit Damage%, and ATK%.
LunaTYPE: ATTACK
Luna (Dark Pierret): A damage dealer that applies continuous damage and slows attack speed. Her passive enables additional turns and helps cycle through dot effects quickly. She is typically built with Violent/Guard or other tanky damage sets and requires accuracy to land her debuffs.
ColleenTYPE: SUPPORT
Colleen (Fire Harpy): A free-to-play friendly support who provides healing, attack buff, and attack break. Her usefulness lies in her tankiness and consistent healing. She is generally built with speed, HP, and defense stats, using sets like Violent or Swift.
DarkYeti
(2A)
TYPE: SUPPORT
Jotan (Dark Yeti, 2nd Awakened): A tanky monster with defense break and the ability to apply a dot. He provides extra durability in the frontline and is usually built with Speed/HP/HP% and high accuracy, using Swift or Violent sets.
RileyTYPE: SUPPORT
Riley (Light Harp Magician): A strong all-around support unit. Riley offers healing, immunity, and buffs, making her a consistent pick for dot-based teams. She is usually runed Violent and built with high HP and decent accuracy.
VeromosTYPE: SUPPORT
Veromos (Dark Ifrit): Used in dot teams for his passive cleanse and AoE stuns, especially useful in early waves.
MelliaTYPE: SUPPORT
Melia (Wind Dryad): A central unit in DoT strategies. Melia applies continuous damage consistently and extends its duration. She benefits from high accuracy and HP, often runed Violent or Swift.
SathTYPE: ATTACK
Sath (Fire Grim Reaper): Works alongside Melia to enhance dot damage through his passive. He also provides AoE application of DoTs. Recommended builds include Will/Focus with speed and accuracy.
Urar, Iaru, Rayo, Crow: These monsters make up a beginner-friendly, fully farmable team for Abyss Hard, which can also be used in B10. Urar and Iaru offer utility, Rayo brings single-target damage with strong crit scaling, and Crow provides brand and high burst damage.
KroTYPE: ATTACK
Kro (Dark Inugami): A fast-clearing unit in burst-focused teams. He deals high damage to low-HP targets and benefits from skill-ups for increased defense break chance.
PangTYPE: ATTACK
Pang (Light Rakshasa): Used in some speed teams for multi-hits and damage scaling. Yen is often used as a substitute.
Jubelle (Dark Hellhound): A less common but usable monster with provoke. Often built tanky, with Energy/Endurance or Energy/Destruction and HP-based stats.
Mantura (Water Serpent): Sometimes considered, though less effective than more reliable picks.
Khali (Fire High Elemental): Occasionally used as a backup damage dealer. She is farmable through scenarios.
Example Team Compositions
Balanced Starter Team
Verdehile (Leader), Raoq (2A), Fran, Jultan (2A), Fire Homunculus
This team provides strong damage through Raoq and Homunculus, sustain from Fran, and frontline durability from Jultan. Some variations include using two Raoqs or replacing Jultan with Jubelle.
Tanky Sustain Team
Verdehile (Leader), Raoq (2A), Colleen, Jotan (2A), Yen
This composition focuses on survivability and utility. Jotan offers defense break and tanking, Colleen supports with healing and attack buff, while Raoq and Yen bring high single-target damage and DoTs.
Dot-Based Safe Team
Veromos (Leader), Melia, Sath, Riley
A reliable team that depends entirely on continuous damage. Riley keeps the team alive, while Melia and Sath apply and amplify dot effects. Fran may be swapped in for Riley if built with stronger stats.
Damage Over Time and Nuke Hybrid
Verdehile (Leader), Fran, Rica, Jultan (2A), Yen or Raoq (2A)
Rica applies AoE dots and crowd control, while Yen or Raoq contributes targeted burst damage. Jultan tanks and adds passive reflect damage.
Farmable Abyss Hard Transition Team
Urar, Iaru, Rayo, Crow
This team offers strong synergy for newer players, with all units being obtainable and capable of transitioning into Punisher’s Crypt B10. Focus is placed on tower elimination before targeting the boss.
High-Speed Boss Focus Team
Verdehile, Jultan (2A), Raoq (2A), Fran, Fire Homunculus
This team skips the towers and goes straight for the boss using DoTs, sustained damage, and constant turn cycling via Verdehile.
Artifacts in Punisher’s Crypt
The primary objective of farming Punisher’s Crypt B10 is to collect attribute-specific artifacts that enhance the stats of your monsters based on their type: Attack, HP, Support, or Defense. These artifacts provide bonus effects to any monster as long as their role matches the artifact type, regardless of their elemental attribute. This makes artifact farming an essential step for improving performance in dungeons, PvP, and other late-game content.
In Punisher’s Crypt B10, the artifacts obtained are type artifacts, and they can come with a variety of beneficial properties. Some of the most notable include critical damage bonuses for specific skills (S1, S2, S3, or S4), first attack crit damage, recovery bonuses, skill accuracy boosts, reduced critical damage taken, enhanced bomb damage, conditional crit damage increases based on enemy HP, additional damage effects based on a monster’s stats (HP, ATK, DEF, or SPD), life drain, and bonuses to counterattack or cooperative attack damage. Effects tied to speed buffs and attack/defense buff interactions are also present, making the artifact system highly customizable to suit specific monster builds and team strategies.
The Abyss version of Punisher’s Crypt further increases the potential value of artifact drops, offering stronger attribute artifacts. Notably, Punisher’s Crypt Abyss is the only location where the Intangible Artifact can drop. This special artifact has the unique ability to replace any type or attribute requirement, allowing for far greater flexibility when assigning artifacts to monsters. Additionally, the drop rates in the Abyss difficulty are significantly higher, offering more efficient farming for players with teams strong enough to handle its challenges.
For players new to Punisher’s Crypt, it’s advisable to start with lower-tier floors to build up a collection of gray-tier artifacts, which can still offer useful substats and help strengthen dungeon teams. If B10 proves difficult, running Steel Fortress B10 may offer a more manageable route to obtaining artifacts that can provide a boost until your team is ready for Punisher’s Crypt B10.
When managing artifact inventory, especially as a beginner, it is recommended to keep all Legend artifacts regardless of their substats. For Rare and Hero-grade artifacts, prioritize keeping those that show at least one max roll in valuable stats such as damage dealt, damage taken, recovery, accuracy, bomb damage, crit damage, life drain, additional damage based on stats, or counter/co-op damage. For speed-related substats, aim to keep artifacts that roll double speed boosts with a total of over 100%. To build a solid artifact base, one effective approach is to alternate farming between left-side and right-side artifact slots each week, helping to ensure you maintain balance and coverage across your monster roster.
Punisher’s Crypt Abyss and Abyss Hard
Punisher’s Crypt Abyss is the second version of the artifact dungeon that drops Type Artifacts. Compared to B10, the Abyss version demands stronger rune quality due to the higher stats of the boss and one of its skills being enhanced. A key strategy is to avoid using monsters with Attack Bar reduction effects, such as Loren, as they can trigger the boss’s passive ability. Instead, it is recommended to use monsters that can boost your team’s Attack Bar, like Verdehile.
The Abyss version also drops stronger attribute artifacts, and it is the exclusive source for the newly introduced “Intangible” Artifact, which can replace any artifact regardless of type. Additionally, the drop rates for artifacts are much higher in Abyss, making it a desirable stage to farm for more powerful gear once you can form a competent team.
The Abyss Boss shares the same abilities as the normal B10 boss but with an important difference. In Abyss, the “Dance of the Swords” skill also inflicts Continuous Damage for two turns with a 30% chance. As such, having monsters that can apply continuous damage (dots) and support the team with buffs and healing is key. For your first Abyss team, monsters like Verdehile, Raoq, Kro, Icaru, Eirgar, and Riley are strong options to consider.
Punisher’s Crypt Abyss Hard (PC12) is a much tougher version of the Abyss, requiring highly refined strategies and carefully selected teams. A good farmable team to start with includes Raoq, Kro, and Icaru. Raoq should be runed with Combat/Blade and optimized for speed and damage, while Kro is best runed with Rage/Immunity for extra durability. Icaru’s runes should mirror those of a typical F2P build.
One of the best speed-focused teams for Abyss Hard includes Julie, Eirgar, Icaru, Raoq, and Kro, with Eirgar being an essential member for applying buffs and debuffs. Fuco can also be a great nuker for reducing the boss’s speed and applying defense break. Speed tuning is important for Abyss Hard, and having monsters that can apply speed reduction to the boss helps ensure its skills are not enhanced too much.
The strategy for Abyss Hard typically involves targeting the mini-boss in Wave 2 and then focusing on the main boss in Wave 4. In Wave 1, it is important to eliminate the devices quickly to avoid unnecessary complications. Similar to the other versions, the Abyss Hard boss also has the “Dance of the Swords” skill, which inflicts continuous damage. The rewards for defeating the Abyss Hard boss include artifacts ranging from rare to legendary in 6-star quality, conversion stones, mystical scrolls, and metamorphosis stones.
Both the Abyss and Abyss Hard versions of Punisher’s Crypt maintain the core mechanic of the boss gaining a turn instantly when its Attack Bar is reduced. As such, the focus remains on Attack Bar boosting monsters and high-damage dealers that can apply continuous damage. In these stages, targeting the left tower to prevent the boss from cleansing debuffs on itself is an effective strategy that can be applied.
General Tips for Success
In Punisher’s Crypt B10, success heavily relies on utilizing continuous damage (dots) and efficient team strategies. One of the most effective ways to deal with the boss is to prioritize monsters that can apply multiple dots, as the boss gains many turns, and these dots will accumulate significant damage over time. Another key strategy is to focus on Attack Bar manipulation—boosting your team’s Attack Bar with monsters like Verdehile is highly recommended to cycle through turns quickly. Verdehile should ideally move last in the turn order to maximize the Attack Bar boost for your team.
A common strategy is to target the left tower, the Purification Device, first. This prevents the boss from cleansing harmful debuffs such as defense breaks and dots. After dealing with the left tower, some teams focus on the right tower, which buffs the boss, while others go straight for the boss, especially if their composition revolves heavily around dots. Ensuring your team is tanky enough to withstand the boss’s strong attacks is also essential for consistent clears.
Applying defense break to the boss is crucial, as it amplifies the damage your team deals. Monsters like 2nd Awakened Jotan and 2nd Awakened Raoq are excellent choices for this role. Bringing sustain through healing and immunity is equally important. Units like Fran, Colleen, and Riley are good examples of support monsters that can help your team survive longer. Speed tuning is vital, as it ensures that your defense breakers land their debuffs before your primary damage dealers act, optimizing overall damage output.
Be mindful of the boss’s passive ability, which grants it an immediate turn when its Attack Bar is reduced. As such, using monsters that reduce the boss’s Attack Bar, such as Loren, should be avoided, as this can trigger the boss’s passive, potentially sabotaging your run. If you’re struggling with B10, starting with lower tiers of Punisher’s Crypt can provide basic artifacts to help boost your initial teams, and revisiting Steel Fortress B10 can also provide useful artifacts.
Experimenting with different team compositions is a valuable approach since there is no one-size-fits-all solution. Pay attention to rune builds—Violent runes for additional turns and Vengeance runes on Verdehile for Attack Bar gain when attacked are commonly recommended. Damage dealers should have sufficient Crit Rate and Crit Damage, while support units need to be tanky and accurate enough to land important debuffs like defense break and dots. Skill-ups on key monsters can also improve performance by reducing cooldowns, increasing damage, and enhancing debuff application rates.
Artifacts play an essential role in improving your monsters’ stats and performance. Focus on farming type-specific artifacts from Punisher’s Crypt and Steel Fortress to enhance your monsters’ effectiveness. Avoid relying on Attack Bar reduction abilities, as they will backfire. A dot-centric team, with units like Fire Homunculus, Yen, and Rica, is often a safe and successful option.
Finally, optimize your team’s turn order to increase efficiency. For dot teams, ensure that your dot dealers act before the boss takes too many turns. For Attack Bar boosting teams, make sure Verdehile moves last to maximize the Attack Bar boost. Be prepared for trial and error, as it may take some adjustments to find a stable team that suits your rune quality and available monsters. Don’t be discouraged by early failures; analyzing what went wrong and adjusting your team accordingly is key to eventually finding success.
PrevPreviousSummoners War Chaos Beast Guide NextSummoners War Monster Fusion GuideNextAbout the Author
Nel B
Nel has been passionate about playing games since childhood. His love for gaming started with the PlayStation. Over the years, he has enjoyed a variety of games, but some of Nel's all-time favorites include Dota, Monster Hunter, and MMORPGs. Gaming has not only shaped his skills but also helped him build lasting connections with friends. 0 0 votes Rating Login Please login to comment 0 Comments Inline Feedbacks View all comments wpDiscuzInsert


