World Of Warcraft: Dragonflight - Halls Of Valor Complete Dungeon Walkthrough
Legion was widely considered to be one of the best expansions that World of Warcraft has ever seen, bringing more flavor and diverse content than anything that preceded it. Halls of Valor was one of the most iconic dungeons of that time, offering beautiful vistas, an engaging story, and memorable boss mechanics.
Related: World Of Warcraft: Dragonflight - The Nokhud Offensive Complete Dungeon Walkthrough
Since Legion, there has been little need to revisit the old dungeon, aside from collecting appearances. However, it's reappeared in the current Mythic+ pool of Dragonflight Season One, which may catch some people off-guard. Whether you've never been there or you're just rusty, here's everything you need to know about Halls of Valor.
Halls Of Valor Location
The entrance to Halls of Valor is located in the Gates of Valor near the southern shore of Stormheim, one of the zones of the Broken Isles. If you played through the Legion storyline, you'll recognize this as the place where the Stormheim storyline ends.
The quickest way to get there is by using your purple Dalaran Hearthstone, if you have one left over from Legion. If not, there's a portal to Dalaran in Valdrakken that functions the same way. Once you're in the Broken Isles, it's just a matter of flying over to the zone.
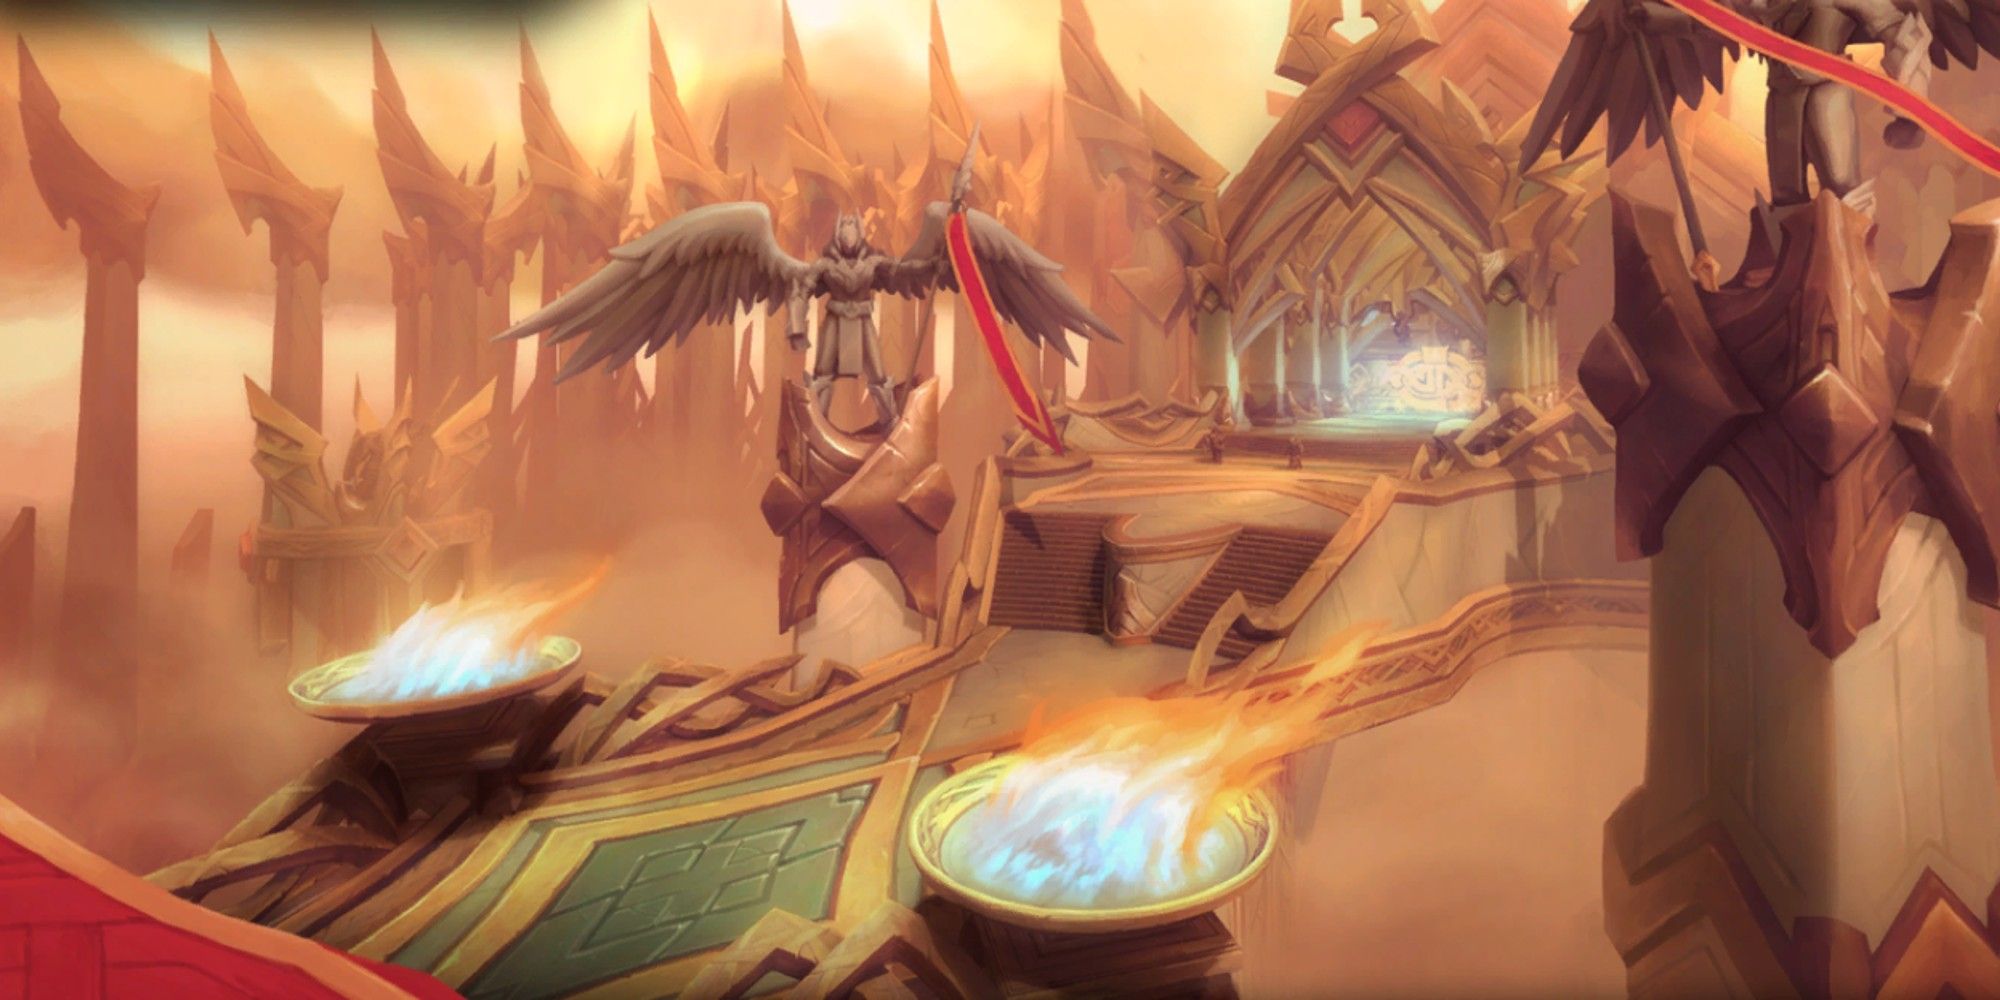
Hymdall Trash
As you zone into the instance, you'll be met with a long, straight bridge that leads right to the first boss: Hymdall, the Guardian. Before you can challenge him, however, you'll have to fight through a few mob packs.
Enemy
Mechanic
Description
Strategy
Valarjar Champion
Power Attack
Deals a large set amount of Physical damage.
Popping minor defensives, such as barriers, and not pulling too many Champions at once will help mitigate the damage taken.
Enraged Regeneration
Once this unit falls beneath 30 percent health, they gain five percent health back every one second for six seconds.
Keep your burst damage until the Champion is just over the threshold, then burn it down as quickly as possible.
Valarjar Thundercaller
Thunderstrike
A random party member is targeted with an unavoidable AoE that deals a set amount of damage to any ally around them.
Move away from the rest of the group while focusing on battering down the Thundercaller first.
Thunderous Bolt
Deals a set amount of Nature damage to the Thundercaller's current target.
This attack is easily interrupted or stunned, so do this as a priority.
Storm Drake
Lightning Breath
Deals a set amount of Nature damage to anyone within a cone in front of the Drake.
DPS should stand behind the Drake while the tank faces it away.
Crackling Storm
Targets an area on the ground and summons wandering vortexes that damage party members on contact.
Move out of the way of both the damage field and the vortexes.
Hymdall
Hymdall's fight requires attention and focus from every party member, and it stands as a test of mobility for many groups. Everyone needs to know where the Storm Drakes are once they're summoned to take up positions properly. Expect to have to keep moving throughout the fight to dodge his zoning abilities.
Difficulty
Mechanic
Description
Strategy
All
Bloodletting Sweep
Hymdall deals a set amount of damage to his current target and inflicts bleed that deals damage every two seconds for eight seconds.
The tank should counter the DoT with defensives, and the healer should apply whatever shields or HoTs they have to do the same.
All
Dancing Blade
Hymdall plants a sword on the ground near a random party member. The sword will deal damage to anyone it touches every two seconds.
If you're targeted by Dancing Blade, quickly move away from the area and avoid it for the rest of the fight.
All
Horn of Valor
Hymdall deals a set amount of damage to every party member and summons Storm Drakes for Static Field and Ball Lightning.
The healer should be ready for party-wide damage once Hymdall begins the cast.Get ready to avoid the Storm Drakes' abilities below.
All
Static Field
Storm Drakes glide across a third of the arena, coating it in a lingering damage field. Once the field dissipates, it will repeat the action for the other two thirds of the arena.
Watch the sides of the arena to see where the Storm Drake will spawn. If it's to the left or to the right of you, move to another part of the arena, then move back when the damage field is gone.
Heroic / Mythic / Mythic+
Ball Lightning
Tornados are born from Static Field and travel across the length of the arena, dealing a set amount of damage.
Keep an eye out for wandering tornados and avoid them accordingly.
Hyrja Trash
Once Hymdall has been bested and you've passed his trial, you'll have to fight through quite a few more mobs. Your aim is to travel up one of the staircases and enter the Hearth of Revelry. From here, take a left to find the next boss, Hyrja.
Enemy
Mechanic
Description
Strategy
Stormforged Sentinel
Sentinel's Watch
Gives the Sentinel's allies immunity to interrupts and stuns.
Move the Sentinel away from any other mob so that they don't benefit from the aura.
Crackle
Creates a linear lingering storm effect on the ground that damages the party.
Avoid the storm effect on the ground by moving away from it.
Charged Pulse
Attacks in a wide AoE with a long cast time.
Move away from the radius of the AoE, as Sentinels cannot be stunned.
Protective Light
Shields the caster to absorb a set amount of damage.
Use Dispel or Purge to get rid of the shield.
Valarjar Shieldmaiden
Breach Armor
Reduces the armor of the Shieldmaiden's current target by ten percent. This debuff can stack.
Pop defensives and focus down the Shieldmaiden so that the stack doesn't get too high.
Mortal Hew
Attacks in a wide arc in front of the Shieldmaiden that deals a set amount of damage to everyone hit and applies a reduced healing debuff.
DPS should position behind the Shieldmaiden while the tank faces them away from the party.
Valarjar Runecarver
Shattered Rune
Deals a set amount of Shadow damage to a random party member.
This can be interrupted with a stun, though it would be better to focus on downing the Runecarver as quickly as possible.
Etch
Applies a DoT that does a set amount of Shadow damage every one and a half seconds for six seconds.
This ability is easily interrupted or stunned.
Valarjar Mystic
Holy Radiance
Heals the Mystic's allies for a third of their maximum health.
If possible, isolate the Mystic from its allies in order to prevent the mass healing AoE.
Rune of Healing
Targets the ground with a lingering healing field that restores five percent maximum health every two seconds for ten seconds.
Rune of Healing can be used by party members as well to restore their own health, so long as you don't allow mobs to stand on it.
Valarjar Purifier
Cleansing Flame
Spews balls of light along the ground that hunt each member of the party.
This ability is easily interrupted or stunned. If no interrupts are off cooldown, allow the balls to chase you around until the channel is over.
Valarjar Aspirant
Blast of Light
Attacks in front of the Aspirant with a large set amount of Holy damage.
Position either to the side or the back of the Aspirant.
Valkyra's Advance
Jumps up and crashes down on the ground, dealing a set amount of Holy damage to any party member within its radius.
Move away from the target on the ground to avoid the damage.
Solsten
Eye of the Storm
Solsten creates a damaging storm that fills the entirety of the arena, dealing a set amount of damage every one and a half seconds for nine seconds. If party members stand within the bubble formed at the center of the storm, it shields them for 75 percent of the damage.
Every party member should be inside of the bubble during Eye of the Storm while popping minor defensives to mitigate damage.
Arcing Bolt
Solsten bounces a bolt of lightning among five to six targets, dealing a set amount of damage to each target.
Party members should separate from one another to minimize the bouncing as much as possible.
Olmyr the Enlightened
Sanctify
Olmyr the Enlightened creates glowing orbs that travel around the arena and deal a set amount of damage to anyone that touches them.
Use mobility spells to easily move around the orbs.
Searing Light
Deals a set amount of Holy damage to Olmyr the Enlightened's current target.
Use interrupts or stuns to negate the damage altogether.
Every mob pack within the Hearth of Revelry can be distracted by an item called Mug of Mead. This is found on the tables within the hall, and if thrown at a group of mobs, they will turn hostile on one another and allow you to sneak by them. However, keep in mind that you can still draw threat while they're in this state, and the effect doesn't last forever.
Hyrja
Hyrja has a puzzle element to her boss fight. Once Solsten and Olymr the Enlightened have been eliminated, their ghosts will linger to empower Hyrja. However, by moving her around the arena, you can cut off one of the ghosts' aid to make the fight much easier to deal with.
Difficulty
Mechanic
Description
Strategy
All
Shield of Light
Hyrja does a set amount of Holy damage in a line and knocks back players that are hit.
Avoid being in Hyrja's line of fire when she's casting the ability.
All
Mystic Empowerment: Thunder
If Hyrja is near Solsten, she is able to cast Eye of the Storm and Arcing Bolt. Solsten continues to empower Hyrja every four seconds, increasing the damage of the two abilities by ten percent.
Drag Hyrja toward Solsten's side of the arena to cut off Olmyr the Enlightened's empowerment.
All
Eye of the Storm
Hyrja creates a damaging storm that fills the entirety of the arena, dealing a set amount of damage every one and a half seconds for nine seconds. If party members stand within the bubble formed at the center of the storm, it shields them for 75 percent of the damage.
Every party member should be inside of the bubble during Eye of the Storm while popping minor defensives to mitigate damage.
All
Arcing Bolt
Hyrja bounces a bolt of lightning among five to six targets, dealing a set amount of damage to each target.
Generally, the party spread out to avoid this bouncing. Healers should brace for incoming damage while the tank and DPS use whatever absorb shields they have.
All
Mystic Empowerment: Holy
If Hyrja is near Olmyr the Enlightened, she is able to cast Sanctify and Expel Light. Olmyr the Enlightened continues to empower Hyrja every four seconds, increasing the damage of the two abilities by ten percent.
Drag Hyrja toward Solsten's side of the arena to cut off Olmyr the Enlightened's empowerment.
All
Sanctify
Hyrja creates glowing orbs that travel around the arena and deal a set amount of damage to anyone that touches them.
Use mobility spells to easily move around the orbs.
All
Expel Light
Hyrja makes a random party member explode with Holy after three seconds, damaging anyone standing within eight yards of them.
If you're targeted by Expel Light, quickly move away from the rest of the team.
Upon starting the Hyrja fight, it should be imperative to drag the boss away from the center of the arena as quickly as possible. If Hyrja is allowed to remain in the middle of Solsten and Olmyr the Enlightened, she gains both empowerments and is able to cast both sets of abilities.
Instead, it's easier to drag Hyrja closer to Solsten and out of range of Olmyr the Enlightened. Eye of the Storm and Arcing Bolt are objectively easier to deal with, and members only have to worry about moving into the bubble during the storm.
Related: World Of Warcraft: Dragonflight - The Azure Vault Complete Dungeon Walkthrough
Fenryr Trash
Once Hyrja is dealt with, every party member will gain the buff Odyn's Favor, which increases movement speed by75 percent for the rest of the dungeon.
Double back through the Hearth of Revelry until you reach where you first came in. Now, instead of hanging to the left, cleave through the mob packs on the right to proceed toward the portal of the Fields of the Eternal Hunt.
Enemy
Mechanic
Description
Strategy
Valarjar Marksman
Snap Shot
Deals a set amount of Physical damage to a random target.
Use minor defensives to absorb the small hits.
Leap To Safety
Jumps away from the party and takes 25 percent reduced damage for six seconds.
Close the distance between the party and the Marksman to continue bursting it down.
Penetrating Shot
Shoots a linear projectile in front of the Marksman that pierces through every party member in the way, ignoring armor.
Position yourself anywhere other than in front of the Marksman.
Valarjar Trapper
Bear Trap
Throws a bear trap on the ground. If a member steps in the bear trap, they're stunned for three seconds and it applies a bleed for a set amount of Physical damage over twelve seconds.
Avoid stepping in any bear traps on the ground.
Angerhoof Bull
Rumbling Stomp
Attacks in an AoE to deal a set amount of Physical damage to any nearby party member and knocks them back.
Move away from the Bull's AoE or stun it to stop it completely.
Enrage
Gains ten percent increased Physical damage and 30 percent increased attack speed for 30 seconds.
Dispel Enrage or burst down the Bull as quickly as possible.
Steeljaw Grizzly
Charge
Rushes toward the first enemy the Grizzly sees, reducing movement speed by 70 percent for one second.
Don't try to group up too many mobs at once while a Grizzly is around, and make sure to heal the Tank.
Crunch Armor
Increases the amount of damage taken by the current target by ten percent for ten seconds.
Shields and minor defensives or HoTs can counteract this debuff fairly well.
Rending Claws
Deals a set amount of Physical damage.
If affected by the debuff from Crunch Armor, damage mitigation helps guard against this attack.
Ebonclaw Worg
Leap For The Throat
Jumps to a party member, dealing a set amount of Physical damage to any nearby members.
The party should space out when dealing with Worgs to reduce the amount of incoming damage.
Fenryr
Although Fenryr doesn't have many mechanics, he is still considered dangerous nonetheless. You'll be expected to coordinate with your group to either move together or separate away from one another, so it is imperative to know Fenryr's moveset, especially in higher keys.
Difficulty
Mechanic
Description
Strategy
All
Claw Frenzy
Fenryr deals a set amount of damage that's split among all members within 12 yards. Claw Frenzy never misses and will always ignore armor.
Group up on the tank to eat the minimal damage evenly. Heal up victims afterwards.
All
Unnerving Howl
Fenryr interrupts all casting for three seconds. In heroic difficulty and above, he also summons three other wolves to attack the party.
As soon as Fenryr summons the wolves, switch your focus to bursting them down.
Heroic / Mythic / Mythic+
Strength of the Pack
Fenryr's damage is increased by twenty percent for every wolf nearby.
Nullify the boss's buff by killing the wolves as quickly as possible.
All
Ravenous Leap
Fenryr jumps to three random party members, inflicting a set amount of damage to them and anyone next to them, as well as inflicting a bleed that deals damage every three seconds.
Space yourself out from the rest of the party to avoid spilling the damage. DPS and Healers can mitigate the Bleed effect stacks by popping defensives or healing up.
All
Scent of Blood
Fenryr chases after a random party member for six seconds while the member is granted extra movement speed. If Fenryr catches them, he will kill them instantly or bring them to critical levels, depending on their health.
Run away and kite the boss around the arena. With the movement speed buff, as long as you keep your distance, you'll outpace him.
Along with the regular gear rewards, on Mythic and above difficulty, Fenryr will spawn again as a neutral mob in the cave behind where you kill the boss version. This gives beast mastery hunters a chance to tame this version of Fenryr and keep him as a pet.
God-King Skovald Trash
After Hymdall, Hyrja, and Fenryr have all been downed, every party member gains the buff Odyn's Blessing. This replaces Odyn's Favor, increasing movement speed by another 75 percent for a total of 150 percent, and it grants access to the final room of the dungeon.
Proceed back through the Hearth of Revelry one last time, find the large door in the middle of the hall and race up The Ephemeral Way to reach Odyn's room, the Hall of Glory.
Enemy
Mechanic
Description
Strategy
King Ranulf
Unruly Yell
Silences long cast times within his radius for three seconds.
Avoid standing near King Ranulf or try to interrupt him through stuns.
King Haldor
Sever
Deals a set amount of Physical damage and makes the current target take twenty percent more Physical damage. This effect can stack.
Pop defensives and damage mitigation in order to avoid the exponential stacks from the debuff.
King Bjorn
Wicked Dagger
Deals a set amount of Physical damage and reduces healing received on a random party member.
Use minor defensives to tank the damage. Healers should pay close attention and keep HoTs on affected members if possible.
King Tor
Call Ancestor
Summons an Honored Ancestor, which moves toward King Tor. If it reaches him, he's healed for half his maximum health.
Kill or slow down the Honored Ancestor to prevent him from reaching King Tor.
Keep in mind that while you can challenge the Kings in any order, when one is defeated, the others will gain their signature ability. It's wise to clear them from left to right, first taking out Ranulf, then Haldor, and ending with Bjorn and Tor.
God-King Skovald
When all four Kings are defeated, Odyn will grant the party the Aegis of Aggramar, which blocks any incoming damage from the front. Whoever is wielding the Aegis will be the most important person in this boss fight, and so it should be claimed by the tank. When that happens, God-King Skovald will appear from behind the party. Be sure to group up with your tank behind the Aegis to avoid Ragnarok's party wipe mechanic.
Difficulty
Mechanic
Description
Strategy
All
Ragnarok
Upon reaching 100 energy, Skovald deals a set amount of Fire damage to the party every one and a half seconds for nine seconds. Ragnarok increases the damage of the next Ragnarok by 25 percent with stacking effects.
This effect can be nullified by using the Aegis of Aggramar's special ability and hiding within the protective dome.
All
Felblaze Rush
Skovald charges toward his current target and deals a set amount of Fire damage to them and places a burn on anyone within six yards that deals damage every one second for twelve seconds.
Space yourself out from the rest of the party to avoid spilling the burn on to teammates.
All
Aegis of Aggramar
Anyone who has the Aegis of Aggramar, whether that be Skovald or a party member, can use a special ability to block any damage from the front for nine seconds.
While you are in possession of the Aegis, click the glowing button on your screen to activate its ability. When Skovald uses it, circle around to his back to deal damage.
Heroic / Mythic / Mythic+
Flame of Woe
Skovald summons a Flame of Woe while he's protected by the Aegis. The Flame chases a random party member every one and a half seconds while spreading Infernal Flames.
Keep your distance from the Flame of Woe and kite to the edge of the arena so that Infernal Flames doesn't get in the way of the fight.
Heroic / Mythic / Mythic+
Consuming Flame
The Flame of Woe will lose five percent of its health every three seconds until it is dead.
Don't bother about trying to burst down the Flame of Woe, as it burns itself out anyway. Just make sure to avoid both it and the field it leaves behind.
Heroic / Mythic / Mythic+
Infernal Flames
A lingering damage field is left behind by the Flame of Woe while it moves, dealing a set amount of Fire damage every half a second.
Move away from the spreading damage field and don't go anywhere near it.
All
Savage Blade
Skovald deals a set amount of damage to his current target.
Use minor defensives like shields to eat the damage.
Do not use the Aegis of Aggramar when Skovald is not channeling Ragnarok. If you do so, then the Aegis will overload, and you won't be able to use it for Ragnarok, likely resulting in a party wipe.
Odyn
After God-King Skovald has been felled and the Aegis of Aggramar has been claimed, Odyn himself descends to the battlefield to fight you. His fight, just as with Hymdall and Fenryr, will consist of making good use of your mobility spells to avoid dying from Runic Brand or Radiant Tempest. Keep an eye out for wandering Glowing Fragments as well - they can chain-stun you if you aren't careful.
Difficulty
Mechanic
Description
Strategy
All
Runic Brand
Odyn applies a brand to every party member. This will slowly chip away at their health every one second until they are dead or they find the corresponding rune on the floor around Odyn, which removes Runic Brand and gives Branded.
Quickly find the corresponding rune on the floor of the arena. This is easily done by matching the color of the glowing circle with the color of the rune above your head.
All
Branded
Upon matching the brand with the proper rune, party members are healed to full health and transform into glowing Val'kyr, increasing damage and healing by 50 percent and increasing movement speed by 25 percent.
You'll want to transform as soon as possible, as the buff makes the fight significantly easier.
All
Spear of Light
Odyn summons glowing spears at a random party member's location, dealing a set amount of damage to anyone around it and lingering to inflict damage every two seconds. In higher difficulties, Glowing Fragments erupt from each spear and travel around the arena.
Avoid the spear when it pops up and be mindful of moving around the traveling orbs that it spawns. Try to tank the boss away from casts.
All
Glowing Fragment
If a party member touches a Glowing Fragment, it explodes and stuns the member for three seconds while doing a set amount of damage.
Keep an eye out for the wandering orbs and take care not to come into contact with one. Heal players hit by an orb.
All
Shatter Spears
Every lingering spear transforms into five Glowing Fragments.
As the arena becomes filled with Fragments, pull the boss to a spot where it isn't so cluttered. Move away from the Spears of Light.
All
Radiant Tempest
Odyn begins to channel a massive AoE around himself, dealing enough damage to instantly kill party members still trapped within as the channel completes.
As soon as Odyn begins his channel, immediately use mobility spells to get to the edge of the arena as quickly as you can.
Heroic / Mythic / Mythic+
Summon Stormforged Obliterator
Odyn calls a Stormforged Obliterator into the fight to help him fight back against the party.
Once Odyn summons the Obliterator, focus on bursting him down like with Fenryr's wolves.
Heroic / Mythic / Mythic+
Surge
The summoned Stormforged Obliterator casts an uninterruptable attack to deal a set amount of damage to all players. Every Surge reduces the cast time of the next Surge by 100 percent with stacking effects.
If left unchecked, Surge can quickly spiral out of control and threaten the party with a wipe. Be sure to burst down the Obliterator as soon as he's summoned, and try to stun or interrupt it if you can.
Halls Of Valor Loot
Slot
Name
Stats
Hymdall
One-Hand Weapon
Key to the Halls
Critical Strike, Haste
Wrist
Adorned Guardian's Bracers
Critical Strike, Haste
Hands
Battleborne Sentinel Gauntlets
Critical Strike, Haste
Waist
Thundercaller's Chain
Critical Strike, Mastery
Feet
Cushioned Treads of Glory
Haste, Mastery
Trinket
Horn of Valor
Versatility
Hyrja
Shoulder
Amice of the Enlightened
Haste, Versatility
Chest
Thunderfused Val'kyr Hauberk
Haste, Mastery
Waist
Solsten's Arcing Runecord
Versatility, Mastery
Feet
Valkyra Protector Greatboots
Haste, Mastery
Finger
Val'kyr Ascension Signet
Critical Strike, Mastery
Trinket
Mote of Sanctification
Mastery
Fenryr
One-Hand Weapon
Fenryr's Bloodstained Fang
Critical Strike, Mastery
Neck
Wolfstride Pendant
Haste, Mastery
Back
Goldscar Pelt
Critical Strike, Haste
Chest
Hide of Fenryr
Haste, Mastery
Wrist
Runebands of the Worthy
Critical Strike, Haste
Hands
Silken Bloodscent Gloves
Critical Strike, Haste
Waist
Greatbelt of Alpha Dominance
Critical Strike, Haste
Trinket
Hunger of the Pack
Critical Strike
God-King Skovald
Off-Hand Shield
Skovald's Resolve
Critical Strike, Mastery
Shoulder
Infernal Mantle of Conquest
Haste, Mastery
Hands
Cruel Vice Grips
Critical Strike, Mastery
Legs
Greaves of the God-King
Critical Strike, Mastery
Feet
Felstep Footguards
Critical Strike, Mastery
Finger
Woe-Bearer's Band
Critical Strike, Mastery
Trinket
Eye of Skovald
Critical Strike
Odyn
Head
Collar of Honorable Exultation
Haste, Mastery
Head
Glory Seeker's Helm
Haste, Mastery
Neck
Pendant of the Stormforger
Critical Strike, Haste
Shoulder
Pauldrons of the All-Father
Haste, Mastery
Back
Cape of Valarjar Courage
Versatility, Mastery
Wrist
Solid Gold Bracelets
Critical Strike, Versatility
Wrist
Wristbands of Magnificent Splendor
Critical Strike, Versatility
Waist
Bjorn's Hunting Strap
Critical Strike, Mastery
Legs
Leggings of Swirling Runes
Haste, Mastery
Feet
Treads of Light
Critical Strike, Versatility
Trinket
Gift of Radiance
Mastery
read moreNext: World Of Warcraft: Dragonflight - Court Of Stars Complete Dungeon Walkthrough