There are plenty of ways to die in a Raid in Meet Your Maker, and it can sometimes feel like it's unfair and comes out of nowhere. From sneaky and creative trap placement to dog piles of guards when you least expect it everything in those player-created Outposts has been placed with the purpose of killing you and ending your Raid as quickly as possible.
RELATED: The Best FPS Games With Platforming
There aren't a lot of moving parts to this game to memorize as it's pretty simple, but it's the creativity of others that can be downright devilish. However, there are a few tricks you can learn that can make each heist a little easier and after a while, you'll be breezing through those high-difficulty Outposts with ease. To help you get back to safety with your pockets filled with GenMat, here are a few things we wish we'd known going into Meet Your Maker.
10 It's Worth Taking Your Time
Tip number one that we wish we'd known going in is that it really pays to take your time. Whilst the trailers make it look like a fast-paced FPS, most if not all of your time is going to be spent slowly creeping along corridors and peeking around every corner. A single hit means death, and whilst you can just throw yourself at each Raid, again and again, it's more efficient to be cautious.
There is no time limit, and some of the trap and guard placements made by other players can be absolutely brutal and deliciously twisted. Plus, with the unlockable upgrade that activates traps after the Gen-Mat has been grabbed, areas you sprinted thoroughly safely on the way in might turn into death traps on the way out. So be cautious, be clever, and don't get overconfident.
9 Don't Forget About The Lean
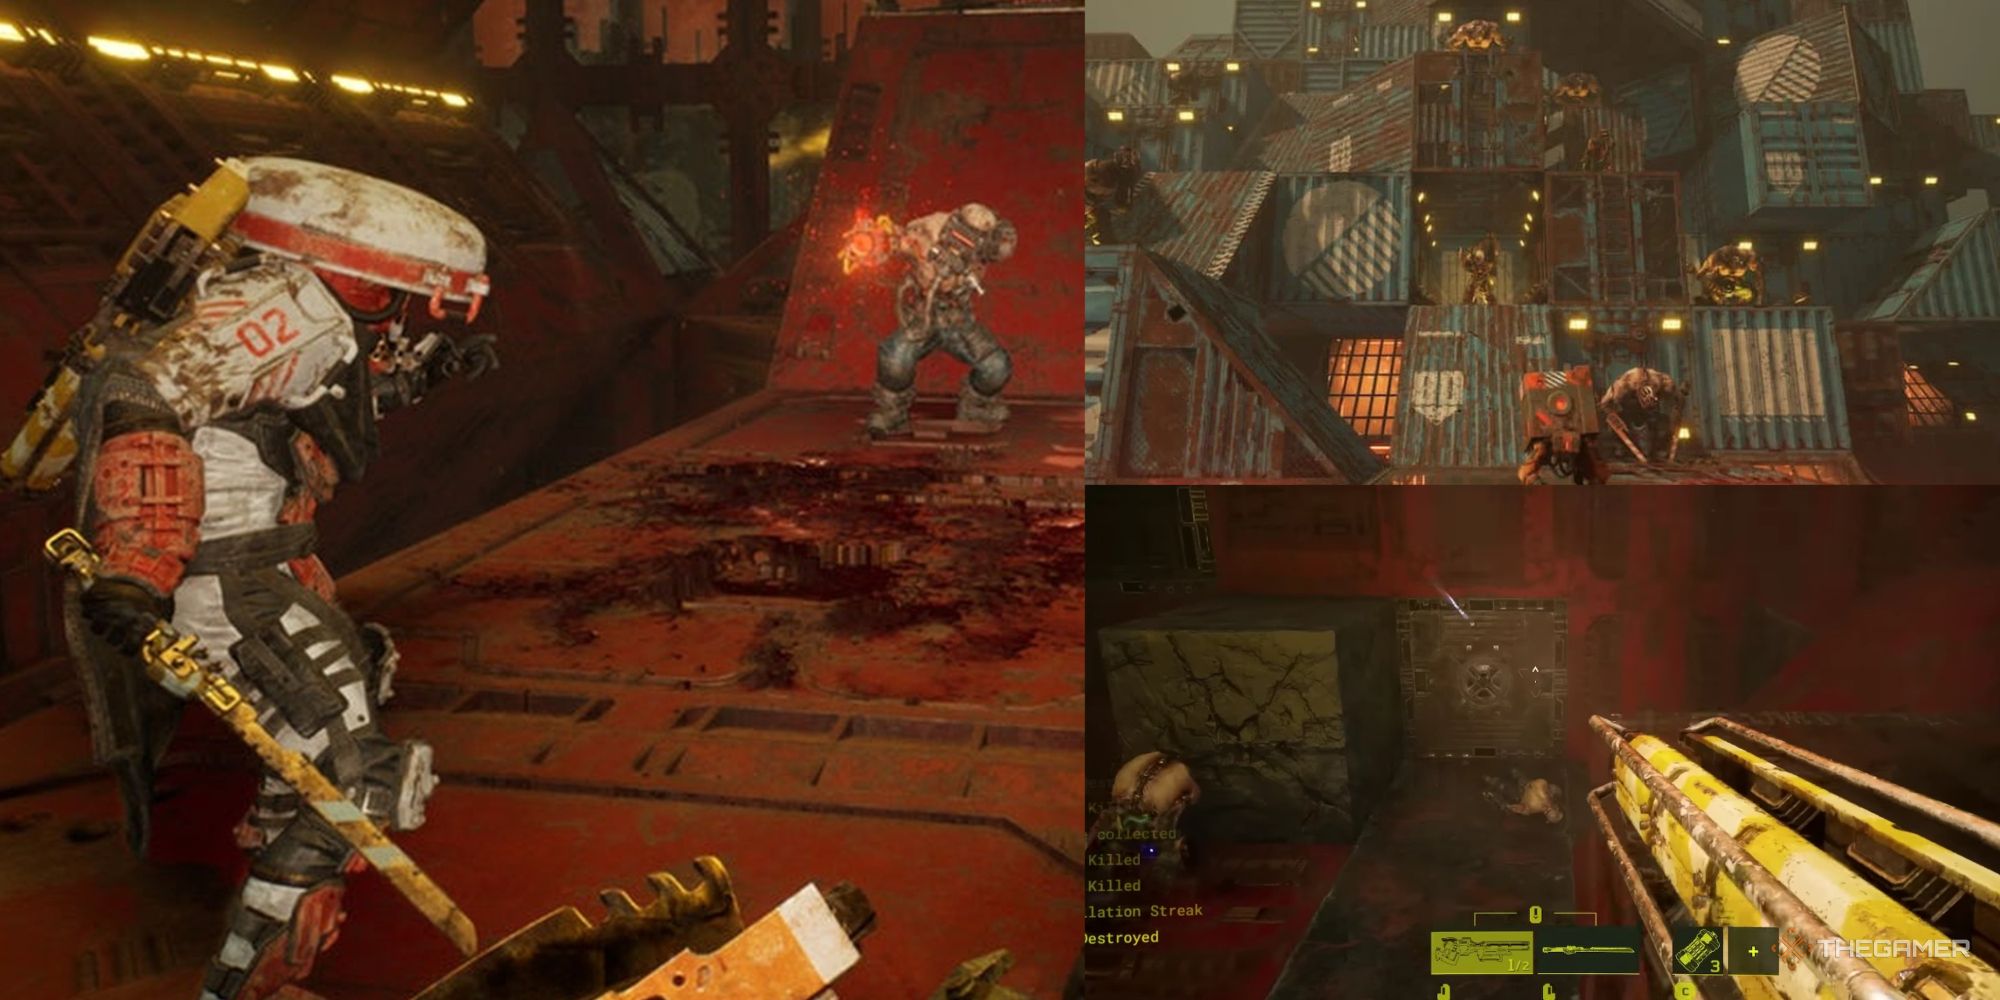
A mechanic you will honestly barely see anyone else do, leaning is incredibly helpful, especially early on when you're still figuring things out and later on when trying 'Dangerous' or 'Brutal' difficulty Raids. Why it's handy is that it lets you look around a bend without triggering a trap.
Normally, the second your entire body steps onto a square, anything hostile next to or within range of that space will activate. So the lean is helpful for that little peek at what you could be facing or if there are any telltale signs of hazards like protruding spikes or shimmering hologram floors over player-made death pits. It's also a nice way to give a friendly wiggle to the mapmaker to show your appreciation for their Raid map since Raider POVs can be watched in the Replay Machine.
8 The Grapple Is Your Best Friend
If video games have taught us anything it's that Grappling Hooks are a problem solver. The one you're provided with in Meet Your Maker is a dependable friend that will speed up your escapes and save you from plummeting to your doom at the worst moment. It costs nothing to use, has a decent range, and a relatively short cooldown, if you're not using it regularly you're missing out.
For example, one of the most useful benefits of the Grapple is that it lets you zip past most traps before they have the chance to fire. Since most hazards take around two seconds to fire (there's a charge-up), by the time they trigger you're long gone. Also, not only can it be used to get you closer to traps to break them, it keeps you attached to surfaces for a few seconds. Which is ideal if you're staying out of the grasp of Guards or taking a breather to assess the room.
7 Never Run Straight Out The Exit Door
When the adrenaline has kicked in and you're fighting tooth and nail to get out, make sure you don't go in a straight line when you leave. It's incredibly easy, and very common to get shot in the back just a few feet from the escape zone.
RELATED: The Best Boss Fights In FPS Games
Putting a close-range trap right at the door or a long-range one like Boltshot angled at the exit area is a cheap trick, but it's reliable. A lot of map builders will usually stick something right by the door that will appear during the Exit Phase. So either take a second to check the way out, or run straight out into the desert in a diagonal or random direction. Most builders don't take that into account so you can just easily bypass any waiting surprises. Or, if in doubt, chuck a grenade or two by the door and see if anything pops up in the XP tracker.
6 Use The XP Tracker For Kill Confirms
It can often be quite hectic and paranoia-inducing wandering around someone's maze in a Raid. A good tip to keep in mind is to use the XP Tracker on the left of the screen as a kill confirm. Every time you kill a Guard or smash a trap it will give XP, and it's shown in a little log.
With visibility often being an issue in a cramped labyrinth or a big room filled with projectiles and particle effects, knowing what's been destroyed and if a trap has been smashed is super helpful. For example, if you're firing your weapon blind or if you're presented with a hallway you can't see the end of, chuck a grenade and see if anything pops up on the left. It's a simple trick, but it's a handy way to know if the space you just threw some explosives into is safe or not.
5 Bring A Buddy
Raids can be pretty tough on your own and since death means a full restart with a loading screen inbetween, grinding through an Outpost can take quite a while. Bringing along a buddy in co-op streamlines things substantially and makes those high-difficulty level maps a little easier.
RELATED: Single-Player FPS Games That Need Co-Op
As an example, in co-op mode you can be revived by your partner if you catch a bolt to the face or get caught out by a spike trap through your rib cage. Another benefit is that it lets you diversify your Raid approach using the two weapon types since one specializes in organic targets and the other mechanical. So you could have someone that focuses on guards, movement, and melee, whilst the other deals with traps and takes potshots from a safe distance.
4 Tips For Traps
First off, don't trust anything, ever. Consider each new hall, corner, and sloped ramp to be built for the express purpose of setting you up for a kill. Outposts are primarily made to give you a hard time, and depending on the builder it can get pretty sadistic. Any surface can have a trap on it and a good tip is to always check behind you when going up ramps or into new areas.
The best way to deal with traps is to try and spot them first, then quickly step in and out of their target square to set them off. This neutralizes most of them as they'll usually close after triggering. On that topic, never assume that a trap firing once means it's done. Some of them can fire twice or continually until they're destroyed, so double-check after you're done.
3 Builder Tips
Whilst Raiding is the main part of the game, building an outpost is something you really should get involved in. It is optional, but there are a number of benefits to doing so. The most obvious being is that it quietly ticks up resources in the background and when you stop by to visit you can collect even more from the corpses of dead Raiders.
It can be quite satisfying to see what traps in your setup got the most victims, and it helps you to learn what sort of traps work well together. Although, don't make your level too hard as the game will decide its complexity level and often the higher difficulty maps won't get a lot of raids. Finally, watch the replays of your outposts, these are great for figuring out which traps and guard clones routinely catch Raiders and what ones they just breeze past. Take notes from Raids you've done yourself and try to incorporate or take inspiration from them to design deadlier mazes.
2 Always Carry Grenades
To give you a fighting chance there are a handful of helpful gadgets to shove in your pockets as you go on Raids. Though they're consumables, they can be crafted again and the most useful of the bunch is the grenades. They instantly kill any Guard type as well as smash apart traps within their range.
Though you're limited to just three, they do refill on each run. A good tip for grenades is to stockpile them so you never have to worry about running out. They cost 100 Machine Parts to make, which makes them relatively inexpensive, so always top up after a Raid as it'll pay off in the long run.
1 Check Your Fire
The last tip worth knowing in Meet Your Maker is to watch how itchy that trigger finger gets. You don't get a lot of ammunition for your two weapons, and whilst you can increase their minuscule amount a smidge more with upgrades, there isn't going to be ammo boxes scattered around to recover those rounds.
Instead, any projectile that's fired has to be physically recovered. So if those shots go wide and fly off into the darkness, you're going to need to go get them. A lovely feature of these projectiles is that they also have their own collision and physics, so it's quite common for a missed shot to go merrily pinwheeling and bouncing away into a spot you can't reach or even see. So unless you want to be constantly ammunition starved, watch those shots.
NEXT: The Best Co-Op Shooter Games