Pressure is a Roblox horror title, featuring many fully-fledged indie game elements such as voice acting, lore discovered via documents and voice lines, and a unique progression system tied to the Roblox Achievements. In Pressure, you will travel through the Hadal Blacksite, a deep-sea abandoned base riddled with monsters that do not like your presence.
RelatedRoblox: Pressure Codes
Use these Pressure codes on Roblox to claim extra free rewards!
PostsYour goal is to reach the heart of the base at room 100, which holds the main power source - the crystal. This guide will help you on your journey there, and prepare you for what awaits you in the depths after the crystal is in your hands.
The Basics
Once you're in the game, you will be greeted by the Lobby. Here, you can step into a submarine to begin your rush down into the depths - and depending on which submarine you step into, you can play the game solo, or with up to 49 different players.
The number in front of the submarine tells you how many players are required to start the game automatically.
While you can play Pressure solo, we recommend playing with friends if you can as the game was designed with this in mind - and, it does make the game a lot easier.
First 10 Rooms
Upon starting a run, you will find yourself in a room with a Keycard slot - the game retroactively teaches you the controls, as ducking is the only ability you have other than moving around. To get to the Keycard, you must duck under some planks.
Keycards are essential in the game, as they're required for progress. Every other item you find in the game is completely optional and only helps in making your run easier.
Once you've got the door open, the run officially starts. You will find Research hidden in drawers, small lockers, and shelves in almost every room in the facility. This Research will come in handy later, once we've reached floor 50.
Hiding From Monsters
At one point, the lights will flicker. This is a sign that a monster is coming to your location. Big lockers with double doors are your best hiding spot, so once you see the lights flicker - hide in them. The monster will rush through the room and kill anything that stands in its way.
Once the monster passes, all the lights in the surrounding rooms will pop and the rooms will go dark. This is where light sources such as flashlights come in handy, and these can be found randomly in place of Research.
Continuing To Room 50
Many different monsters roam the halls of the Hadal Blacksite; the first 50 rooms are a gauntlet, and have the purpose of teaching you as much as possible about the different threats you will face. Listen, hide, and keep moving forward.
Upon Reaching Room 50 you will be greeted by the first and only friendly creature in the entire game - Sebastian Solace.
Sebastian's Shop
This is where Research comes in, as here you can stock up on supplies and items you didn't get so far.
There will always be batteries you can get for 50 Research, and an ensemble of five different items you can choose from. Once you're done shopping, grab the Keycard and continue forth.
The Grand Encounter
Moving on from Sebastian, around room 70, you will find the first Grand Encounter with the Searchlights. The objective here is to stay away from the Searchlights' searchlights, and fix generators until the door opens, allowing you to pass through.
The number of generators required depends on the number of players alive when getting to the Grand Encounter.
The Ridge
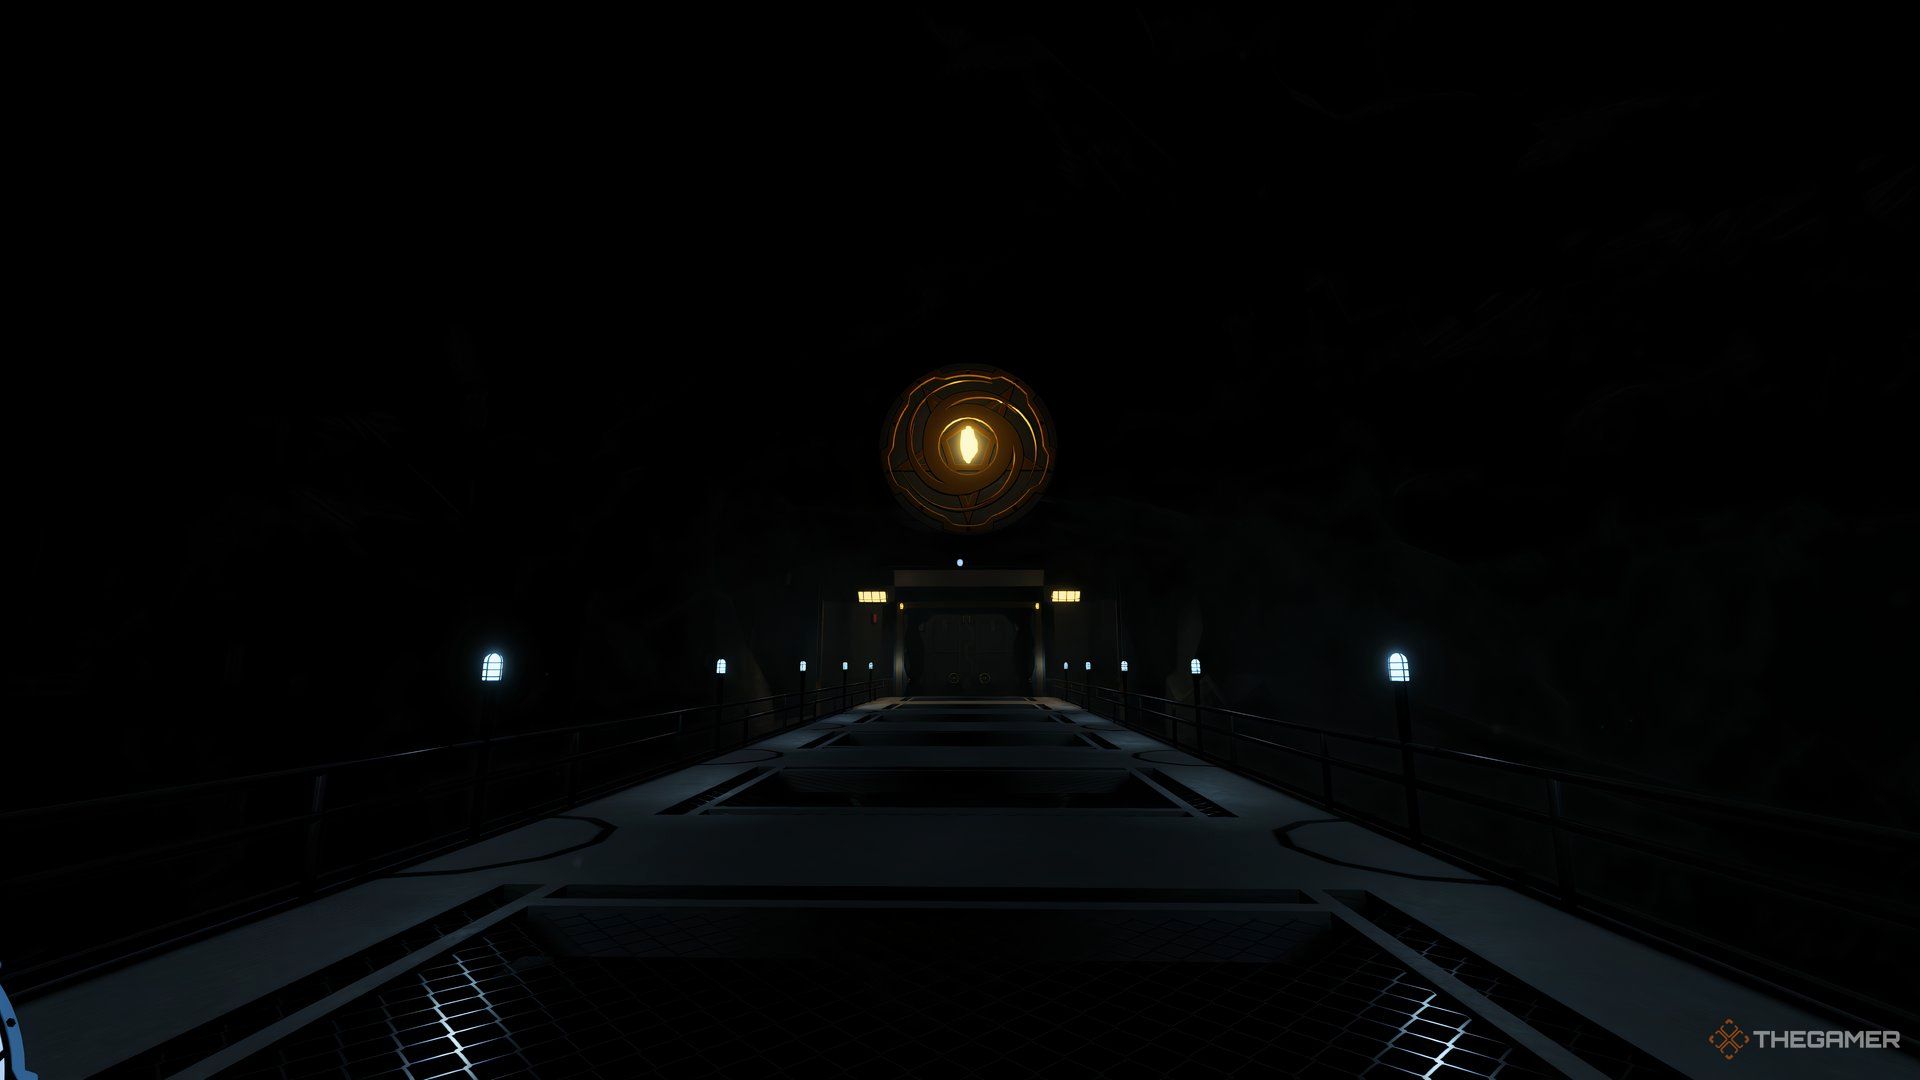
Once you've survived the Grand Encounter, you're on your way to victory! Upon reaching room 100, the control room, you will find the crystal, and once you pick it up, the power to the facility is cut and it's time to hustle to the escape submarine.
From this point on, the monsters will be far more frequent, so audio cues become essential when trying to survive. The ridge consists of 15 rooms of this nature.
The Final Encounter
With the ending within reach, the final stretch of the game consists of fixing exposed wires whilst evading a total of three Searchlights. The area will be illuminated by a Trenchbleeder, and hiding in caves is your main option when one of the Searchlights comes near you.
Once all the wires have been fixed, you'll have to go through a tunnel leading to the exit whilst evading the swinging Searchlights. If you make it through this, a submarine will be waiting for you to take you to the surface where the game ends.
The Strategy To Win
The game predicts that you will not be able to beat it in its entirety on your first attempt. This is supported by the fact that Sebastian provides dialogue upon your death, noting where you went wrong and giving you information about your killer from that run. One of the key features of the game only unlocks upon your first death, so after testing the waters we recommend you take this course of action on your next runs.
Where To Use Kroner
Kroner is the currency that remains on your account after the run ends. The amount of Kroner you get depends on how well you did in the run, how many doors you opened etc. It can be used for buying outfits, but we recommend saving up until you have 900 Kroner so you can buy five Ferryman's Tokens, which will help you in beating the game.
Ferryman's Tokens can be used upon death to bring you back to life. You will lose all the Research you had on hand, as well as any batteries you picked up, but you will keep all the items.
This makes your run far easier, but to get to this point you will need to play a few runs first to be able to afford the Tokens or buy the Kroner required with Robux.
Pre-Round Shop
The Pre-Round Shop only unlocks after your first death and gives you the ability to buy items with Kroner before the run begins. We recommend picking up at least a flashlight here, as it will help out a ton in dark areas. Medkits are also recommended, but they only unlock if in a previous run, you've given or received a Medkit from another player.
First 50 Rooms
There's no need to loot a room for too long, as Research can only be used in Sebastian's shop - but even then, you might only need batteries, Medkits, or the occasional Code Breacher. We recommend blitzing through rooms quickly, and only looting convenient places. Node monsters attack at intervals, so the longer your run takes, the higher the chances are of seeing tough monsters that are hard to evade.
If you find yourself looking for a Keycard, note that they will primarily spawn on surfaces such as tables, couches, and chairs. You can still find them in drawers and lockers, although not as frequently.
How To Use Research
Research should be used only to purchase things you're lacking. If you don't have at least one Medkit, one Code Breacher, and a Flashlight by the time you reach Sebastian's Shop, make sure you have at least enough Research to purchase them.
Other good options include two batteries, as these can top up any light source's fuel, and a Flash Beacon, if you find one, for quickly checking out dark rooms. Leftover Research will be converted to Kroner after the game ends.
Saving Up Code Breachers
Code Breachers should only be used when the situation is dire or requires it otherwise; in the case of an Eyefestation room with a Keycard door, or an exclusive red Keycard door that can only be opened with Code Breachers.
Otherwise, save these up for the endgame, when things get difficult. Monsters will be far more frequent, and if you have to find a keycard amidst that chaos, you'll be thankful to have a Code Breacher on hand.
Skip Dark Rooms
If the room goes completely dark, and you can't see any bonus rooms with items, feel free to skip them entirely. The significant amounts of Research will glow in the dark, so pick them up. Your light source won't last long if you spend it looking through every drawer for Research, so use it sparingly to find the exit.
Be Patient In Grand Encounters
Even though they seem slow, Searchlights can easily sneak up on you if you focus on fixing generators and wires. Take your time, and wait for them to pass completely before attempting the fix.
In Pressure, Audio Is Key
There are no threats in the game that don't make any noise whatsoever. Keep your audio on, take note of where safe lockers are, listen for the glisten of Keycards, and try to remember which noises link to which threats.
Learning what each noise means is key, as the game has many ambient noises that don't mean you're in any danger - thuds, creaking, and knocking can all be ambient sounds adding to the atmosphere of the game.
NextRoblox: Doors Walkthrough And Level 50 Guide
Here's how to complete Level 50 and defeat Figure in Roblox Doors.
Posts