Enshrouded's Hollow Halls 0.7.1.0 update introduced exciting endgame dungeons for everyone to enjoy. These dungeons challenge a player to fight through hordes of enemies and encourage players to play with others.
RelatedEnshrouded: How To Get The Kettle
Here is how you can get the kettle item in Enshrouded.
PostsThe Hollow Halls has a ton of puzzles but rewards players with amazing loot. These dungeons are accessible for low-level players, so it is beneficial for players starting their journey to get their gear upgraded by finishing the Hollow Halls instead of crafting them themselves. There's also a secret that unlocks the 6th crafter in Enshrouded, so it is quite mandatory to finish this dungeon.
Enshrouded is still in early access. Information relayed in the guide is subject to change, and it will be amended in the future when needed.
Hollow Halls Quest Location
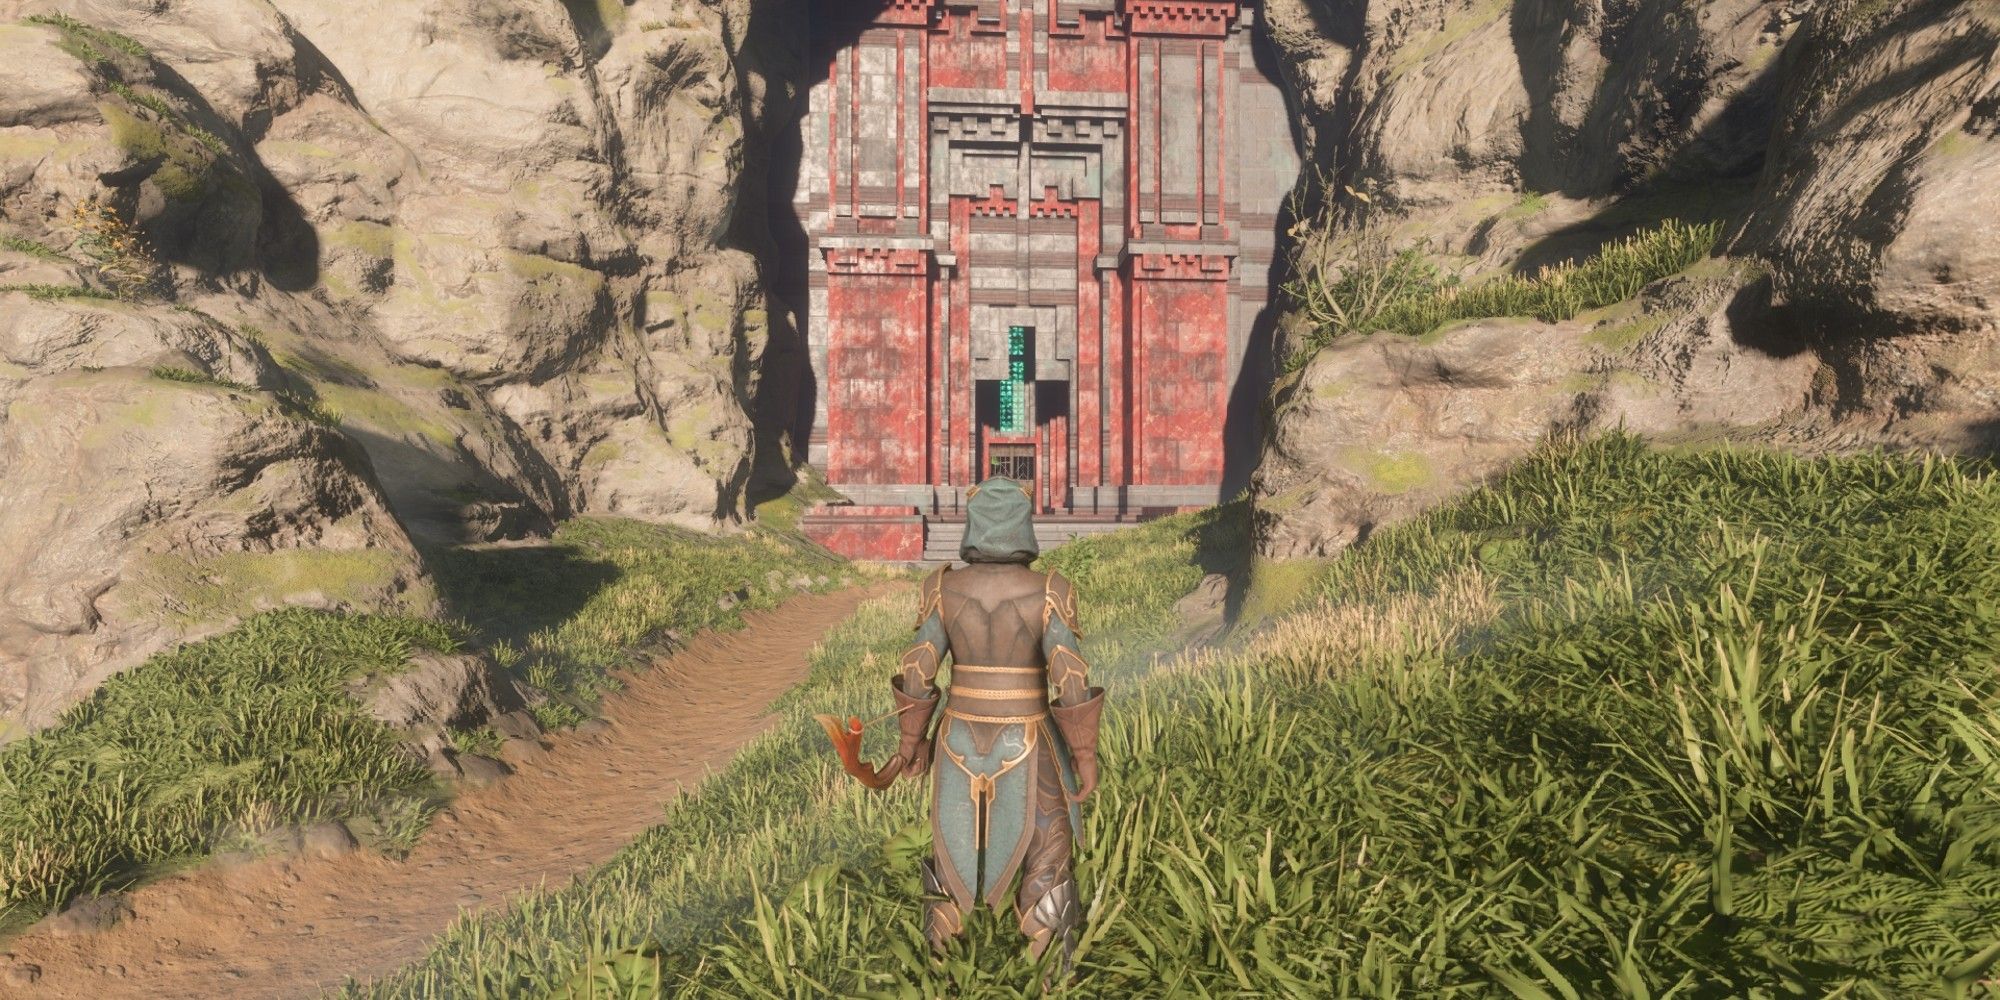
The "Explore The Hollow Halls" quest starts when you talk to the Alchemist. Once you have taken the quest, a new point of interest will appear on the map. Start tracking the quest, and you can follow the waypoint on the top of your screen.
The Hollow Hall is near the starting area of the game, and you can hug and jump around the left side of the mountains until you climb high enough to see the entrance. There's an arrow in the image above that will show you the exact entrance location for the Hollow Halls.
Before challenging the Hollow Halls dungeon, you should prepare first. The dungeon is meant to be played with other players, but it is doable solo.
How To Prepare For The Hollow Halls
Here is a quick list of things you need to bring:
- Healing items such as potions, food, and bandages.
- Arrows & Spells (depending on your class).
- Bring at least two to three food buffs, especially Constitution buffs from any grilled meat.
- Grappling Hook
Apart from consumables, you should also prepare for the worst when it comes to combat. Bringing friends isn't necessary, but it will surely help reduce the difficulty. Roles do not matter as you can go with three rangers and still finish the dungeons.
It would help if you could get a healer and a tank, though.
The Hollow Halls Walkthrough
Once you go inside the gates, you'll see an open hall with at least five enemies. These enemies would roughly be the same throughout the dungeon, so you should try to telegraph their attacks to get used to the fights.
When the enemies are clear, go straight to the ghoulish teleporter. This should mark the start of the dungeon.
After going through the teleporter, you'll see your first checkpoint. Go down and clear the halls. You'll see a barrier blocking the main path. You need to acquire all the ghostly runes inside the room by just going through each one. These first two runes are easy to find because the room is quite small.
The first runes is seen close to the barrier. Just jump through the gap near the barrier.
Use your Grappling Hook to get up to the platform. The second rune will be in the middle of the platform.
After getting both runes, the game will show "Barrier Unlocked," meaning you have opened the barrier and can progress further.
In the intersection, you'll see a big door in the middle. The middle door leads to a chest with a few enemies guarding it. If you go to the left or right side, it'll both lead to the next area. Keep following the pathway after choosing the side. You'll see a horde of enemies attack your party so be prepared.
Keep following the hallway, and you'll see some stairs leading further underground.
You can also repair your equipment here if you want.
Second Checkpoint
Once you go downstairs, you'll see a gate with your next checkpoint altar. Go straight ahead after looting the room.
You'll encounter more enemies, but you are given two choices – to go through the middle or to the right side (the one with the big bone pillars to the side). There's a barrier to the right side and the middle path is a dead end. In the same intersection, you'll encounter a skeletal mage with a rune marker on top of its head. When you eliminate the mage, you'll unlock the barrier.
Go straight through the pathway, and you'll see a hole in the ground. Jump down, and you'll enter an enormous room with another puzzle.
In this big room, there's a barrier blocking the middle path. In the image alone, you'll see two platforms on the left and the right. Both of them have an rune you need to acquire. The third rune is literally in the middle of the room with a ton of enemies surrounding it. Dispose of the enemies and get the rune.
The next rune is just by the broken bridge in the middle, leading up to the barrier.
For the fifth rune, you need to look to the left from the broken bridge (while looking to where you came from). There are some rubbles you can jump to, and they'll lead you to a hook you can grapple to lead you up to the platform. Once you get up to the platform, you'll see the fifth rune guarded by bats.
The last rune is near the first two platforms, but underground. From where you first entered the room, look to the left, and you'll see an oddly-placed hook. This is because you can jump down to the platform and glide towards the last rune. You have to use the hook to return to the area.
If you fall, you'll get heavy damage from the greenish-burning floor. Be careful because you'll have to restart at the checkpoint from here because your friends cannot revive you from here.
RelatedEnshrouded: 6 Best Spells
There are a limited amount of spells that you can use in Enshrouded, which are called Staff Charges. Here, you can learn about the spells in the game.
PostsThird Checkpoint
Once you go straight to the opened barrier, you'll encounter the next checkpoint.
Once you go straight through the pathway, you'll encounter an intersection. There's a path to the left and right while the middle is covered in bones. You can jump through the middle, but you can also go whichever way you want.
Both the left and right sides have numerous enemies ahead, but there's a coffin that contains loot on each side. Once you finish each of the sides, it'll redirect you to the middle path. The enemies are quite dangerous because there is little space to work with.
Once you get back to the middle, follow the path, and you'll see a staircase leading up. There's a door with a rune on the right side. Press the rune and proceed ahead. You'll see a gate on your right, which leads to the fourth and final checkpoint.
Fourth Checkpoint
Follow the path, and it'll lead you to a big room with a long bridge in the middle. Go past the bridge and you'll encounter several enemies ahead. Once you deal with them, another horde of enemies will simultaneously attack you from behind.
Once you clear all of them, you'll see more enemies straight ahead. In total, there could roughly be at least 30+ enemies here. If you are a ranger, you should use the ranged assassin build because the Explosive Arrows will eliminate more than one enemy at a time. However, if you don't have access to that resource yet, you should still follow the build and buff up your Wooden Arrows.
If you go further ahead, you'll see a barrier blocking the path. The only way to open it is by eliminating the skeletal reapers who have runes on top of their heads.
Continuously kite the enemies because the sheer number of enemies will destroy your party when they get near.
There are four little rooms in the area. There are two to the left and two to the right. Go through each of them and you'll see some more enemies. Some of the skeletal reapers might be hiding in here too. Once you have cleared everything, the barrier will open and that should end the dungeon.
How To Unlock The Collector - The Sixth Crafter
Before you enter the last room in the Hollow Halls, you'll see an odd-looking coffin before you even reach the last room. Interact with it, and you'll release the Collector, which will now be available at your base when you use the Summoning Staff.
This will prompt the "Explore The Hollow Halls" quest to change. Go straight ahead and loot the coffin in the middle. You'll see a teleporter that will redirect you to the entrance of the dungeon.
If you don't interact with the coffin, your quest will never update, which is extremely confusing for players because if they take the teleport, it'll take them back to the entrance without finishing the quest. The coffin doesn't really have a waypoint or notification, so if you miss this one, you might end up spending hours circling around the Hollow Halls.
NextEnshrouded: Where To Find An Athanor
Here is how you can make an athanor for your future laboratory.
Posts