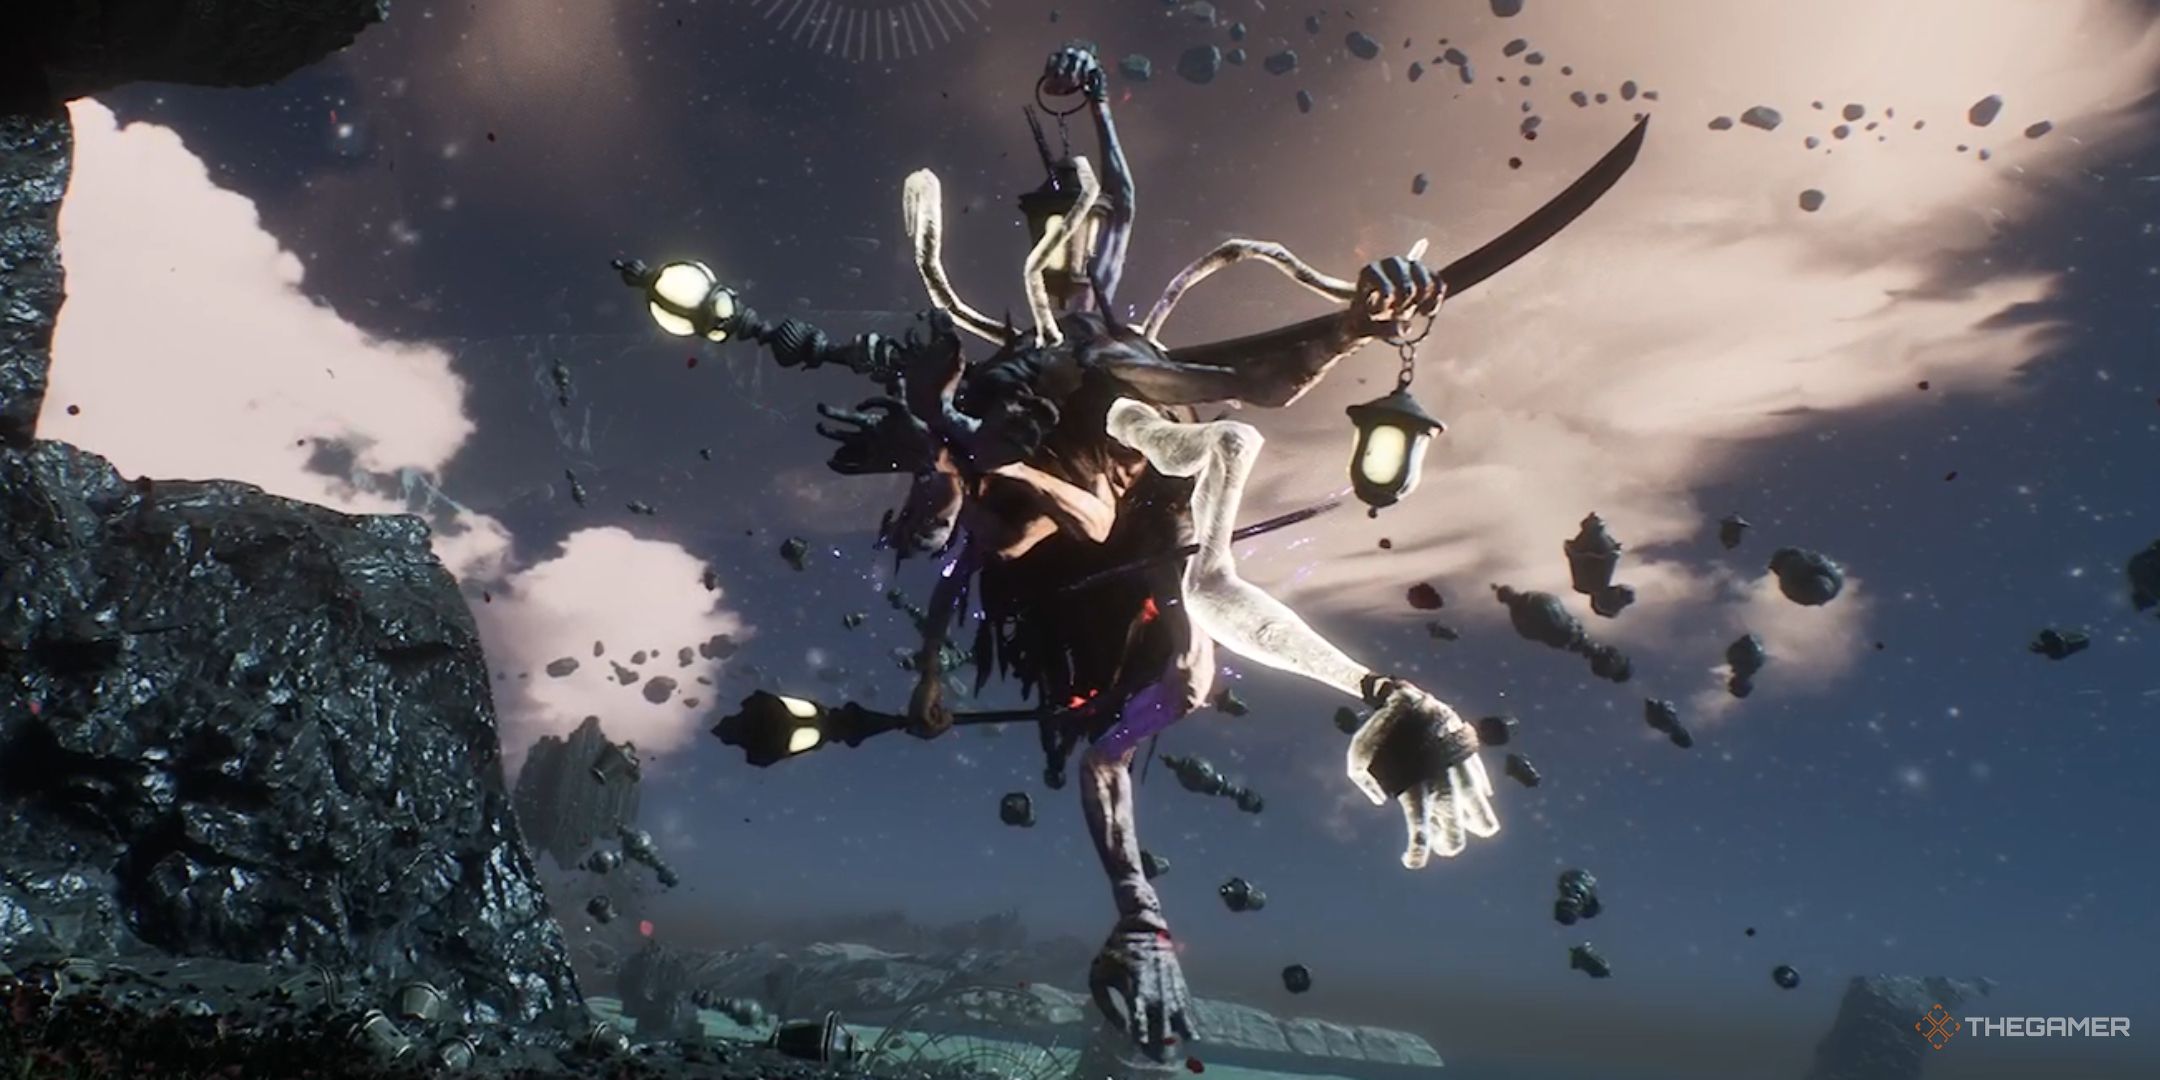
When exploring the Stone Wave Cliffs area in Clair Obscur: Expedition 33, you will eventually run into a strange-looking foe with several arms and a lot of lanterns. This is the Lampmaster, who is the main boss for the Stone Wave Cliffs region.
RelatedClair Obscur: Expedition 33 - How To Respec
Reallocate all your attribute and skill points.
PostsIt is very tricky boss, particularly compared to the other story bosses you will have faced before meeting the Lampmaster. That said, like most other foes, it isn't perfect, and there are certain things you can do to make the fight go much more smoothly. Here is a guide to defeating the creature.
Phase One
There are two phases to this fight, and the first takes place inside a dark cave. This isn't a situation where you just have to hurt the boss a bit, and then the game moves on to Phase Two. No, you have to almost deplete the creature's health before you can progress to the second phase. Thankfully, though, the first phase isn't too tough.
Lampmaster's Phase One Attacks
These are the attacks that the Lampmaster uses during this phase of the battle:
Attack
Description
Jump Attack
This is a standard jump attack like many other enemies have in the game, where the creature jumps in the air and attempts to slam down on you.
Shoots With Its Lights
Four of the boss's lanterns shoot projectiles at random party members.
Aim Disrupting Attack
The creature performs a three-hit combo with its sword. If it lands a blow, your character will be inflicted with the dizzy status effect.
The Power Of Lamps Attack
The Lampmaster builds up a collection of purple energy and fires it at the entire team.
How To Complete Phase One
Something that isn't made clear in the first phase is that you can shoot the four lanterns that the boss fires at you with. Destroying them is highly beneficial because it stops the creature from performing that attack, which he does regularly. Additionally, destroying one of those lights hurts the boss.
Strangely, when you hover over the lights in free aim, the reticle doesn't change like it typically does when you're aiming at something you can shoot.
When taking out the lights, try to use a character that has weaker offensive skills than the others, as this will use up their AP.
Countering the beast's attacks in this one can be very effective, particularly the big purple move, as the return hit deals a lot of damage. Plus, attempting to fill up and break the boss's break meter is also a good strategy. So, try to bring party members who have skills that can do that.
The boss doesn't seem to be weak to any particular element, but it is resistant to light. Therefore, don't bring any light-element weapons to the fight if you can avoid it.
Other than that, it is just about hitting your big moves and trying not to use any items since you may need them for the more challenging second phase.
Phase Two
As the fight moves out of the dark cave, things are a little easier to see in Phase Two of the battle. Yet, this second and final phase is tougher than the first.
Lampmaster's Phase Two Attacks
The Lampmaster has different attacks for Phase Two. Here they are:
Attack
Description
Flying Combo
The boss unleashes a four or five-hit combo, including one where he seemingly floats away before coming back for another hit.
Sword Of Light
The creature swings its giant sword at the entire party, dealing significant damage.
Each Arm Attack
For this move, Lampmaster unleashes a four-hit combo as it swings back and forth.
Vast Ball Of Light
The boss builds up a ball of light and fires it at the entire party.
How To Complete Phase Two
The secret to beating the second phase lies in the strange ritual that Lampmaster performs regularly during the battle. During this moment, the fight stops, and the boss's lanterns begin lighting up in a specific sequence. When you get back control of your party, you need to use free aim to shoot these lanterns in the exact order they lit up during the ritual.
Correctly following the sequence lets you complete the ritual, which deals decent damage to the boss and stops it from using the Sword of Light attack. As the Sword of Light is the creature's most dangerous and hardest-to-avoid move, completing the ritual is very important. Plus, if you shoot the correct lanterns, you don't lose any AP, so they're essentially free shots.
Outside of this, the phase is just about dealing as much damage as possible as quickly as you can. Once again, the boss remains resistant to light and has no clear weakness, so the light ritual is crucial to gaining the upper hand.
NextClair Obscur: Expedition 33 - Where To Find Bourgeon Skin
Getting bourgeon skin is a dangerous task.
Posts