Quick Links
- Svsona, Fermosa Fembra Overview
- How To Beat Svsona, Fermosa Fembra
Some bosses in Blasphemous 2 surprise you with their strength and gimmicks, while others will catch you off guard with how straightforward and unassuming they are, which is the case with Svsona, Fermosa Fembra, one of the game's last bosses, and one of its easiest.
RELATED: Blasphemous 2: How To Beat Sínodo, Hymn Of The Thousand Voices
While she isn't the easiest boss in the game, she's definitely in the running due to her minimal move list and lack of any solid gimmick or phase shifts. You can also seek the help of Yerma for this encounter, which will make it much more manageable!
Svsona, Fermosa Fembra Overview
Being the ninth boss of the group, we expected so much more from Svsona, as she is arguably one of the weakest encounters in the game. Nonetheless, she still packs a punch, albeit in the six or so moves she has access to, which is a far cry from the arsenal most bosses have access to.
Regardless, Svsona, being one of the last bosses you will encounter in your journey, will reward you with the most Tears of Atonement and Marks of Martyrdom from a boss encounter thus far, making this encounter not all that bad!
Svsona, Fermosa Fembra Rewards
Tears of Atonement
7500
Marks of Martyrdom
4
Yerma's Helping Hand
If you've been following Yerma's story up to this point and want to finish it, this is your chance! But, to do so, you must have talked to her at the bottom of the Ravine of the High Stones at the start of the game and got her assistance during the Radamés and Afilaor fights.
After meeting those requirements, you must obtain the Holy Oil Key Item from the Elevated Temples in the area to the left of the large shaft that leads back to the City of the Blessed Name.
With the Holy Oil in your possession, speak with Yerma in the Two Moons dungeon and give it to her, having her help you once more when you face Svsona!
How To Beat Svsona, Fermosa Fembra
Whether you choose to have Yerma's help or not, Svsona's move list remains the same, and that's not saying much. Svsona has access to only six moves, three of which are the same attack but with slight altercations.
The fast-paced nature of this encounter is what makes it decently challenging, but it's nothing compared to some of the fights before it. If you got this far, you can undoubtedly defeat Svsona!
Death Ray One
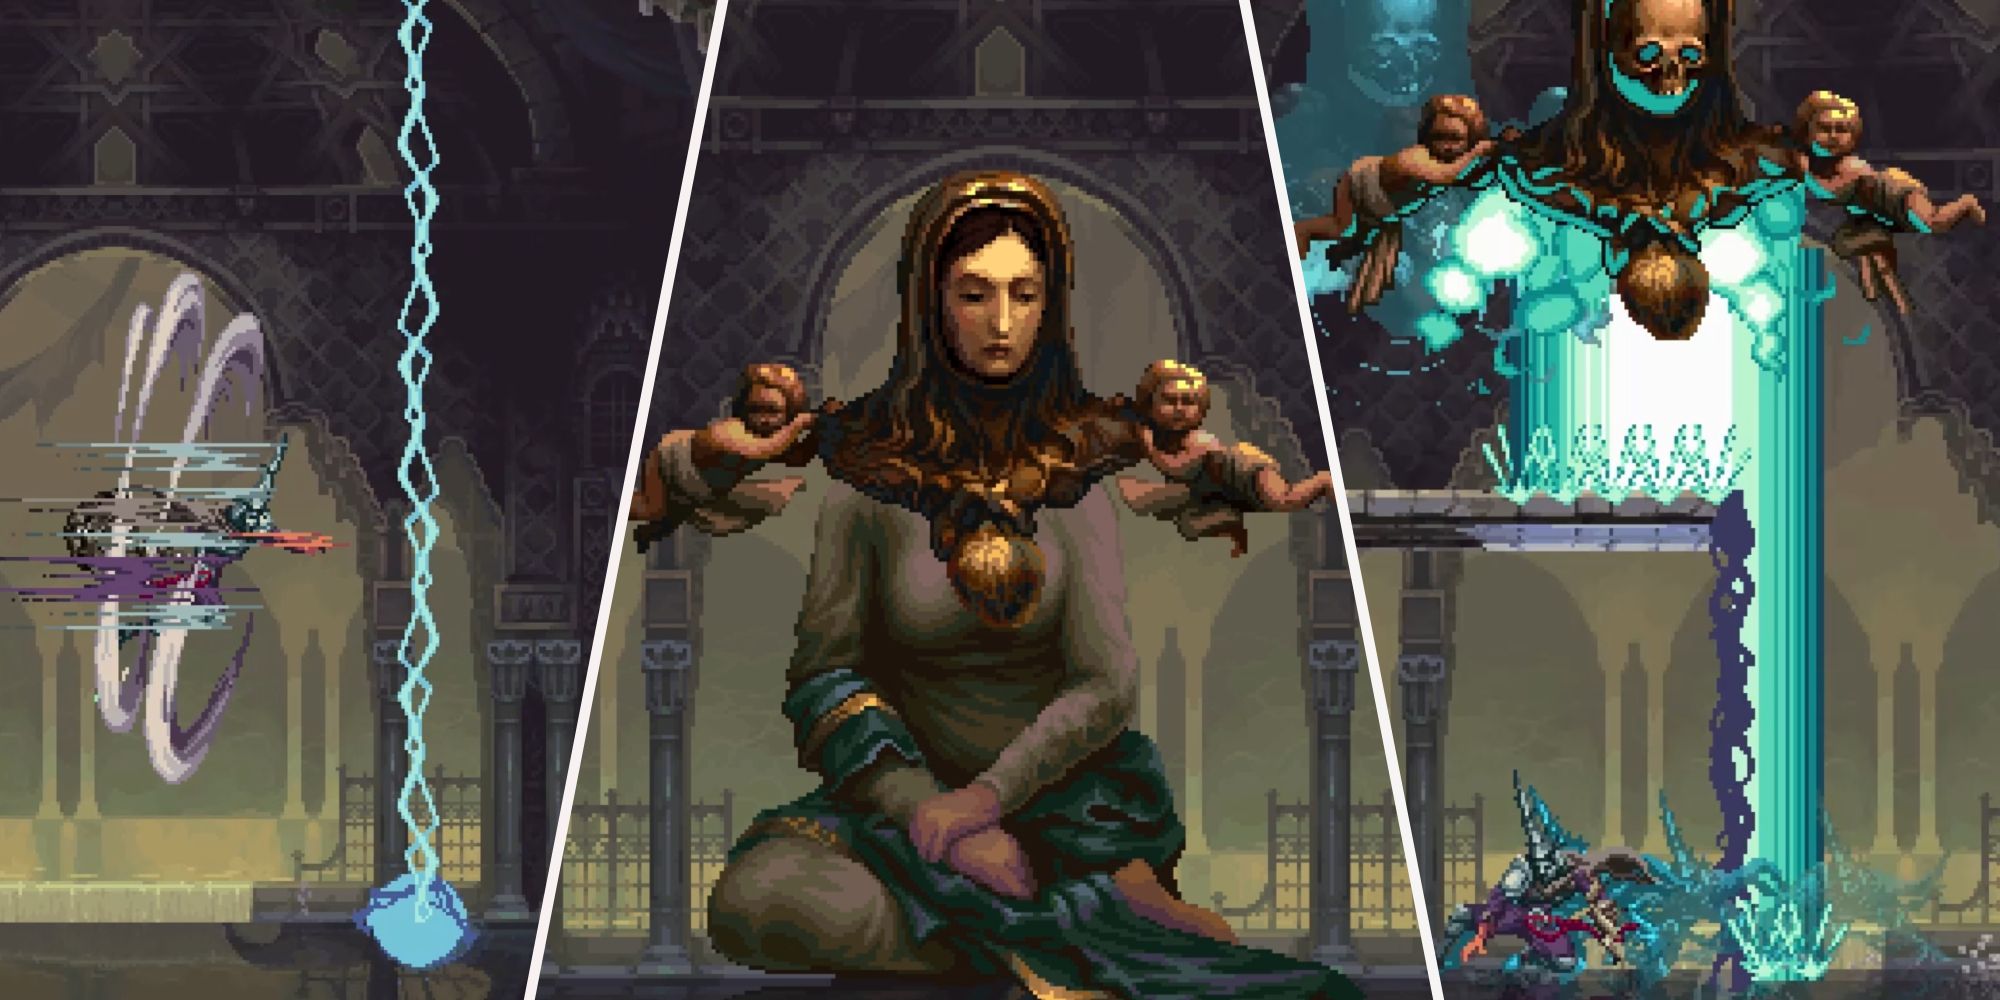
Opening up with one of her most common and overly spammed attacks, Svsona will use her first Death Ray, having her emit a large beam of light downward from her headpiece and slide across the top of the screen.
Platforms will spawn near the stage's center, run toward them, and stand underneath them. When the Death Ray passes over the platforms, it won't be able to hit you, allowing you to avoid damage altogether!
Orbs: Burst Fire
Another common attack of Svsona's is her Burst Fire, having her launch a steady stream of Orbs at you in controlled bursts. They come out slow enough that you can jump and Air Dash over most of them while weaving in and out of the others.
You can use yourBleeding Miracle Prayer here to hit her, then close the gap when her Orbs dissipate to get a good few hits on her with your weapon!
Death Ray Two
After you drop her health down 1/4th of the way, she will send out another Death Ray, this time with fewer platforms to hide underneath. The same strategy applies from above. You just have a much tighter window to react and safely get under the sparsely provided cover.
Lightning Currents
As she nears half health, Svsona will spawn her whole body on either the right or left side of the arena. When she's with her whole body, she will perform two attacks before rotating to her other actions.
One of these attacks is the Lightning Currents, which has her send waves of vertically oriented strings of electricity toward you. Jump and perform an Air Dash before they reach you to pass through them and avoid all damage.
In between Lightning Currents, you can use your Bleeding Miracle to hit her from a distance until you close in on her. Once you're near her, you can begin using your weapon after you Air Dash and can safely land two to three hits when she stops this action.
Orbs: Streams And Waves
The other action of hers when she's with her whole body is the Streams and Waves of Orbs she will launch your way. These Orbs are stacked in groups of six and will flow through the arena, almost like a wave of water.
Jumping, Air Dashing, Evading, and Guarding will be your best friends during this attack. You can also use your Bleeding Miracle to hit her periodically after dodging the incoming Orbs!
Death Ray Three
Finally, she has one more Death Ray up her sleeve, providing you with a sliver of cover to hide underneath. This is handled the same way as the previous ones, but you will have to be on point to evade it in time.
The pace is pretty fast here, making it nearly impossible to pull off, so you might be in trouble if you don't have the health to spare or the Bile Flasks to top off your health. After this, however, she will repeat her most common actions along with this version of the Death Ray until she is defeated!
NEXT: Blasphemous 2: How To Beat Odón Of The Confraternity Of Salt